
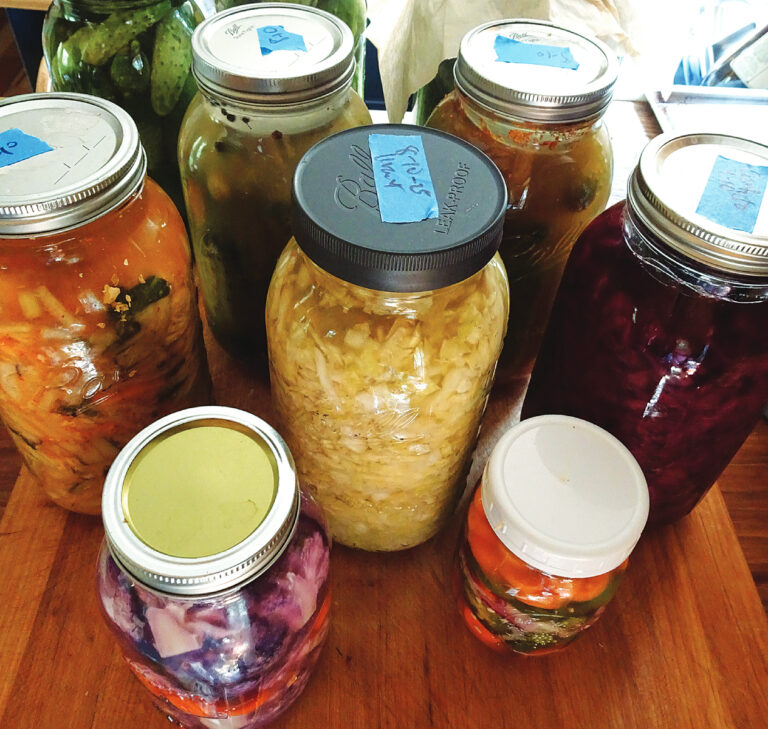
Make good fermented-foods recipes for Fall, including a giardiniera recipe, beet kvass, gingery golden sauerkraut, and dilly sauerrüben recipe.
What better time of year than fall to fill your kitchen with fermented foods? One of the oldest methods of preserving foods, fermentation is a wonderful way to put up the end-of-season harvest while also adding nutrition and flavor to your diet. Fermented foods are simply food products, such as sauerkraut, yogurt, sourdough bread, kefir, and lacto-fermented pickles, that have undergone changes through microbial action. Microbes, such as bacteria and yeast, either added to or naturally present in or on the food, will essentially start to digest parts of the food and transform it in the process. The result is an end product that has not only changed in flavor and texture, but also in nutritional value.
Good Fermented Foods Recipes
Fermented foods have been around for tens of thousands of years, and we’re only just starting to learn how much we need them. These foods support our health in a variety of ways, most notably digestive function. Fermented foods are rich in beneficial microbes. Even just a teaspoon of a fermented food can have billions of gut-friendly bacteria in it, supporting digestion, skin, immunity, and so much more. Fermented foods are also easier for some people to digest, because through the fermentation process, microbes break down fibers, starches, gluten, and lactose. Some anti-nutrients found in plant foods, such as phytates, are greatly reduced during fermentation, increasing the availability of vitamins and minerals in fermented foods.
Fermented foods also boast an incredible nutrient content. They often provide prebiotics and fiber, and during fermentation, the microbes create vitamins B12 and K2, which weren’t present prior to fermentation. Fermentation also preserves nutrients, such as vitamin C and potassium, which can be lost during canning and cooking, making it a great way to preserve food.
The beneficial microbes in fermented foods don’t survive cooking or canning, so if you want the bacterial benefit of these foods, be sure they’re raw. Some foods that undergo fermentation aren’t “probiotic” because they’re heated, even though fermentation makes them easier to digest; sourdough bread is one example. These are still great choices, though! I generally recommend a small serving of a fermented food with each meal to help support digestion and improve diversity in the microbiome. If you’re new to eating bacteria-rich fermented foods, start slowly and gradually add more over time to avoid digestive upset (though not everyone experiences this), especially if any gut conditions are present. Even kids love fermented foods, especially yogurt, kefir, and pickles. Don’t be afraid to let your littles try these, and they can even help you make some of the recipes shared here!
Whether you’re a homesteader looking to put up produce as fall arrives, a home cook looking to expand your culinary repertoire, or someone who simply wants to bolster digestion and immune function in the cooler months, I encourage you to give these fall ferments a try.
End-of-Season Giardinara Recipe
This easy-to-prepare recipe is perfect for a beginning fermenter. The process of making brine-fermented or “pickled” vegetables is as simple as cutting up a few veggies and making a quick salt-water brine. Pickles can be so much more than just cucumbers, and I love this recipe for using up vegetables at the end of the growing season. The veggies are cut into bite-sized pieces, creating the perfect snack, condiment, or side dish for any fall meal. This recipe gives you the basic process for making brine-fermented vegetables, so feel free to improvise and use what you like or have on hand, keeping the ratio of 1/2 cup of salt to 1 gallon of water for the brine, and go from there.

Fermentation time: 1 to 2 weeks. Yield: 1 gallon.
- 2 tablespoons whole black peppercorns
- 1 tablespoon whole mustard seeds
- 2 tablespoons fresh (or 1 tablespoon dried) basil, finely chopped
- 1 tablespoon fresh (or 1/2 tablespoon dried) oregano, finely chopped
- 1 medium cauliflower head, cut into small florets
- 3 medium radishes, sliced (use any type you like)
- 4 medium carrots, cut into sticks or coins
- 4 celery stalks, sliced
- 1/2 cup yellow onion, thinly sliced
- 6 to 8 garlic cloves, crushed
- 1 jalapeño or serrano pepper, sliced
- 1/4 cup fine-grain pure sea salt
- 1/2 gallon filtered water
- In a clean glass gallon jar, place the peppercorns, mustard seeds, basil, and oregano.
- Cut the vegetables into bite-sized pieces. Place in the jar on top of the spices. You can mix them together prior to putting them into the jar or layer them.
- In a mixing bowl, whisk together the salt and water. Pour over the vegetables, leaving about 1/2 inch of headspace.
- Place a fermentation weight over the vegetables to keep them submerged in the brine. Cover with a nonreactive lid, being sure not to screw the lid on too tightly to prevent buildup of pressure.
- Place in a cool, dry place at room temperature. Let the vegetables sit for 1 week, then taste for “doneness.” Feel free to eat them at this point, or, if you like your fermented veggies a little more tangy and “pickled,” let them sit for a few days more, up to 2 weeks. The brine will likely be cloudy and may have slight effervescence, which are normal products of fermentation. Check the jar regularly for surface mold; keeping the vegetables submerged in brine should prevent this. If it occurs, discard and start over. Kahm yeast, on the other hand, can be skimmed off.
- Once the vegetables are fermented to your liking, transfer to the fridge for storage, where they’ll keep for approximately 6 months.
Notes:
- To speed up the fermentation process and enjoy your veggies sooner, add a starter culture to your brine. For a 1-gallon batch, add 2 to 4 tablespoons of liquid whey strained from plain yogurt or sauerkraut or kimchi brine.
- Keep your brine when the veggies are all gone! The brine from fermented vegetables is flavorful and probiotic-rich. Use it in dressings, marinades, or sauces; save some as a starter culture for future batches of veggies; or swig a few tablespoons as a probiotic “shot!”
Beet Kvass with Lemon and Ginger Recipe
Beet kvass is a digestive tonic that comes from Eastern Europe. It’s a powerhouse for digestive, cardiovascular, and liver health, providing probiotics, prebiotics, electrolytes, betaine, folate, and plenty of minerals. The strong, earthy taste of the beets is balanced with the sweet, pungent ginger and bright lemon.
Using a starter culture lets you enjoy your kvass sooner, as it speeds up fermentation time, but it’s not necessary. Enjoy chilled kvass alone, sipping 3 to 4 ounces before a meal to support digestion, or add to sparkling water for a refreshing, nutritious spritzer. This also makes a great slightly savory, herbaceous bloody mary and other cocktails (it pairs well with gin).

Fermentation time: 3 to 7 days. Yield: 1 quart.
- 2 to 4 medium (2 pounds) clean but unpeeled red beets, diced
- 4-inch piece of ginger, grated or finely chopped
- 1 tablespoon fine-grain pure sea salt, or to taste
- 2 to 3 cups filtered water
- 4 tablespoons fresh lemon juice
- 4 tablespoons starter culture, such as liquid whey drained from plain yogurt or leftover brine from your sauerkraut or other fermented vegetables (optional)
- Place the beets and ginger in a clean glass quart jar.
- Add the salt and cover with starter liquid (if using) and water, leaving about 1 inch of headspace at the top of the jar.
- Place a nonreactive lid on the jar and screw on. Shake the jar to incorporate the salt.
- Let sit at room temperature for 2 to 3 days to ferment, checking daily for surface mold; if this occurs, discard and start over. If not using a starter culture, let it ferment an extra 3 to 4 days.
- The kvass is ready once the brine has a tart flavor and is slightly effervescent, similar to other fermented vegetables. When ready, strain the kvass (the resulting liquid), setting the beets and ginger aside. Stir in the lemon juice and transfer to the fridge for storage. Alternatively, transfer the prepared kvass to a flip-top round bottle, such as those typically used for beer brewing and other fermented beverages, for a second fermentation. Stored in this airtight bottle at room temperature for 1 to 2 extra days, the kvass will become lightly carbonated. Be careful when opening, as it will be effervescent and prone to overflow (and staining!).
- After the first or second fermentation, store the kvass in the refrigerator, where it will keep for several months. If desired, reuse the beets and ginger to make a second batch.
Anti-Inflammatory Gingery Golden Sauerkraut
Basic sauerkraut is amazing, but it can be even better with a few additions. This sauerkraut gets its bright-yellow color from golden beets and turmeric, storing up the sunshine of summer for the cooler fall months – plus, these ingredients add anti-inflammatory and immune-supporting antioxidants. Golden sauerkraut is amazing on over-easy eggs, bratwursts, salads, or straight out of the jar. This recipe uses the dry salting method, with a ratio of 1 teaspoon salt to 1 pound vegetables; this recipe should need about 4 teaspoons of salt.

Fermentation time: 14 days. Yield: 1/2 gallon.
Ingredients
- 1 medium head (about 3 pounds) green cabbage, finely shredded
- 2 large (about 1 pound) golden beets, peeled and grated
- 2-inch fresh ginger root, finely grated
- 2-inch fresh turmeric root, finely grated (if you can’t find fresh, substitute 1 teaspoon turmeric powder)
- Zest and juice of 1 lemon
- 4 teaspoons fine-grain pure sea salt
- Place a large mixing bowl on a kitchen scale, then tare the bowl to set the scale to zero.
- Combine the cabbage, beets, ginger, turmeric, and lemon. Add the salt based on the weight of the vegetables.
- Massage the salt into the veggies for several minutes to soften them and begin to release their water. You’re ready for the next step when you can easily squeeze water from the vegetables.
- Put the prepared veggies into clean glass jars or a fermenting crock, tightly packing the mixture in as you go to remove air bubbles and push up the brine to cover the vegetables. Continue to fill and pack the container until all the veggie mixture is gone or until the container is completely full, leaving an inch or so of headspace at the top of the jar.
- Place a fermentation weight on top of the vegetables to keep them submerged in the brine. Place a nonreactive lid on the jar, ensuring it’s not screwed on too tightly to prevent breakage with buildup of pressure during fermentation. If using a crock, cover with a cloth or lid that fits the crock.
- Place in a cool, dry place at room temperature for about 14 days; fermentation will go faster with warmer temperatures or slower at cooler temperatures, but 14 days at room temperature is typically the sweet spot for optimal taste and texture. Check regularly for surface mold and to ensure the vegetables stay submerged in the brine; if they rise out of the brine, use a clean hand to press them back down below the brine.
- Once fermented, transfer to the refrigerator or other cold storage, where the sauerkraut will stay good for about 1 year.
Dilly Sauerrüben Recipe
Sauerrüben is like sauerkraut’s cool, weird cousin: It’s basically sauerkraut made from turnips instead of cabbage. The dry-salting method is used, as is the salt-to-veggie ratio of 1 teaspoon salt per 1 pound vegetables. The garlic and dill paired with the slightly funky turnips creates a delicious, powerful burst of flavor that goes well on hot dogs, reubens, or a tuna salad.

Fermentation time: 2 weeks. Yield: 1 quart.
Ingredients
- 3 pounds turnips (any variety), grated
- 3 to 4 cloves garlic, minced
- 1/2 cup fresh dill, finely chopped
- 1 teaspoon fine-grain pure sea salt
- Place a large mixing bowl on a kitchen scale, then tare the bowl to set the scale to zero.
- Place the turnips, garlic, and dill in the mixing bowl and add salt as needed using the ratio of 1 teaspoon salt per pound of vegetables; you’ll need about 1 teaspoon of salt here.
- Massage the salt into the veggies for several minutes to soften them and begin to release their water. You’re ready for the next step when you can easily squeeze water from the vegetables.
- Put the prepared veggies into clean glass jars or a fermenting crock, tightly packing the mixture in as you go to remove air bubbles and push up the brine to cover the vegetables. Continue to fill and pack the container until all the veggie mixture is gone, or until the container is completely full, leaving an inch or so of headspace at the top of the jar.
- Place a fermentation weight on top of the vegetables to keep them submerged in the brine. Place a nonreactive lid on the jar, ensuring it’s not screwed on too tightly to prevent breakage with buildup of pressure during fermentation. If using a crock, cover with a cloth or lid that fits the crock.
- Place in a cool, dry place at room temperature for about 14 days; fermentation will go faster with warmer temperatures or slower at cooler temperatures, but 14 days at room temperature is typically the sweet spot for optimal taste and texture. Check regularly for surface mold and to ensure the vegetables stay submerged in the brine; if they rise out of the brine, use a clean hand to press them back down below the brine.
- Once fermented, transfer to the refrigerator or other cold storage, where it will stay good for about 1 year.
Laura Poe Mathes is a holistic registered dietitian. She’s the founder of Rest, Digest and Heal, an online course and community dedicated to offering knowledge and support through the gut-healing journey, with a special focus on stress and its effect on gut health. She’s also a mother, homesteader, and lover of nature, movement, and laughter. Follow along at @The.Crunchy.RD on Instagram.
Originally published in the October/November 2026 issue of MOTHER EARTH NEWS and regularly vetted for accuracy.





