
Learn how to use a variety of easy and cheap options to make DIY cold frames to grow more fresh vegetables throughout the fall, winter, and early spring months without any type of heat source or electricity, even in northern climates.
VIDEO TRANSCRIPT
Melissa K. Norris: [00:00:00] Hey, guys, and welcome to this module where we are talking about using different type of cold frames to extend your gardening and growing season. There are a lot of different options for cold frames, and we’re gonna be discussing a lot of them, things that you probably already have supplies on-hand at home, and then others where you may decide to purchase them.
With your cold frames, it’s important to know what crops that you’re gonna be using your cold frames with. So if you have your warm weather crops, where you’re gonna be thinking things like tomatoes, peppers, pretty much your entire annual summer vegetable garden, your cold [00:01:00] frames will help you extend the growing season at the beginning, in the springtime, and then at the end of the growing season as we move into fall and winter, and those cold temperatures and those first frosts come in.
But with those warm weather crops and just using cold frames, it won’t allow you, in most of the country, to grow those warm weather crops all year round, but it will extend the season. And we’ll talk specifics when we show you each cold frame model on how many degrees protection it gives you. But the great thing is when you are using cold frames with cold weather vegetables that are more tolerant to those cooler temperatures, a lot of those you will be able to grow year-round.
So this is very exciting to be able to put these into use, because in some instances, you can get year-round growing of lettuce and broccoli and cauliflower, kale, the Brassica family, cold weather vegetables. And you also can extend your growing time of the warm weather [00:02:00] vegetables per year if you use them in the early spring and then again in the fall.
You can usually extend your growing season of warm weather crops by anywhere from four to eight weeks, so an additional two months Okay, so I’m super excited. Let’s start going through some of the different types of cold frames you can make and build and use in your garden. So this is probably the easiest and one of the least expensive cold frames that you can do, and this one has been really effective.
So as you can see, this is just a clear plastic tote. You can get them at pretty much any big box store. And you just wanna make sure that when it’s pushed down on the ground, that it’s pretty much sealed to trap all of the warmth in. What’s great about this is I put this out four weeks ago, and at this time when I first put it out, we were still getting some pretty hard frost.
We were down into the 20s at night, not even out of the 40s much during the day, and definitely hitting those [00:03:00] hard, killing frost. And my soil temperature in the morning when I would come out and measure the soil temperature, was down to anywhere from 26 to 28 degrees Fahrenheit, which for warm weather crops, especially cucumbers, which is what I have growing in here, they need ideally 65 to 75 or higher degree soil before they will germinate and grow, and they do not tolerate any type of frost.
It will kill them. So by just putting this out here and direct sowing these seeds, I have got three cucumbers that have come up and are growing, even through the frost. So protection-wise, during the day when the sun’s out, this definitely heats up the soil, and you can get about 15 to 20 degrees increase if it’s a lot of direct, really warm, on a hot, sunny day when it’s sealed up.
And then it provides about six degrees, between five and six degrees additional temperature coverage in the morning. So I came [00:04:00] out here and measured the soil, and we were at about 27 degrees Fahrenheit, and then inside it was about 30 to 33 degrees Fahrenheit, which normally the soil temperature you need to have warmer for cucumbers.
But because it had generated a lot of warmth and kept it in here, even though inside the air temperature was close to that freezing mark the cucumbers are surviving and growing just fine So this type of cold frame is obviously a small tunnel. So this works really good with crops that you have in rows.
What’s great about this is it will warm up the soil for you in the springtime. So if you wanna put your crops in and do some direct sow early, it’s gonna warm up the soil, but it also provides protection from those overnight frosts and those hard freezes as well. And then of course, you have the greenhouse effect with this variety.
So this I use to put my beets in the ground, direct sow to heat up the soil [00:05:00] four weeks earlier than I normally would get to. And then in the fall, when you’re going into having frost protection again, you’re gonna be able to put this down overnight, and then you can take it off until temps drop even during the daytime.
You can get also different ones. There’s different varieties of f- frost fabric that you can put down. Now, you are, with this smaller frame, of course, limited to the size of the plant, but this works really good for your greens and for some of those smaller plants. And what’s great about this is it is really easy for you to put in and to remove.
So they just go like this, and you can pull it up all the way and open that up. So during the day when it needs to get some air so that it’s not quite so hot, then you can go like that, and it, you can easily remove it. The whole thing will come up fairly quickly.
So [00:06:00] you can see how fast that is to remove, and then on the flip side, when you’re going to put it down at night or to protect it during some of those cold days or even extreme winds that you know may be coming and hail storms to help protect it
It’s a pretty fast installation. Now, as far as protection, again, this one I have found has provided about five degrees warmer on those extremes. So at the coldest part of the early morning before the sun comes up, when the ground temperature is at its absolute coldest, I’m gonna find about a five-degree increase by using this on the inside.
And of course, when the sun is out or you have daylight, then it increases the temperature inside even more. So it can really give you a boost on growing those things by keeping the air temperature during the day warmer as well. So this is another type of cold frame that you can do, and obviously you can see I still have our old [00:07:00] glass windows here.
But this one, we dug straight down into the ground. Now, having that southern exposure when you’re doing a cold frame like this is really important, because we wanna make sure that we’ve got it positioned so as the sun comes up and goes out throughout the day, it’s getting the full optimal range of the sunlight and that you’ve got the back end is elevated slightly so that you have all the sunlight going in there.
Now, a lot of cold frames, if you’re gonna be building them with wood and doing them permanent, you can elevate that back up even further. But we had a slight slope in our yard here on our southern exposure, and so we decided to du- dig down in and see if we could create a cold frame that actually was using the earth’s natural thermal to help keep it, being that was below ground level, if that would keep it even warmer.
And we put this in, and we’ve been testing the temperature. So this, even on the cold [00:08:00] spots in the morning time, is 10 degrees warmer than what it is out here. So I came out and it was 26 degrees Fahrenheit outside, and inside it was actually 37 degrees Fahrenheit. So it was actually 11 degrees warmer at the coldest part of the morning before the sun came up.
And it’s hard to see because they’re little, tiny, but I have got growing in here some amaranth seed that are a little small and have just started to sprout. And normally, they like to have at least 70 degrees Fahrenheit soil temperatures and are a definite warm weather crop before they will sprout. So I was really pleased that they are actually sprouting and growing when we’re still having such cold temperatures.
Now, you also wanna make sure that when you do something like this, that it is at the angle. And we have it clearly marked because we have livestock, we have dogs, we have kids, and I don’t want anybody to be going through the yard and forget this is here and step on the- the glass. So we’ve got it clearly marked.
But another thing is this is gonna heat up a lot once we start to move into those [00:09:00] warmer days, or we’ve got a lot of sunshine. So you wanna make sure that you do have a way for it to have th- air venting and to cool it off if it starts to get too hot inside. So if you can prop that up with some type of stick or something like that, so you can see that it’s elevated enough on the back that I can just easily prop this up so that I’ve got airflow and can keep things at a good temperature
Hey, guys. So I’m gonna walk you through how to build an easy cold frame with just using a few supplies. You’re gonna see that I am using straw bales. One, because those are super easy to come by, they’re not gonna be a big expense, and they are really easy to manipulate. I don’t need to have a saw or nails or boards to do this cold frame.
You are going to need either some type of plastic or some old windows to create our cold frame, let the light in, and to heat up the [00:10:00] soil and the plants that are going in there. But this is one of the easiest cold frames that you can put up with just a few supplies. So one of the important things that you wanna consider when you’re putting your cold frame in is you really need the front of your cold frame to be facing your southern exposure so that it takes full advantage of all of the sunlight and the solar heat that it possibly can.
So you want the back of your cold frame to be elevated. So we’re gonna have the highest piece, so I’ve got the straw bale turned on its side so that I’ve got as much vertical power as I can from the back. So you can see phase one here, we have got the sun, and it’s coming from that direction, and it’s going directly through.
Now, on the back, on our side, we’ve got two windows here that are measuring up, and we wanna have the glass really touching whatever we’ve got here so that it’s sealing up at the top. One, that this is stable enough that if we have, some wind or some rain, which we [00:11:00] will have here, that this is not going anywhere.
So you can see by me pushing and wiggling on this that it’s really secure, and of course, this straw bale is pretty secure. It’s not gonna go anywhere. So we wanna make sure that we’ve got that sealed up, and you also wanna make sure that this is at a fairly steep angle so that it gets all of the sunlight coming up as it comes through, and that it’s filtering through and hitting[00:12:00]
Now, the beauty of cold frames is they can be used on both sides of our weather, both in the springtime and in the fall to overwinter. This particular one that I built here, I’m using in the springtime, and I don’t want it to be a permanent structure because I’m only using it while we’re still having our heavy frost and we’re getting our hard freezes.
And as soon as that is done, then I’m gonna be pulling it off of the winter squash, which is a warm weather crop. So winter squash, when you’re having temperatures of 27 degrees and the soil temperature itself is not 60 degrees Fahrenheit or warmer, it’s not going to germinate very well. And if it does germinate, those killing frosts are going to kill the young seedling that’s starting to grow.
So I am using this to give me about a two to three-week head start on when I would normally be able to sow those seeds outdoors in the spring. So you can see I’m not overly concerned that I’m just using all straw [00:13:00] because I purposely want to be able to move this and take it out of the garden during the summer months because I’ll have no purpose for it during that time.
So you can have your cold frames be permanent structures, or you could just use them throughout the growing season for short periods of time as you need them to be able to manipulate the conditions so that you can get the crops you’re wishing to grow sooner and give you that longer harvest frame.
So we’re gonna let this, I’m gonna let the sun solarize and warm up the soil temperature for about 24 hours, and then I will be planting my seeds in it tomorrow. A cold frame that uses glass and has it at this pitch, this really can heat things up. So you’re gonna find usually about a 10-degree protection mark from the frost during those cold overnight lows and the really cold extreme temperatures.
And then on the flip side, during the day when the sun is out, these can heat up 20 to even 30 degrees above if they’re completely enclosed [00:14:00] and you’ve got the full midday sun on there. So these are great options to use for growing your cold weather crops and also getting them started in the springtime as well.
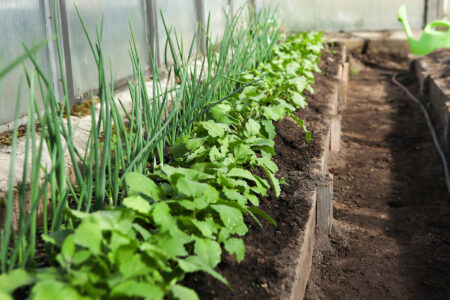
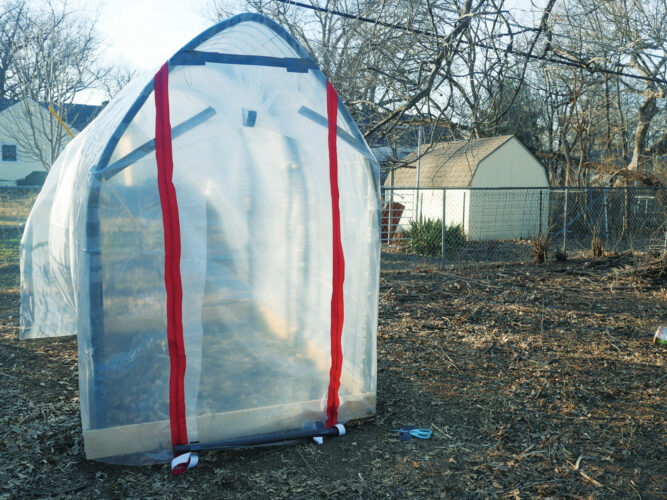
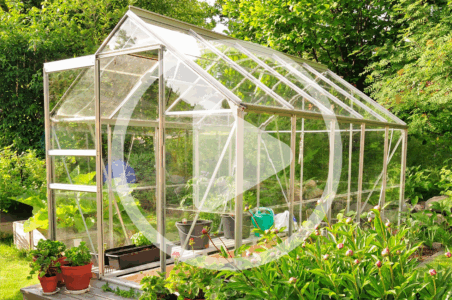
So this is another type of cold frame, though this is technically a high tunnel because as you can see, this is really large and big. I’m able to walk through this, but I can get a lot of plants in this high tunnel. So it’s not a greenhouse because we don’t use any type of heat in it. And what this is this is an old metal carport.
So you know you can go to Costco and get they for boat sheds or to put cars under, and they usually come with some type of a tarp canvas material? It was a metal framing and we bought it 15 years ago and used it to store our little boat in, and over the years, the tarp canvas that was on it rotted away.
But it’s a really good and solid metal frame. So we purchased this greenhouse plastic and some of the greenhouse fasteners in order to attach it to it, and we’ve had it in the same spot up all year [00:15:00] long. We never take it down, and the same greenhouse plastic has been on here going on six plus years. Now, this past year, we had some really big snows.
We had up to three feet of snow, and we also had one of the largest windstorms in recorded history that ever came through this area. We had wind gusts of over 80 miles per hour. So it actually bent my greenhouse or my high tunnel, I call it an off-grid greenhouse, it actually bent the frame a little bit.
So we’ve got some boards in here just to help support it. That’s why it looks a little cockeyed. It’s not your camera angle. It’s actually a little bit bent that way. So we just put in some additional we have some 2x4s to just kinda help keep the framing. But it’s still standing and working with everything being in its original form.
So having a high tunnel like this is really great for those warm weather crops, and I do all of my tomatoes and my peppers in this high tunnel. One, because I can get them into the ground about four weeks, four to six weeks sooner than I would be [00:16:00] able to. I’ve had these tomatoes in here without any heat for over four weeks, and we still had a frost this week.
So technically you wouldn’t wanna put tomatoes or peppers out in the regular garden for another two weeks. So six weeks earlier I’m able to have ’em in here. Now, then when it comes to fall and getting those frosts, normally here where I live in the Pacific Northwest, we can start to get some of those frosts anywhere from mid-September to the 1st of October, just depending upon the year.
So usually my tomatoes by mid-September, because any type of frost is gonna take out your tomatoes. They do not hold up well to frost. But by having them in here and protected with this, in, in this high tunnel, I can usually get another two to three, sometimes four weeks additional harvest time in the fall on my warm weather crops of my tomatoes and peppers.
The other reason that I grow my tomatoes and peppers in here specifically is because in the Pacific Northwest we get a lot of rain. Big surprise there, right? And any [00:17:00] overhead water or moisture, especially on your tomatoes and peppers, anything in the nightshade family, potatoes, you have got a large increase of developing blight.
And if you have ever dealt with blight, which is a fungus, once your plants have blight, they’re pretty much done for that season. There’s really no way to bring them back from blight So I started putting all of my tomatoes and peppers in here and growing them because this keeps the rain off of them.
And then I use a soaker hose so I don’t have any rain when I- or rain, any water, not rain. They don’t get any rain, but they don’t have any overhead watering going on either because I use soaker hoses. That way, I’ve been able to grow my tomatoes and my peppers, and I have never had any issues with blight, which in the past, prior to that, we always got blight, and I would be really frustrated and could hardly grow any tomatoes.
So when you’re using a high tunnel like this, because it’s a luch- much, much larger capacity and bigger than [00:18:00] when we were looking at some of those other smaller cold frames for this size, when I have it buttoned up tight, which I can take this plastic. So this, you do need to have venting. So these walls, this is the front, and then I’ve got the back.
These will roll up so when it’s hot during the day I can get good airflow going in here. And then during the summer months, because it can get 120 degrees plus in the summer months during the sunshine, if I have all of this down and buttoned up, which is too hot, you’re gonna scorch and kill your plants.
So you do need to make sure if you’re using something like this where you’re growing for a prolonged period of time, that you have a way to cool things down and to ventilate in the hot times, and that you have a way to keep things warm, and that you can trap the heat when the colder months come. So this, typically about five degrees is what I get when I have it just all buttoned up for the cold time.
And I will put this down, and then this actually, there’s springs, and I can even put this in tighter, but I don’t need to right now. [00:19:00] I need a little bit of ventilation ’cause it’s probably about 70 degrees in there right now, where it’s only about 50 degrees outside. So when the daylight is coming on, even if it’s like today where it’s overcast and it’s not super sunny, you’ll still get about a 15 to 20-degree increase inside.
And on really hot, sunny days, it can be anywhere 30 to 35 degrees plus. So you’re thinking, “Five degrees, and you have been down in the 20s, but you’ve been growing tomatoes and peppers in there. How are you doing that?” When you’ve got a larger high tunnel like this, one of the great things is you can use smaller cold frames with- inside this larger structure to get even more temperature and frost protection.
So you can see now looking inside, I have got another smaller polytunnel or cold frame over top of my tomatoes. So by using another cold frame or using, you can either use this, which [00:20:00] is the poly plastic, or using frost fabric, you’re gonna gain another additional five to six degrees Protection. So outside these tomatoes, it’s been 26, 27 degrees Fahrenheit, and I’ve had these tomatoes in here, so they never get frost.
Now, if they’re hitting 37 degrees Fahrenheit, that’s really not ideal for tomatoes. Tomatoes and peppers ideally don’t like to b- be beneath 50 degrees Fahrenheit, 60 and 75 is really their sweet spot. But because it’s for such a short period, and then during the day, and it takes it almost all night for it to hit to be that cold, they’re only at those cold temperatures for a little bit.
So it’s not killing them and it’s not inhibiting their growth very much. So when you’re using this inside, of course, as it begins to heat up, I need to make sure that they don’t get too hot. So I put this on at night, and then I take it off in the morning. And again, these pull up really easy. And so then the tomatoes can get air, which we want, some [00:21:00] ventilation, and they don’t get too hot.
Now, something else that you can do, if you are wanting to put out your plants when they’re younger, or you’re wanting to start them and you need to keep them protected in the springtime when you’re waiting for those temperatures, or if you’ve got smaller things like greens that you’re trying to protect from cool night temperatures, is you can use any type of clear plastic container or glass and do this.
So I have used wide-mouth Mason jars work really well when they’re small. And you can put this on overnight or even out in the regular garden space if you’re worried that temps in the evening are gonna be getting a little bit too cool, and this’ll protect it, and then you’re just gonna take it off in the morning once temperatures start to warm up.
So you can really look and see what you’ve got, what you can reuse, because anything that is clear plastic or clear glass is gonna create that greenhouse effect, and usually give you anywhere between five to seven degrees increase on temperatures, keeping them [00:22:00] warmer. And so as 32 degrees, of course, is when things start to freeze, and then once you start to get below that, you start to get into the heavier frost and those killing and hard frost.
So if you can keep that off of your plants, then you’re gonna just increase your harvest time. Now, as you go into fall, we’ll sometimes have a frost that will come in September, and then we won’t have another frost for two weeks. So if I can get all of my plants through just that one frost, then I have more harvest time for about two weeks worth of harvest without having to do anything.
So an important thing to remember when you are doing cold frames is it’s not gonna allow you to grow those warm weather crops all year long, unless you live in a warmer or southern climate, and you just need the additional five to 10 degree boost to stay in that 50 to 60 degrees Fahrenheit, then it would allow you to do it.
But if you live in a northern or a colder climate, it’s not gonna allow me just the use of a cold frame and 10 degree temperature-wise to keep them going all year long. But- Your [00:23:00] cold frames work really well, as I said, for those colder crops. And so in the download guide, we will have a list of those cool weather crops that will go in a cold frame.
One of the things you wanna remember is those cooler weather vegetables, we actually need to get them started and established growing in late summer, early fall, depending on when your first average frost date hits, so that they’re growing when they go and enter into those cooler weather periods and they go into the cold frames.
Because the cooler that they are, if they get really cold, it significantly slows down their production and their growth. So we want them established and already of a good size before they really hit those cool weather temperatures, and then putting them in those cold frames, they will continue to grow and we’ll get a harvest.
It stops them from going into complete hibernation and/or being killed off, depending upon snow load and how cold those temperatures are. But you wanna remember that you wanna get them started and established before they hit [00:24:00] those really cold temperatures, and then it just extends the harvest, and in many cases, will allow you to grow them all winter long