Learn how to grow sprouts in a jar for a way to top your meals packed with nutrition and a quick and easy project for kids and adults alike.
I love sprouts! When I was in college, a local sandwich and bakery shop called La Bou would put sprouts on all of their sandwiches, and they were my favorite. To be honest, it’s been a few years since I’ve had sandwich sprouts (out of sight, out of mind) but I don’t love them any less. I sprout food for our livestock, called “fodder,” and it’s basically the same idea. If you’re interested in sprouting fodder to increase nutrition and decrease costs, check out Growing Fodder for Your Homestead. If you’re interested in sprouts for you and your family, keep reading.

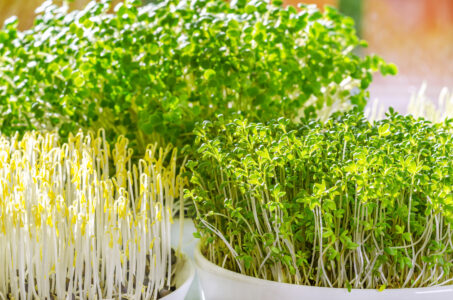
Sprouts are exactly what they sound like: seeds sprouted for consumption. I’ve sprouted alfalfa, red clover, and radish seeds. Also common are beans, peas, kale, and broccoli sprouts. Microgreens get a lot of press these days, and while they’re also great, they tend to be a bit more involved than sprouts, requiring dirt or a growing medium. Sprouts only require water and a well-drained container, such as a Mason jar topped with cheesecloth. Simple! You don’t even need sunshine to do this.

Why would you want to sprout seeds and then eat them? This is a quick process that’s fun for kids and adults alike and it makes for a gratifying project in winter, when fresh greens may be less available. Sprouting seeds releases enzymes and antioxidants that may not be present in the seed alone, or in the mature vegetable. This change from seed to sprout also makes the nutrients easier to digest and absorb.
So, how do you do it? Find some high-quality seeds of your choice. You can start with a small seed pack that will last quite a few batches, or you can buy in bulk online. Grab a sanitized quart jar, cheesecloth, and a rubber band for a simple setup, or purchase special sprouting containers online.
How to Grow Sprouts in a Jar: Sprouting 101
- Put 1 tablespoon of seeds into the quart jar, and cover the seeds with filtered water by an inch or so. Soak for 8 to 12 hours.
- Place the cheesecloth over the jar mouth, and secure with a rubber band. Drain the seeds through the cheesecloth, and then rinse well with fresh water. Continue to rinse and drain well twice per day until the sprouts have green leaves, which should take about 4 to 6 days. Seeds should show signs of sprouting within 24 to 48 hours.
- Once green leaves have appeared, place the sprouts in a bowl and fill it with water. The unsprouted seeds will sink to the bottom, and the hulls will float to the top. Strain off the hulls and discard, strain out the sprouts and allow to drain. Discard any unsprouted seeds.
- Drain your sprouts well and store in the refrigerator to halt further growing and preserve the sprouts.
Sprouting Tips
Seeds will sprout best in a semi-warm environment, about 68 to 72 degrees Fahrenheit.
As with any moist environment, there’s potential for mold growth. This can be avoided by rinsing and draining the sprouts twice daily. Sprouts can also harbor harmful bacteria; if you have a weakened immune system or you’re concerned about compromised sprouts, you can treat the seeds before sprouting by soaking them in vinegar for 15 minutes, or cook the sprouts themselves thoroughly to ensure their safety.

What should you do with these sprouts? Eat them raw by topping scrambled eggs, salads, sandwiches, burgers, stir-fries, or soups. The possibilities are endless! In the long days of winter, sprouting provides a fresh food and can be a great project for kids to witness. In my own experience, kids eat more veggies when they’ve played a part in how those veggies make their way to the table. Happy sprouting!
Nicole Wilkey transitioned from a corporate job to small-scale farmer in 2015. Since then, she has run California-based Flicker Farm to accommodate meat pigs, mini Juliana pigs, and pasture-based poultry, and she sells goats milk soap and lotion on Etsy.
All MOTHER EARTH NEWS community bloggers have agreed to follow our Blogging Guidelines, and they are responsible for the accuracy of their posts. To learn more about the author of this post, click on their byline link at the top of the page.


