Build a homemade drip irrigation system using PVC pipes and tubing to start efficiently watering your garden inside and outside.
Proper watering is one of the most important aspects of growing your own vegetables. On a recent trip to Virginia, I met Scott and Susan Hill of Hill Farm. Scott and Susan turned their retirement into a profitable farm venture. Susan is a master of the growing and accounting part of the operation, and Scott is the architect, maintenance man, and everything-else guy. Scott was a helicopter maintenance test pilot in the U.S. Army before retiring. His skills in fluid dynamics shine in his development of this unique dual watering system.
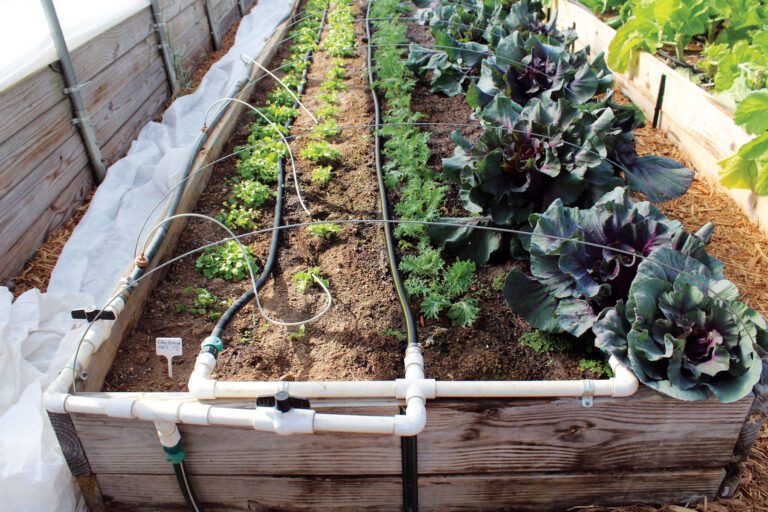
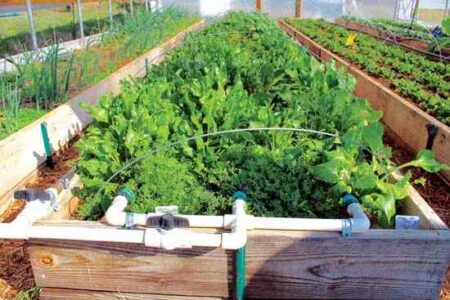
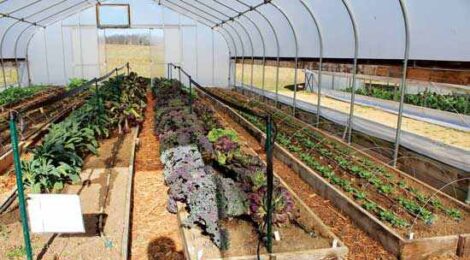
Scott and Susan use these dual watering systems in both their raised and in-ground garden beds at Hill Farm. One part of the system is comprised of a series of three soaker hoses, and the other part provides drip irrigation. Scott created this system to make the best use of Hill Farm’s well water and to help support the farm’s amazing harvests month after month, all year long.
With a little time and effort, you can build your own dual watering system with easy-to-find parts at a reasonable cost. You can expect to pay approximately $60 to $85 per unit, depending on the length of your garden beds and the quality of your materials. Scott suggests going with higher-quality materials because, in his own words, “The better the quality, the less repair required.”
Irrigation System Building Supplies
To build your own system, you’ll need the following:
- 3 lengths of soaker hose
- 1 length of drip irrigation tubing
- 4 hose end caps
- 4 female hose menders
- 5 feet of 1-inch PVC pipe
- 2 PVC shut-off valves
- 1 PVC cross fitting
- 1 PVC tee fitting
- 4 PVC elbow fittings
- 5 male PVC hose fittings
- PVC cement
- Drip irrigation tubing hole punch
- Emitters
- 1/8- to 1/4-inch polyethylene micro tubing
- 1-inch pipe straps
The lengths of your growing beds will ultimately determine how many emitters, pipe straps, and feet of hose you’ll need for each bed. Scott recommends that you buy your soaker hose in bulk rolls nearest the amount you’ll need. You can then cut it to the exact lengths that work best for your garden beds. These rolls generally come in lengths ranging from 50 feet to 500 feet.
Scott also suggests, “Don’t make the same mistake as me — don’t mix sizes.” He uses only 3/4-inch hosing to build his systems because the male and female hose fittings only come in a single size that’s supposed to accommodate hosing from 5/8 inch to 3/4 inch. Scott has found that when he’s used these fittings with 5/8-inch hosing in the past, the hoses tended to split at the coupling after about a month, spilling lots of water into his beds, so he’s decided to stick with 3/4-inch hosing.
The width of your bed will determine the lengths of PVC that make up the dual watering system’s manifold. The manifold described in these instructions is for a 3-foot-wide garden bed, but you can modify the same basic manifold design to accommodate garden beds of varying widths. So, after you gather all of your supplies and have an idea of the length of hose you’ll need and the spacing of your emitters and soaker hoses, you can start by laying your components out alongside your growing bed. This will help you visualize how everything will fit together before you begin cementing the PVC components together and cutting your soaker hoses and drip irrigation tubing to length.
How to Make a Homemade Drip Irrigation System
- Start by cutting your soaker hoses and drip irrigation tubing to the length of your garden bed. Cap one end of each of the hoses and attach a female hose mender to the opposite end.
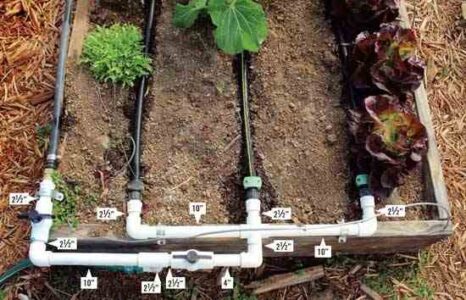
- To create a PVC manifold for a 3-foot-wide garden bed, cut three 10-inch pieces, one 4-inch piece, and eight 2-1/2-inch pieces from your length of PVC. By cutting the 10-inch pieces either longer or shorter, you can accommodate wider or narrower beds and create the proper spacing of your soaker hoses to meet your specific needs.
- Using the photo diagram on Page 73 as a guide, lay out your fittings and pieces of PVC pipe in the correct configuration for assembly.
- Apply PVC cement to a single joint, push the joint together tightly, and hold the joint firmly in place until the cement has set. Repeat this procedure for each of the PVC joints and fittings.
- Attach the drip irrigation tubing and soaker hoses to your PVC manifold.
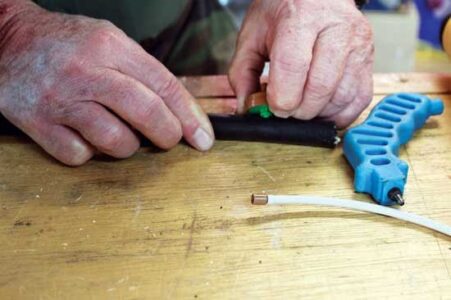
- Use the drip irrigation tubing hole punch to attach the emitters to the drip hose at the spacing you require (see photo, top left). Attach the polyethylene tubing to the emitters.
- Attach the manifold and the drip irrigation tubing to the frame of your raised garden bed using the 1-inch pipe straps. Alternatively, if you’re using in-ground beds, you can lay the drip tubing where it needs to be for the crops you’re growing.
- Attach a water source to your completed watering system, and turn it on to check for leaks, assess your hoses for proper placement, and make sure your shut-off valves work properly.
Now, simply sit back and marvel at how well this watering system irrigates your crops. By not spraying water on your plants’ leaves, you’ll help save them from scorching in the hot sun. You’ll also be saving water after you determine how long to run your system based on the growing stage of your plants and the time of year. And with this system in place, you’ll be able to spend less time watering and more time harvesting and preparing your lovely crops all growing season long.
For tips on setting up and maintaining your irrigation system, check out “Irrigation Tips from Mother Earth News.”
Kurt Jacobson has been a chef for over 20 years and worked occasionally as a freelancer. He was schooled in the U.S. Coast Guard and afterward, he trained in many restaurants under both kind and maniac chefs.


