I’ve been on hiatus for a few days just trying to wrap my head around this new normal while simultaneously scrambling to get a workspace ready for the kiddo to start online school. We have been placed under a stay at home order until April 30, with the schools closed indefinitely. Our district has decided to move to an online education system which started yesterday. It is wonky and slow and already this morning has crashed, sending my extremely Type-A super student into an emotional nosedive that has ended in tears and a nap.
These teachers need to be paid so much more, given so much more credit and support. Every day they post words of encouragement, fun lessons that challenge and inspire, and have been a source of light and love for our kids throughout this crisis. Most of them have families of their own, are struggling with the same challenges we are — trying to balance work, keep up as much normalcy as possible, and all while trying to homeschool often multiple kiddos.
None of it is easy, and as parents, we need to lower our expectations and demands upon our kids’ teachers. It’s Ok if all they’re doing is coloring or practicing writing words they already know. It’s Ok for high schoolers to post pictures of what they’ve been doing on their “break” so far and talk about their feelings. We don’t have to be pushing our kids with additional school stress right now – you’re stressed, they’re stressed, heck even our pets are stressed. The Lazy Dog has gained about 5lbs in the past few weeks and he’s been cruising from couch to bed to bed just sleeping constantly. We’re all in this together and we all need to keep expectations reasonable.
We’ve been operating on an “unschooling’ model”, during which kiddo is just given free rein to explore whatever pops into her head. So far, she’s painted a mural on her ceiling, a mural on an old broken violin, read countless books, talked with friends, counseled friends having emotional issues, started a Minecraft league, hosts scheduled online chat parties for her various friend groups and has displayed the kind of curiosity, humility and leadership kids need for life beyond school.
Needless to say, we’re not worried she’s going to spiral into some kind of juvenile delinquent just because she’s not in a building with a formal learning plan. We’ve instilled the love of learning, the value of curiosity and exploration, and the necessity to step up and lead when no one else will. Again, thrive not just survive no matter what the circumstances. That’s not to say we’re not happy that she’ll be doing schoolwork — it gives her structure and an outlet for more interaction with others. It also gives her new subjects to explore and new ideas to work with. Her teachers in particular are keeping it very low-key so far, not making anything laborious or stressful for the kids. There’s been a worksheet and some fun questions to answer in writing, but nothing that makes me feel like they’re pushing too hard — they’re not. And to those teachers I say thank you – you guys are rock stars in my book and I’ll figure out a way to thank you all once this over!
So, to try and help alleviate stress a bit on this blog, I’m pulling out all the stops and dedicating the next week of posts to chocolate. All the chocolate — candies, cookies, cakes — if it is sugary and gooey, it will be found here.
And without further ado, on to the candy.
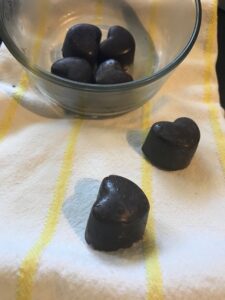
Sunflower Butter Cups Recipe
Ingredients:
- Any nut butter can be used here. We’ve had success with natural sunflower butter, almond butter and cashew butter. Peanut butter can be used here as well – we just don’t use it due to severe peanut allergies.
- 3/4 cup nut butter
- 1/4 cup light oil (we use either safflower or sunflower) – optional*
- 1.5 cups chocolate chips (we prefer dark, but any will do)
Directions:
1. Mix sunflower butter and oil (if using) until combined.
2. In mini or regular muffin tins – line with cupcake papers. We have started to use silicone candy molds. The silicone molds allow the candies to just pop out. We have used the muffin tins as well and had success with them as well.
3. In a double boiler, melt the chocolate being careful not to burn it. If you don’t have a double boiler, you can use a pot with water and a metal bowl over top (make sure water doesn’t touch bowl). You can also microwave in brief intervals 20-25 seconds, stirring between each one until melted as well.
3. Spread about 1 tablespoon up the sides and on the bottom of the mold you are using. We like to add extra to the bottom for a more chocolatey experience.
4. Allow cups to harden – you can speed this up by placing in the refrigerator for a few minutes.
5. Spoon nut butter mixture into cups.
6. Pour more chocolate on top (reheat if it hardens in the pot).
7. Refrigerate or freeze until chocolate is firm (chocolate will look hazy when placed in the freezer)
8. Enjoy
*Note: The oil only needs used if your nut butter is especially dry. We do not normally use oil, but have had drier natural nut butters that have needed a little extra oil to make them smooth.
These cups will keep for a week or more in the refrigerator or transfer them to a bag and freeze them for up to 6 months.
Chocolate-Covered Cherries Recipe
Oh my! These have been my favorite candies since I was a kid. Dark chocolate and cherries, how can you go wrong?
Ingredients
- 1 jar of Luxardo cherries (you can use any maraschino cherry)*
- 1.5 cups quality dark chocolate
Directions:
Silicone candy mold method:
1. Melt chocolate in double boiler or microwave (see sunflower cups recipe above for directions on how to microwave).
2. Brush mold cups with chocolate, making sure to put extra on the bottom. Allow chocolate to harden.
3. Place one cherry in cup. Cover with additional chocolate.
4. Level off tops with flat edge of a knife.
5. Refrigerate or freeze for at least an hour to set.
6. Pop candies out of mold and store in refrigerator.
Parchment drop method:
1. Line baking sheet with parchment paper.
2. Melt chocolate.
3. Using a metal spoon, place one cherry into the chocolate. Roll around to coat.
4. Drop chocolate-covered cherry onto baking sheet lined with parchment paper.
5. Repeat until you have enough cherries for your needs.
6. Chill in refrigerator or freezer to allow chocolate to harden.
7. Remove and drizzle more chocolate on top of cherries.
8. Chill for an hour.
9. Remove cherries from parchment and enjoy.
*Notes: Luxardo cherries are the adult version of maraschino cherries. They are extremely sweet and flavorful. The liquid they come in can be reserved and used in drinks and desserts. I will post a recipe later on that uses the liquid for a batch of killer brownies. You can also rehydrate dried cherries (or any fruit, really) for this recipe for a less sweet version.
Chocolate Truffles Recipe
Truffles are my sister’s favorite thing in the world. I buy her a box from our local chocolate shop every year for Christmas as a special treat. These truffles use only TWO ingredients, plus whatever you wish to use for filling. You will need 5 cups of chocolate chips in total.
For the centers:
Ingredients:
- 2 cups chocolate chips, finely chopped (use whichever kind you prefer here – we make ours with dark chocolate)
- 1 cup heavy cream
- Filling of your choice – the internet is full of ideas, but I usually make mine with 1 tablespoon espresso powder and 1/2 teaspoon of vanilla extract.
Chocolate covering:
- 3 cups chocolate chips (you can switch it up and use a different type of chocolate if you wish)
- Garnish of your choice (we like a little espresso powder or chopped almonds)
Directions:
1. Place chocolate for the centers in a heatproof bowl
2. In a saucepan, heat cream to simmering, then pour over chocolate.
3. Stir until smooth.
4. Add flavoring and stir until combined.
5. Allow mixture to cool.
6. Prepare a silicone mat or parchment-lined baking sheet.
7. Once cool enough to handle, scoop rounded spoonfuls of mixture and roll between hands to create a small ball that will be the center of the truffle.
8. Place centers on lined baking sheet.
9. Cover and refrigerate centers for 30 minutes or until firm.
10. Melt covering chocolate in double boiler or microwave
11. Dip centers into melted chocolate using a fork or dipping tool (a chopstick stabbed into the center works well here)
12. Place back onto lined baking sheet and garnish with toppings (if desired)
13. Allow chocolate to harden and store in a sealed container in refrigerator for up to 2 weeks.
Dana Gnadis a freelance writer and photographer with over 20 years of experience in technology. She has spent most of her life living on various homesteads — off-grid, urban, and everywhere in between. Currently camped out on 30 acres in the suburbs, affectionately known as The Lazy Dog Farm, she is working on her first book and dreaming of a life on the sea. Connect with Dana onFacebook, Twitter, andInstagram, and read all of her MOTHER EARTH NEWS posts here.
All MOTHER EARTH NEWS community bloggers have agreed to follow our Blogging Guidelines, and they are responsible for the accuracy of their posts.


