
Want to make the best irrigation system for vegetable gardens? Learn how to make a cheap drip irrigation system that works for homes and small farm gardens.
One of the most important aspects of growing your own veggies is proper watering. On a recent trip to Virginia in March I met Scott and Susan Hill of Hill Farm. This retired couple turned retirement into a profitable farm venture. Susan is a master of the growing and accounting part of the operation and Scott is the architect, maintenance man, and everything else guy. Scott was a helicopter maintenance test pilot in the Army before retiring. His skills in fluid dynamics shine in Hill Farm’s dual watering systems.

This low cost system design was inspired by the Israelis, and Scott Says, “If it’s designed by the Israelis, you know it’s going to work.” At Hill Farm these dual watering systems are used in the raised garden beds, as well as the in-ground beds. One part of the system is a soaker hose and the other part is drip irrigation. This dual system makes the best use of their well water and grows an amazing crop month-after-month, all year long.

To build a dual watering system for each growing bed is simple and affordable.
Parts Required:
- 120 feet of soaker hose (for 3 hoses in each 40′ bed)
- 3 end plugs for soaker hoses
- 1 end plug for regular hose
- 5 feet of PVC
- 2 PVC shut off valves
- U clamps for attaching PVC and soaker hose to raised beds
- 1 four-way PVC joint
- 5 PVC elbow joints
- 4 female PVC hose fittings for soaker hoses and drip hose
- 4 male hose fittings for soaker hoses and the drip hose
- 1 male hose fitting to connect to a water source
- 10-20 drip lines with nipple and emitters
- PVC adhesive for cementing joints
- Hole puncher for setting the soaker hose nipples
Your growing beds will determine exactly how many feet of hose, number of nipples and emitters needed. Most of us would have a smaller growing bed requiring less length of the soaker hose, drip hose, and number of drip lines.

Instructions For Building Your Irrigation Lines
After you gather all of the supplies and have an idea of the length of hose needed and spacing of drip lines you can start laying it out alongside your growing bed to see how it fits before starting the cementing process for pvc and hose cutting.
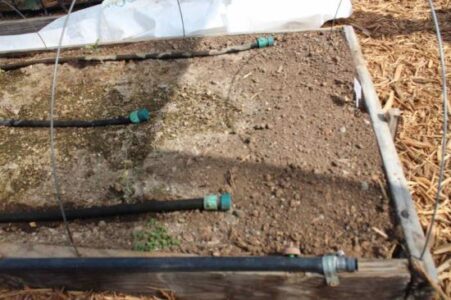
- Start by cutting your soaker and drip hose to the length you need. Cap off the ends and attach female fittings on opposite end where you connect to the pvc manifold.
![]()
- Get out your pvc cement then glue all joints and fittings and let set per instructions on cement package.
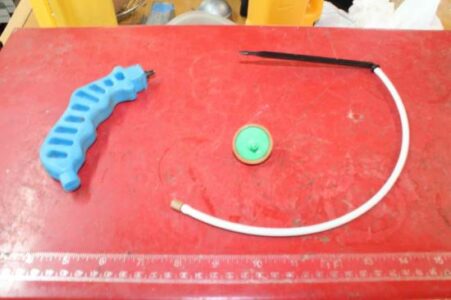
- While pvc cement is setting, use hole puncher and attach nipples to drip hose, then to raised garden bed wooden frame with U-shaped clamps. Or if using in-ground beds lay drip hose where it needs to be for the crops you are growing.
- Attach the short emitter lines, with or without the stakes to drip hose nipples.
![]()
- After the pvc has bonded properly it’s time to assemble the best watering system you ever had.
- Test for leaks and position.
Then sit back and marvel how well this watering system waters your crops from below. Without spraying water on your plants leaves to water them you will save the plants from scorching in the hot sun. You will also be saving water once you determine how long to run the water based on the growing stage of your plants and the time of year.
Since all of this might still be intimidating I asked Scott a series of questions to further clarify the process.
Q & A
How do you suggest readers purchase soaker hose, in large rolls and if so what sizes do the tools come in?
I would suggest buying in a comparative bulk quantity for individual needs, if you need 500 linear feet, buy the 500 foot roll. From various vendors they come in 100, 250, and 500 foot rolls. I would also hope you don’t make the same mistake as me, DO NOT mix sizes, I am going to use only 3/4″ hosing for all my needs, the male and female hose fittings only come in a 5/8″/3/4″ size, NOT either-or, and when used on the 5/8″ hoses, they tend to split at the coupling after about a month, spilling LOTS of water into your beds!

What was your approximate cost for one-40 foot bed’s dual watering system?
Depending on the quality of chosen materials (and the better the quality, the less repair required!) between $60 and $85 per bed. I use brass fittings any more, they last!
How long do you think it would take readers to construct their first dual watering system?
Loaded question,;~) if you’re NOT mechanically inclined, or know how to use and have tools, at least a month! I will also elaborate on recommended tools for the project at bottom of this page.
What type of hose should we suggest they buy for the drip hose?
Unequivocally, must be plastic irrigation system hosing, which is usually less flexible than rubber soaker hosing. The connectors are slightly different than rubber fittings and usually can be found at Lowe’s or Home Depot locations. I suggest all hose fittings be secured using pipe clamps.
What type of clamps to connect to the wooden frame of the raised bed?
See below, I use one inch PVC and use standard inexpensive “C” clamps also found at almost any hardware or plumbing provider.
If watering an in-ground bed do you recommend attaching the drip hose to the ground with some sort of U clamp?
No, it’s not necessary.
What diameter is the pvc?
I use one inch PVC, it’s suited to the standard submerged well pump captive pressure on my tanks of 35-45 PSI.
What’s the best tool for safely cutting both types of hose?
For the PVC, use any standard hack saw, the rubber hoses should be cut with a standard razor knife used for scoring drywall.
Are you okay with me saying you are willing to answer emailed questions? If so what email address do I give the readers.
I have no problem answering questions via e-mail @ <hillvegetables@gmail.com> I would only ask that the SUBJECT LINE of the email specifically say “MOTHER EARTH”, otherwise not probably recognizing the sender, I would delete without opening.

Scott and Susan grow some of the finest looking produce this chef and writer has ever seen. They are so committed to seeing you succeed too they have graciously agreed to answer questions submitted by email. Imagine how much easier watering will be once you have this system in place. That will free up more time for weeding, picking, and preparing your lovely crops all growing season long. How cool is that!
All MOTHER EARTH NEWS community bloggers have agreed to follow our Blogging Guidelines, and they are responsible for the accuracy of their posts. To learn more about the author of this post, click on their byline link at the top of the page.


