We live in a throwaway, convenient world, and we produce an overwhelming amount of trash. It’s easy to toss food out, recycling efforts are far from perfect, and our ability to fix cheaply made products is limited. The problem can feel too large for us to make a dent, but individually altering our own behaviors can feel empowering. In our August/September 2025 issue, we shared that the United States produces nearly 200 million tons of nonhazardous industrial waste each year. We also shared the story of repurposed MATERIALS, a company dedicated to giving industrial materials new life in other sectors, such as agriculture and construction. Its goal is to prevent 15 million pounds of waste – or enough to fill about 375 semitruck beds – from going to the landfill in 2025.
This summer, in collaboration with repurposed MATERIALS, we launched our Trash to Treasure photo contest and asked you all to share your projects. From pallets to car parts, you made some pretty great things out of “junk” destined for the dumpster. We hope these projects inspire and encourage you to look beyond the big-box store when you need an item for your home, yard, or homestead.
The winners of our photo contest saved money, met their needs with their own ideas and hands, and reduced the burden on landfills. Let’s repurpose and reuse a million more pounds of trash together, one project at a time!
– Mother
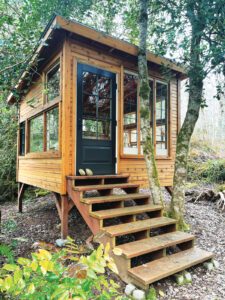
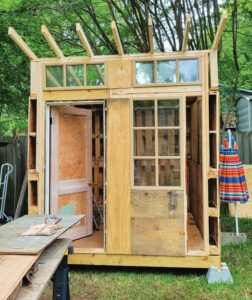
Trash to Treasure Grand Prize Winner: Holly Hideaway
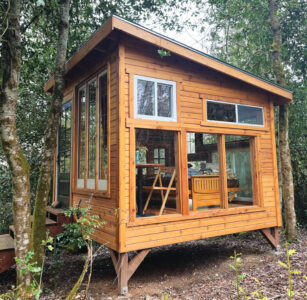
We have a little grove of holly trees on our property, and my husband got the idea of building a little “Holly Hideaway,” a place to go read or hang out or to use as a glamping hut. We collected a bunch of discarded and secondhand windows from a lumber store. We also had leaded-glass French doors, circa 1905, from a friend’s house, and a door from another construction project that we no longer needed. The floors of the hut are wood from a salvage store; they were originally in a school gymnasium. The inside walls are all constructed from scrap lumber we had on the property. My husband and our neighbor (who’s a blacksmith) built the structure in 2020 and 2021. It took about a year to construct. Since then, it’s settled a bit and the door is crooked, but it’s still a lovely place to lie down and read.
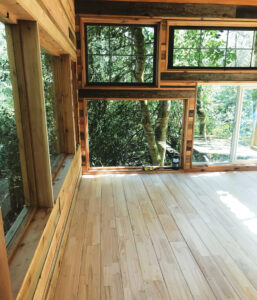
Victoria, Washington
Reclaimed Pallet Projects
Storage Cupboard
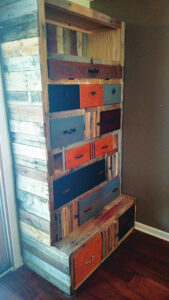
My husband said I needed a cupboard for all of my herbs and essential oils. He built it from pallets, and we reused old wooden drawers and handles.
Cassandra, North Dakota
Drum Shed
To start creating this pallet shed, I picked up some old pallets from a local landscape business, along with some old windows taken out of a house by a local business that does window replacements. I also used some plywood from our house renovation.
We have a small house, and I have a very loud hobby: I play drums! So, building this pallet shed allowed me to get some creative juices flowing.
Ryan, Texas
Self-Watering Planter
I made this self-watering planter using pallet wood and some other scrap wood that a neighbor was throwing away. I even had some used screws that I’d saved when we were taking apart our old deck. I designed it myself and made it to fit some old recycling bins that were left behind by the previous homeowners. They were no longer being used by the waste-disposal company, so we couldn’t use them for recycling. The recycling bins were different sizes and nested pretty well, so I used the larger one as the water reservoir for the self-watering part of the planter. I used scraps of PVC pipe for the watering tube and for stilts so I could set the smaller bin on top to keep it up out of the water. I used stained and ripped old T-shirts as wicks to draw the water from the bottom container up into the soil in the top container.
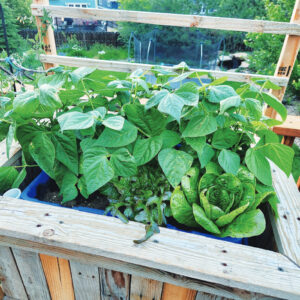
The inspiration for this build was the dry climate of Colorado where I live. It’s very water-intensive to grow plants here, and the ready-made self-watering containers are expensive. I also custom-built these to the right height so I didn’t need to bend down to tend my plants. My planters use much less water than a regular pot, and I like the rustic look of the unfinished wood. There’s also pride in having built it myself.
Susanne, Colorado
Dumpster Cable Basket
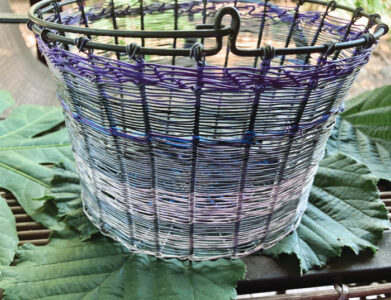
I found a chunk of telecom cable in the dumpster of a building that was being renovated. The colors of the wires were fascinating! I’ve been making things out of dead computers for a while, but this heavy piece of glorious color made me go back to wanting to make baskets, a craft I hadn’t explored since high school.
Marian, Oregon
Dishwasher to Turkey Nesting Box

We used the stainless-steel washing chamber from an old dishwasher to create a nesting box for our turkeys. We have a habit of creating small shelters for our flock using pallets and things that have gotten worn out, such as old coffee tables, so we thought, why not try the dishwasher tub and see what happens? It turns out they loved it, and it’s become one of their favorite nesting locations. We call it the turkey spaceship! It’s fun to see multiple turkeys using it at once, and I’ve also had a broody turkey raise poults in it.
Stacy, Oregon
Free Trampolines for the Garden
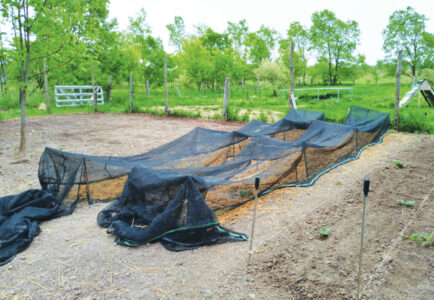
We started our farm in 2022 on a dime. I asked on Facebook for old, unused trampolines to put around our yard and pasture to provide shade for our 42 chickens and two pigs. We were offered eight trampolines in just a few days. The trampolines created instant shade, so instead of retreating to their coops and pens to escape from the heat, the animals now stay out and forage. This has the added benefit of reducing our feed bill.
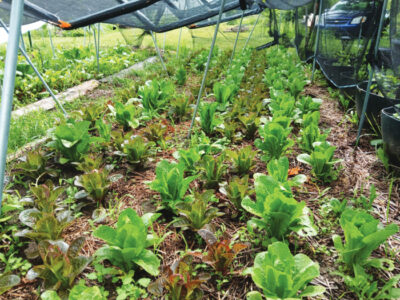
We have a lot of birds of prey, and the trampolines also helped us keep our flock safe. We placed them around the pasture and looping back to the coop door in a staggered pattern, touching each other. This gave the chickens a run to escape an attack from birds of prey, a bonus use! Another bonus is that the trampolines came with safety nets. We cut the safety nets in half at the zipper and got 40-by-5-foot shade cloths. The last two summers have been very hot for us, and the shade cloths kept our cool-weather crops, such as lettuce and broccoli, from going to flower too soon. On narrower rows, we found we could use an old straw bale rope to stitch up the ends, and this kept almost all cabbage moths and other pests off our crops. It turned out the trampoline springs can be used to hook up chicken netting to keep them out of areas we don’t want them in. Best repurposing we’ve ever found, for free!
Penny, Michigan
Car Parts for Petals
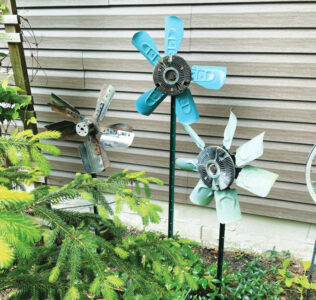
I used discarded car and tractor parts to make metal flower displays in the garden. We’ve made some out of free, old, rusty planter coulters. We screwed these on T-posts we already had and grouped them together. The ones shown here are made from radiator fans, some purchased at flea markets, one free, some painted, again mounted to T-posts and grouped in the garden. No matter what time of years it is, I have flowers.
Heather, Ohio
Free Art Supplies
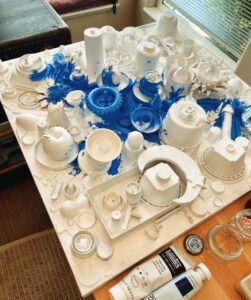
I’m all about recycling, especially with my grandsons. This project was made from found objects and plastic items, such as toys, lids, and utensils destined to be thrown away. We also used scrap wooden pieces, nails, screws, and washers – anything small and disposable. My grandson Zion helped with placement of the items on a precut wooden backboard.
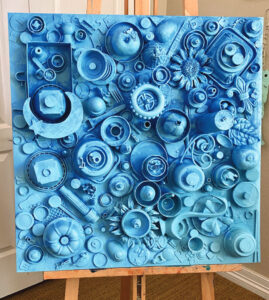
After gluing the pieces onto the board using a strong adhesive, we let it dry overnight. Then, we painted multiple layers of gesso, and let it dry again. Next, we chose a base color of acrylic paint and covered everything, making sure to get in the crevices. We chose a sky-blue color. After the base paint dries, you can add a coat of another watered-down color and wipe off the tops of any textured pieces to add dimension and shadows. I had the finished piece framed and covered in a piece of clear, lightweight acrylic, and we mounted it over our fireplace. I loved working with Zion, and now I have artwork to remind me of him whether he’s visiting or not!
Cindy, Colorado
Scrap Wood Play Structure
My late hubby loved to build everything from scrap. We got lots of ideas from Mother Earth News! On the farm, he built every raised bed from scrap wood or bricks, and he built an entire large chicken coop using telephone poles. He built a beautiful staircase along a pond too! I have pictures of them all, but the most memorable thing is a tree fort he built for our three grandsons. Shortly before he passed, he began work on the tree fort. When he passed, the boys were very sad about losing him, and sad he didn’t have the chance to finish their fort. The following year, my younger brother, his wife, and my niece decided they would honor my late hubby by visiting me and finishing the boys’ fort.
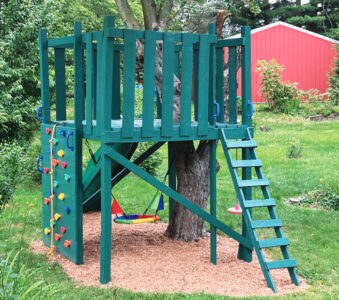
My husband had been on the lookout for free supplies on Facebook. He’d already found the free slide and a large pile of free wood. These were left over from construction jobs and were perfect for the framework! Knowing my brother was coming, I began searching for flat boards for the railing, rock wall, and floor. I found a fence company selling their scrap boards for pennies, so I ventured on over and filled the back of my SUV. I painted as much as I could using leftover paint from another job. It took us four days to build the tree fort! My grandsons learned about honoring the loss of a loved one, about the love of family coming forward to help, and about saving tons of money by reusing and repurposing materials.
Linda, Ohio
A Home with History
My husband and I are currently in the middle of building our new home. We’ve been doing as much of the work as possible ourselves, in the hopes of a debt-free build. We sourced materials from two other buildings, both from the 1800s, that needed to be taken down because of structural issues. The first was a neighbor’s barn. We salvaged as much of the barn wood on the sides and beams as possible. We used the barn boards for several interior walls and the ceiling, and we used the barn beams to trim around the windows and corners.
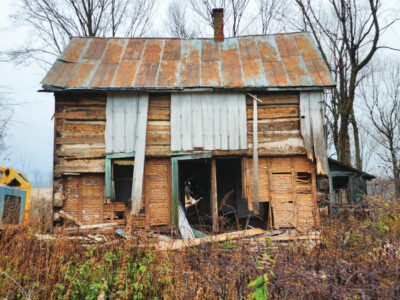
The second building we sourced materials from was a hand-hewn log home. This one was already collapsing, but we salvaged as much wood as possible, as well as lots of tin from the roof, some old 1930s newspapers, and several of the old doorknobs. The metal roofing we salvaged got washed, cut to size, coated in a protective finish to prevent further rusting, and installed above the showers in each bathroom to continue the rustic vibes and also aid in waterproofing.
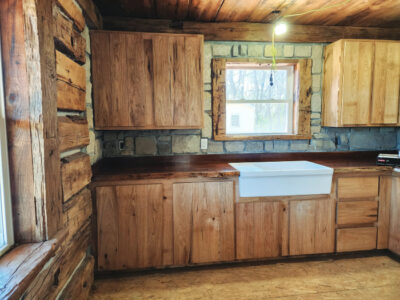
In the kitchen, we reused veneer stones that had surrounded our pellet stove in our trailer home. These became our kitchen backsplash. In the laundry room, the lower wall is covered with metal that came from an old fallen-down shed on my husband’s childhood farm, so it contributes sentimental value as well. We’re slowly working on finishing our home and hope to be moved in within the next several months.
Michelle, Wisconsin
Garden Planters on the Cheap
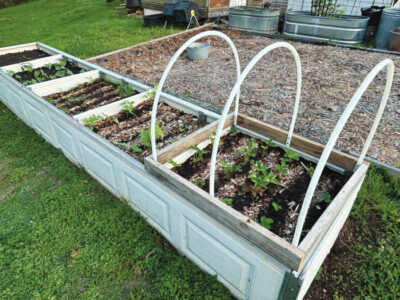
We were looking for an economical way to build raised beds. Because of physical limitations, raised beds are easier for me to manage. My husband recycled damaged garage-door panels to build these. He also used leftover flexible tubing and scrap wood to build a movable net covering. I can use the net on different sections, depending on when the strawberries are fruiting or when the kale is coming in, to avoid caterpillar issues. We used the Hügelkultur method of incorporating wood, compost, and leaves to fill the beds and promote soil health. The whole project only cost us the screws to assemble it.
Carol, Tennessee


