
Keep building materials local by building a DIY wood kiln to dry locally harvested and milled lumber.
After being inspired by creations they’d spotted online, The Farm at Okefenokee co-founder Jeff Meyer and elevator mechanic John Whitfield chose to build a wood kiln out of a shipping container for multiple reasons:
- It would save money by avoiding building permits and hiring contractors to build a new structure.
- It would save time by not needing a foundation or frame.
- It’s more sustainable than starting from raw materials.
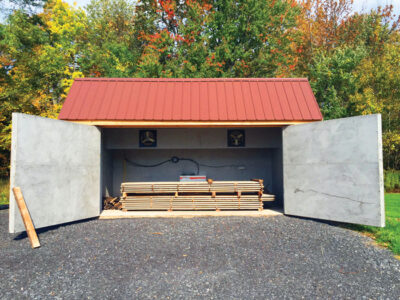
The wood kiln at The Farm is a hub for locally sourced and harvested lumber, thereby promoting a sense of community and environmental consciousness.
Whitfield found the wood kiln project enjoyable and practical. He sees the kiln’s durable aluminum exterior and Corten Steel (weathering steel) interior as a long-lasting investment. Working mostly alone, he estimates that other homesteaders could complete a similar project in about two weeks. While a lumberyard might have a larger wood kiln, Whitfield believes his DIY version is a good investment for those who always have access to a woodlots and woodworking projects in mind.
How Does a Wood Kiln Work?
Drying wood in a kiln is a precise process. Freshly cut wood has a moisture content of anywhere from 40 to 200 percent, depending on the age, species of wood, and growing conditions. This green wood is placed in the kiln, and over about three weeks, depending on the wood type, the kiln reduces the moisture content to less than 10 percent for construction uses (firewood use allows up to 20 percent).
A temperature probe measures the air in the kiln and regulates a heat pump; as it warms up, it pulls air across the boards and the moisture from them. Fans circulate the air, and when it crosses the cooling coils inside the unit, it condenses the humidity, similar to an air-conditioning unit. Once the desired internal temperature of the kiln is reached, the kiln’s vents open to moderate the temperature.
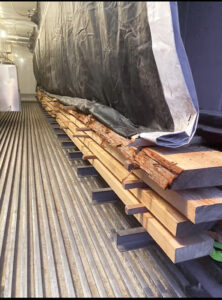
To dry efficiently, the boards need to have as much surface area as possible exposed. This is accomplished by separating the boards on what are known as “stickers” (1-by-1-inch wooden shims set between boards to allow airflow).
Transforming the Container into a Kiln
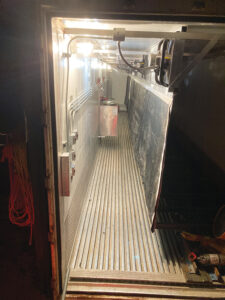
Whitfield says the refrigerated shipping container cost them around $5,000. It still had the nonworking refrigeration unit enclosed on one end, and he left it alone. “It was going to get too technical for what we needed if both ends were open, and what we did works well. So, I’m glad we didn’t open it up.”
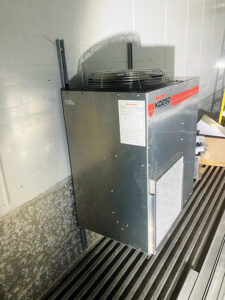
Whitfield purchased a Wood-Mizer KD250 Dehumidification Wood Kiln kit as the delivery arrangements for the container were being made. “Purchase a kit that best suits your enclosure based on volume,” Whitfield recommends.
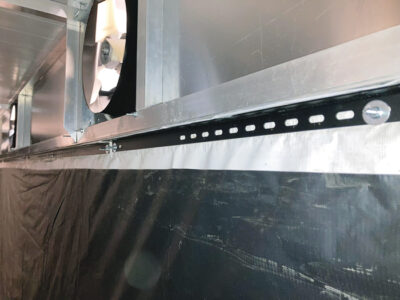
One of Whitfield’s first steps was to install an aluminum frame for the fan motors, which came with the wood kiln kit. For the 40-foot shipping container, Whitfield used five three-blade fans, equally spaced lengthwise throughout the kiln. He says if he did it all over again, he’d install two additional fans.
“We don’t need more circulation. However, I could always turn individual fans off. I’d rather have too many installed where I know I’m getting the proper airflow than not. So, installing too many fans isn’t a bad thing.”
The Wood-Mizer kit includes a heater and a control box. The next step was installing the Wood-Mizer kit’s heat pump and coils (the dehumidifier). “Run the proper electric circuit from your panel box to your kiln. You’ll install lighting using wet-area-type fitting and conduit [as you will] when you wire the fans.”
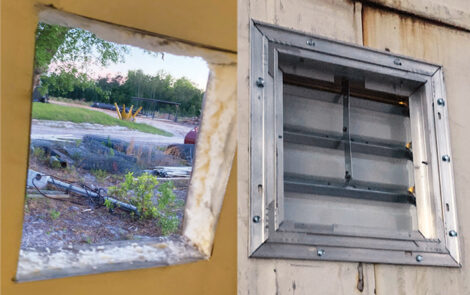
Whitfield wants to remind everyone that the control box must always stay outside the kiln, as it can’t be exposed to the heat. He found a truck toolbox that worked well to protect it from the outside elements. (Note: Use caution; a control box may have its own cooling needs.) After that, he installed the fans’ switches using a conduit. He cut 8-by-8-inch holes into the sidewall of the shipping container for the intake and exhaust fans to regulate airflow and temperature.
Baffling
A “baffling” system must be utilized to distribute the heat evenly to ensure everything dries equally. Baffling is the act of controlling airflow. A “baffle” is also known as a “wind deflector” and is set at an angle from the fan to the top of the wood stack, or, if using a tarp (or similar), from the roof along the outside of the stack to its bottom. As the air flows along the baffle, the baffle moves and shifts the air along the edge of the stack, ensuring that each layer has enough air moving across it to dry the wood.
The fans are directly centered over the stacked wood, all facing in the same direction, pushing the air down and to the right. To baffle, Whitfield recommends a piece of heavy-duty tarp or similar material. It’s important to ensure all your wood is square and flush and nothing sticks out in any direction, or your wood won’t dry evenly.
To test the movement of the air, Whitfield closed the door and turned on the fans. He knew the design was complete when the fans were on and he could feel air coming through the stack at the bottom. You can test that the airflow is evenly distributed by using a digital anemometer along the spaces of the stack.
Monitors
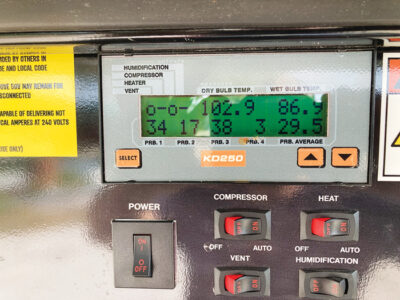
After the baffling was set, Whitfield mounted the wet and dry bulb monitors in a central location. “The dry bulb [probe] monitors the air [temperature], while the wet bulb probe – inside a reservoir of water – [monitors the humidity of] the kiln.”
The next step is to wire the heater, which is inside, to the controls, which are outside.
Moving and Drying the Wood
Whitfield built two 10-foot carts and one 12-foot cart out of steel with metal casters that roll along the tracks he set into the container’s floor. “We installed two continuous [elevator] rails to load the wood. They can handle at least 3,000 pounds. We built ours long so we can roll all three carts out simultaneously … I can push a cart by myself in and out, so it’s a good design,” Whitfield says.
You then load the wood in and screw in the moisture-sensing probes, near the center of the boards and the stack. “The four probes talk back to the Wood-Mizer controller. You go into the controller and enter the type of wood you’re using, and the Wood-Mizer controller tells [you what temperatures to] set the dry and wet bulb [monitors].”
Whitfield says there’s a booklet that comes with each kiln kit that provides the temperature references.
“Around 8 percent is what we like to use here in Georgia. You set the controller to 8 percent, turn it on, and it’ll run until the wood dries to that percentage. Then, you pull it out, load the cart, and repeat the process.”
Originally published as “Build a Wood Kiln from a Shipping Container” in the December 2024/January 2025 issue of MOTHER EARTH NEWS and regularly vetted for accuracy.
Special thanks to our friends who lent their expertise and experience to this article and answered all of our questions! – Mother


