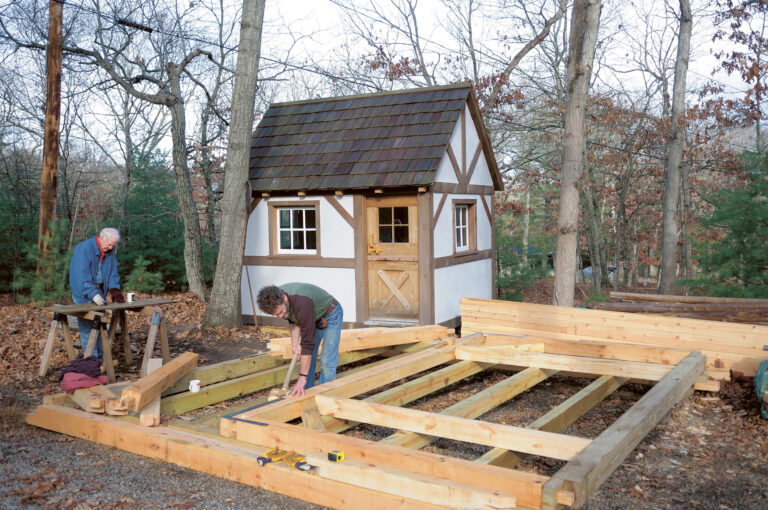
What is timber frame construction? Construct a tried-and-true timber frame using timber framing joints in this how-to, complete with helpful tips.
Traditional timber framing looks great, and is very strong and durable. Although it takes time to make a mortise and tenon joint and secure it with a wooden peg (treenail), the sense of pride and accomplishment is well worth the effort. This is the way buildings were made for centuries, by carpenters using simple hand tools–mainly a saw, mallet and sharp chisel.
Many people, even professionals, confuse timber-framing with post & beam construction. Both methods use heavy timbers, which accounts for the confusion that exists between the two. Traditional timber-framing uses difficult-to-make mortise & tenon joints secured with wooden pegs (tree nails), whereas post & beam often uses simple lap joints and even metal fasteners to hold the pieces together. Various materials have been used to fill between the timbers, such as wattle and daub (sticks and mud), bricks, stucco and straw. Timber-frame structures can be finished off in numerous ways, just like a modern stick-built house–among them, plywood, clapboard, board & batten, shingles, or even stucco. Today, houses are generally stick built with 2×4s or 2×6s, and sheathed with plywood to stiffen the frame and keep it from racking.
Tips to make timber framing easier:
- Use pressure-treated wood for the sill plates and floor joists, Northern pine for the rest.
- Invest in a coarse-cut saw (we used the Bahco Profcut and Superior saws) to cut the big lumber and lap joints. A circular saw and a chisel can also be used for lap joints, but may be harder to control accurately. A framer’s slick is useful for finishing (paring) tenons and lap joints.
- Use a marking gauge to find the center of timbers, mark tenons and mortises, etc. For repetitive joints, make a cardboard template, and use a tenon-sized piece of wood to test each mortise for fit.
- With an electric drill and 3/4″ auger bit, bore out most of the waste material from the mortises, and finish with a 1-1/2″ framing chisel. Mark around the mortise with shallow chisel cuts before drilling, to prevent splitting out the edges.
- When the sill lap joints are finished, cut temporary pegs to hold them in place while you adjust the timbers. Use a long level and a framing square to set them in place, on blocks if necessary. Make sure the diagonals are equal.
- Temporarily set the top plates upside-down on the leveled sills while you make and fit the corner posts, braces and studs. That way you won’t have to keep lifting the heavy top plates every time you want to check a joint for fit (but you will have to remember which side is which when it’s upside-down . . .).
- Number each joint with a chisel or permanent marker as you work. And never assume it fits– check it before you try to assemble the whole frame. Each new joint tightens the whole structure and leaves less margin for error.
- This building is designed to have vertical sheathing boards nailed to the outside of the frame. If you intend to use horizontal shiplap, tongue & groove or clapboard, supplement the main posts with 2×4 studs, set 24″ apart; this will allow you to insulate between the studs and cover them with drywall.
- Draw plans on 1/4″ grid paper; for a 10’×12′ building, use two squares to the foot, or for a larger building, one square to the foot. If you’re planning something really big, consult an architect or structural engineer with experience of timber-framing. For ease of access, consider placing the door at the highest point of the site.
- Most lumber yards and home-improvement centers don’t stock material suitable for timber-framing, but they should be able to order it for you; if you live in the country or have access to a saw mill, you may be able to get the wood significantly cheaper. Northern pine will be a lot lighter than oak, in case you don’t have an army of helpers.
- If you do have helpers, why not have a timber-framing party?
How to Build a Timber-Frame

Lay out the shed with mason’s string and four wooden stakes. Use a level and check the diagonals for square.

Cut lap joints on the ends of the 6×6 pressure- treated sill beams, using a coarse-cut timber saw. Set out the base, level and square, on concrete blocks.


With a framing chisel, cut 2″×2″ mortises through the lap joints (remembering that the corner posts are 5″×5″). Place a piece of wood under the mortise to avoid splitting out, and turn the beam over to finish the cut from the other side. Use a carpenter’s square to make sure the sides of the mortise are straight.


Use 4×6 pressure-treated lumber for the floor joists, set into 2″-long×3″-deep pockets in the sills. Cut a 35-degree bevel at the ends of the joists to alleviate stresses as timbers expand and contract.
Cut tenons on each end of the 5″×5″ corner posts, by making rip cuts a little wide of the mark and paring them down to fit the mortises. On all tenons, chamfer the edges with a sharp chisel or a rasp to make assembly easier.


Make the lap joints on the top plates, and set them upside-down on the sill beams while you mark, cut and fit the studs, braces and girts. The 4″×4″ braces should be fastened with oak pegs (treenails or “trunnels”) passing right through the posts. Drill the holes carefully, from both sides.
Cut lap joints in the tops of the 3″×5″ rafters, and cut bird’s-mouth notches where they will rest on the top plates. Mark the exact location by laying trial pieces on the floor. Use the first rafter as a pattern for all the rest. Cut the rafter tails long enough to deflect rainwater, but make sure there is enough clearance for the door (if it is to open outwards). Use treenails at the lap joints and at the top plates.

Once everything fits, mark and cut corresponding mortises in the sill plates for the 3″×5″ studs, then gather your army of helpers to raise the building. It can be tricky to fit the girts and braces at the same time–you may find it easier to assemble an end wall (or “bent”) on the base first, lift it into place and repeat the procedure at the other end, before fitting the other two walls and locking them all together with the final top plates. Nail the bents to the sills with temporary diagonal braces until the walls are finished. Assemble the rafters, and nail a temporary ridge board to the peaks until you are ready to enclose the building.

More from Backyard Building:
• How to Build a Rustic Gate
• How to Build a Classic Cottage Garden Shed
Reprinted with permission from Backyard Building by Jeanie and David Stiles and published by The Countryman Press, 2014.