Vinyl tiles are a common kitchen flooring choice, but even one damaged tile can ruin your kitchen’s aesthetic appeal. Learn how to repair vinyl flooring with our guide to fixing kitchen floor tiles. Complete with photos and expert tips, you can treat yourself to a newer-looking kitchen floor or prepare your house for the market without hiring the work out. You’ll be surprised how easily a blow dryer, tile adhesive and a couple of tools can solve your flooring woes.
A kitchen floor is generally judged on two counts: how it looks and how much maintenance it needs. If you’re selling the house, your kitchen floor should look more or less new. As with countertops, old scars and stains on a floor are not only unsightly but can also be unsanitary. If you think it might be time to replace your kitchen floor, consider installing sheet vinyl flooring, vinyl tiles or laminate planks. These all rank near the bottom of the price scale and are right at the top of the low-maintenance list.
A kitchen floor that is out of date, in poor repair, or both is an instant turnoff to new homeowners and potential buyers alike.
How to Repair Vinyl Flooring
Vinyl flooring is the most popular type of resilient flooring (flat-surface flooring that is soft underfoot), thanks to its relatively low cost, superb water and stain resistance, and excellent durability. It’s also one of the easiest and cheapest types of flooring to install.
There are two types of vinyl flooring: sheet vinyl, which comes in big rolls and is (ideally) laid in one continuous piece, and vinyl tiles or planks — individual pieces laid in a pattern and stuck to the subfloor with glue or self-adhesive backing. Sheet vinyl runs between 50 cents and $5 per square foot, depending on thickness, construction and complexity of the design. Vinyl tiles and planks range between 25 cents and $4.50 per square foot, depending on those same factors.
Linoleum is another well-known resilient flooring. It has been around since the late 1800s and is an all-natural product, made with linseed oil, sawdust, cork and other organic materials. Real linoleum has the right qualities for the kitchen and is now available in a range of appealing colors and patterns, but installing sheet linoleum a job for professionals. Plank and tile linoleum are similar in price to vinyl and are DIY-friendly, but vinyl remains the most popular flooring for its all-around excellent characteristics.
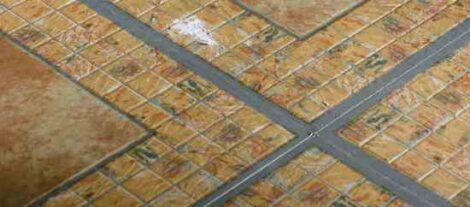
Sheet vinyl is more durable and has a higher quality look than most vinyl tiles. This is because the seams in tile can be gathering places for dirt and grime, and can allows water to infiltrate and compromise the adhesive bond between tile and floor. The main advantage, however, is that individual tiles are easy to replace and the initial installation is also easier. Damaged sheet vinyl can be patched, but not without leaving visible seams. Vinyl tiles can loosen at the edges and curl up, but you can simply replace the affected pieces.
Ideally, you or the previous owner had the foresight to save extra tiles for this purpose. If not, bring a sample of the flooring with you to local flooring stores to see if they can match it. Note: Older floor tiles and adhesive may contain asbestos. If you suspect your flooring was made or installed before 1980, consult the U.S. EPA recommendations for asbestos in the home, available online at the EPA’s website.
How to Replace a Vinyl Tile
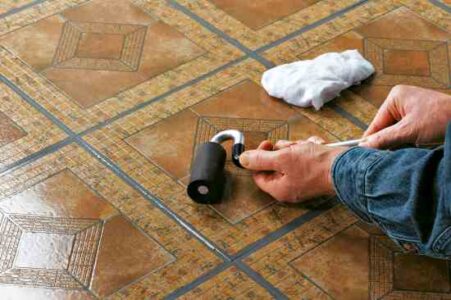
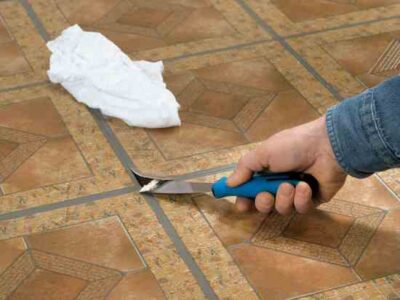
1. Heat the damaged tile with a heat gun set on low or medium, or an iron on top of a dishtowel. When the tile and adhesive are soft enough, pry up the tile with a putty knife or a 5-in-1 painter’s tool. Let the adhesive cool and harden, then scrape it up so that the underlayment is clean and smooth.

2. Fill holes and depressions in the subfloor with floor patching compound. Apply tile adhesive to the clean subfloor, using a notched trowel. Set the new tile in place and press it flat. If necessary, add or remove adhesive so that the tile is flush with the neighboring tiles.

3. Roll the replacement tile with a J-roller, working from the center of the tile toward the seams to avoid trapping air bubbles. Clean up any excess glue that squeezes out at the seams. Let the adhesive cure completely before walking on the tile.
Floor Tile Adhesive Quality
When it comes to saving money long term, bargain tile adhesives are really no bargain at all. Spend a few dollars more for the adhesive recommended by the tile manufacturer and you’ll protect against eventual adhesive failure, bleed-through and other problems that can occur with off-brand adhesives.
Flooring Repair Tip
You don’t have to replace a tile that is just curling at one edge. Heat the affected area with a heat gun until tile and adhesive are soft. Carefully pull up the loose edge and scrape out the old adhesive and any accumulated dirt. Use a putty knife to apply vinyl tile adhesive to the back side of the tile, then press the tile back into place. Clean up any excess adhesive from the edges following the manufacturer’s directions. Roll with a J-roller and place a weight on the tile until the adhesive cures completely.

Need to know how to repair vinyl flooring? Have a few broken, peeling or damaged kitchen floor tiles? This excerpt, taken from Upgrade Your House (Creative Publishing International, 2010) by Philip Schmidt, has your solutions (with photos!). The following article comes from Chapter 1, “Updating the Kitchen.”


