Learn how to sew a standard pillowcase with basic sewing terms for a successful start to your first sewing project.
My sewing machine is my favorite tool. Sewing is how I relax after a long day, and it helps me mend, adjust, and make long-lasting and sustainable garments, bags, and other useful items.
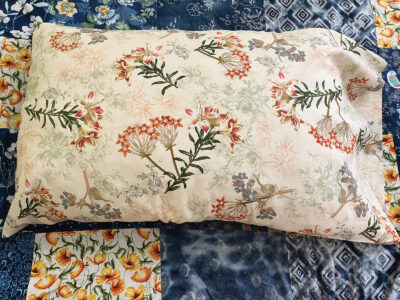
The first project I made with my machine was a pillowcase, and while I’ve long since lost that particular one to many moves, it’s still dear to my heart. This pillowcase is simple, sturdy, and machine-washable. Its construction is easy, with only three straight seams and one opening. I make new ones from time to time, whenever my pillowcases wear out. This beginner-friendly project, which takes less than an hour from start to finish, is one of the little steps I fit into my life to make it more sustainable. I hope you’ll give it a try.
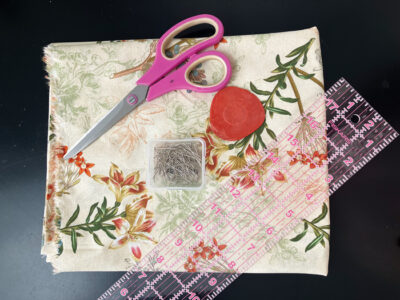
Tools and Materials
Sewing Basics
Here are a few basics to review before you get started with your pillowcase.
- Backstitching. Whenever you begin and end a line of stitching, backstitch for a few stitches to ensure your seam doesn’t easily come undone.
- Fabric. Different types of fabric have different weights, fiber content, opaqueness, and so on, and thus are better suited for different functions. For this project, consider using quilting cotton or linen for a sturdy pillowcase that can hold up to regular washes.
- Grainline. This refers to the direction of the woven threads. Woven fabric consists of a warp thread, which runs top to bottom, and a weft thread, which goes left to right. Straight grain refers to the direction of the fabric that’s parallel with the warp threads, while the cross grain is perpendicular to the warp threads. The bias is a direction of 45 degrees across the fabric, which allows it to naturally stretch a little. This project is fairly flexible, so you can cut the fabric out on either the straight grain or the cross grain, but not on the bias. You don’t want your pillowcase to stretch out or warp!
- Pins. Pin two pieces of fabric together for sewing but remove the pins as you sew. Never sew over the pins, as doing so can potentially snap the needle of the sewing machine, and the broken bits of the needle could hurt you. You may want to invest in a sewing pin picker-upper for locating hard-to-spot pins that have dropped on the floor.
- Right and wrong sides. Each piece of fabric has a “right” and a “wrong” side. The right side is the one where the pattern, color, or print is most visible, whereas the “wrong” side is the opposite.
Selvedges. These edges of fabric are already finished as part of the weaving process. They may be solid or have a little fluff at the end. - Sewing around corners. When you reach the corner of the fabric, lift the presser foot while keeping the needle in the fabric. Pivot the fabric toward you and then set the presser foot down. Continue stitching.
- Tailor’s chalk. Use it to make marks on the fabric in a nonpermanent way. Test it on a scrap piece of fabric to make sure it washes or rubs off fully first, though. Use on a hard, flat surface.

Directions
- Iron out any wrinkles or folds from your prewashed fabric to ensure your measurements are as accurate as possible. On the wrong side of the fabric, use a ruler and tailor’s chalk to measure and mark out two 20-by-35-inch rectangles.
- On the right side of the fabric, mark a line 5 inches from the edge with tailor’s chalk, all the way across the shorter length of your rectangle. This is where you’ll later form the facing for the pillowcase opening to enclose the raw edges and provide a clean finish.
- Pin the fabric wrong sides together. Pin three of the four sides together: both long sides and one short side. Leave the side parallel to the line you drew in Step 2 unpinned, as that’ll be your pillowcase opening.
![]()
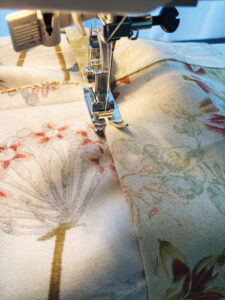
- Sew 3/8 inch from the edge of the fabric, your “seam allowance.”
- Using an overlock or zigzag stitch on your machine, finish the raw edges of the fabric. Using an iron, press the seams flat to one side.
![]()
- With your pillowcase right side out, along the line made earlier, fold back the fabric on the opening toward the inside of the pillowcase. Press flat. Then, turn your pillowcase inside out and fold the raw edge under by 1/2 inch. Press this seam and pin it. Sew along the inside edge with a 3/8-inch seam allowance. Enjoy your pillowcase!

I Can Make That is a new department in Mother Earth News, in which we’ll share projects anyone can make. We hope they’ll add a homemade touch to your space and replace something you’d otherwise buy. We’d love to hear from you: Send photos and details of your craft projects to Letters@MotherEarthNews.com. – Mother
Ingrid Butler is an editor at Mother Earth News. She enjoys sewing, trying out pickle recipes, learning how to use new tools, and thinking about literature.
Originally published in the April/May 2025 issue of MOTHER EARTH NEWS and regularly vetted for accuracy.


