When we started down the path of our self-reliant life the only place we could find rhubarb was in abandoned gardens and farms. Now, in the wake of the real food movement, rhubarb has been rescued from decades of neglect. Even if you don’t grow it, you will be able to find it in farmer’s markets during June and July. My method for planting, harvesting, and using rhubarb, from garden to table, was streamlined years ago to meet the demands of a busy gardening and farming life without compromising quality.
What Rhubarb Looks Like
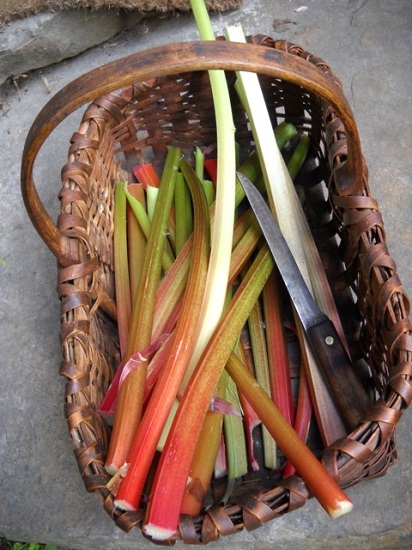
No question about it, rhubarb is real food with an almost space-age presence. In early spring, sometimes through snow in the northeast, clumps of crinkled green leaves emerge from the ground, the first sign of a new growing season after what always seems to be a very long winter.
As leaves unfold, we begin to see their stalks or stems, green, red, or a combination of colors. By the time the stalks (the edible part) are ready to harvest, the leaves will be about 12 inches long, waved at their edges, and about 12 inches wide. Just 6 plants create an impenetrable barrier to weeds and an attractive hedge in our kitchen garden. As soon as plumes of fluffy cream-colored flowers appear, pull them gently out, unless you want to keep them as a garden accent.
What, When and How to Plant Rhubarb
Most gardeners like to plant 2 types, a red for color and a green-red for general use. Some popular varieties are Canada Red, Macdonald, and Valentine. We grow a very productive unnamed one from a neighbor’s garden. Two plants will provide plenty of stalks for one person.
In spring, choose a sunny site with good drainage and enriched soil. Plant roots so the crown (the nubby part) is above ground. Each crown should have 2 or 3 buds on it.
To plant, make holes about the depth of the blade of a shovel and the width of 2 shovelfuls. Water the hole and refill it with a shovelful of well-rooted compost, then a layer of topsoil. Set the crown into this mixture, making sure the buds are 2-3 inches below the soil line. Tamp soil, water. To keep plants moist, apply mulch, especially if the weather is dry and the site is windy.
Growing and Maintaining Rhubarb
In the second season, spread 3-4 shovelfuls of well-rotted compost around each plant but do not cover the crowns. Cover compost completely with cardboard or any decomposable material (we have used old, non-synthetic carpet). On top, add a fairly thick layer of straw, rotted sawdust, or whatever mulching material is available. In time, all layers will break down to form friable humus.
In fall, when plants are dormant, throw a shovelful of manure over each plant. Fresh manure is o.k. If it contains straw, so much the better.
With this spring-fall fertilizing regime, winter protection is unnecessary, even in harsh northern climates.
Stalks may be lightly harvested from new plants in their second year and for 3-5 weeks their third year. Thereafter, you can harvest them until production has noticeably slowed down. Pull, don’t cut stalks (this could encourage disease). Trim both ends of the stalk making sure to cut away all leaf growth (leaves contain toxic amounts of oxalic acid). It’s safe to add the rhubarb leaves to the mulch.
Making the Perfect Rhubarb Pie
The secret for successful rhubarb pie is to have a supply of fresh rhubarb stalks on hand plus never-fail pie dough. Ours is an heirloom recipe from the Swisher family, originally Dutch fruit tree farmers from Virginia. Even a beginner will succeed using the method described below.

Swisher Family Never-Fail Pie Crust
Ingredients:
• 2 cups all-purpose unbleached white flour, part white wheat flour (a little lighter in color than regular whole wheat flour with the same nutrients and better for baking)
• 1 tsp salt
• 13 tbsp unsalted butter, chilled
• 1/4 cup ice water
Directions:
1. Reserve 6 tbsp of the flour and mix it with the ice water to make a paste.
2. Blend cold butter with remainder of flour. Use a pastry blender or 2 knives to chop the butter into the flour.
3. When blended completely, add flour paste, stirring it in with a fork. Work dough only until it coheres. Form into a ball and chill.
4. Pre-heat oven to 400 degrees, then proceed to make the pie.
Rhubarb Pie Filling-for a 9-inch pie
Ingredients:
• 2-1/2 cups or a little more diced rhubarb
• 1 cup sugar
• 2 tbsp flour
• 1 egg, beaten
• dash salt
Directions:
1. Mix ingredients together in a large bowl.
2. Cut dough in half, roll our bottom crust, lift carefully and place in the bottom of the pie pan.
3. Add rhubarb mixture, spreading it out to fill pan. Roll out top crust, lift carefully and place on top of the fruit, pinching dough edges together to seal them.
4. Prick around the top crust several times with a sharp fork.
5. Place a pan in the oven to catch spilling pie juices.
6. Pre-heat oven to 400 degrees Fahrenheit. Bake pie at 400 degrees for 10 minutes, then at 350 degrees for about 45 minutes or until filling is bubbly and crust is light brown.
7. When cool bring your masterpiece to the table.
For more rhubarb recipes see my book Old-Fashioned Jams, Jellies, and Sweet Preserves.
Photo credit for pie – Hayford Peirce
Jo Ann Gardner is a noted plantswoman, lecturer, and author of 7 books on fruits, herbs, the cottage garden, and most recently Seeds of Transcendence: Understanding the Hebrew Bible Through Plants. She and her husband live in the Adirondacks where they maintain a small farm with extensive gardens. She may be reached through her website,www.joanngardnerbooks.com.
All MOTHER EARTH NEWS community bloggers have agreed to follow our Blogging Best Practices, and they are responsible for the accuracy of their posts. To learn more about the author of this post, click on the byline link at the top of the page.


