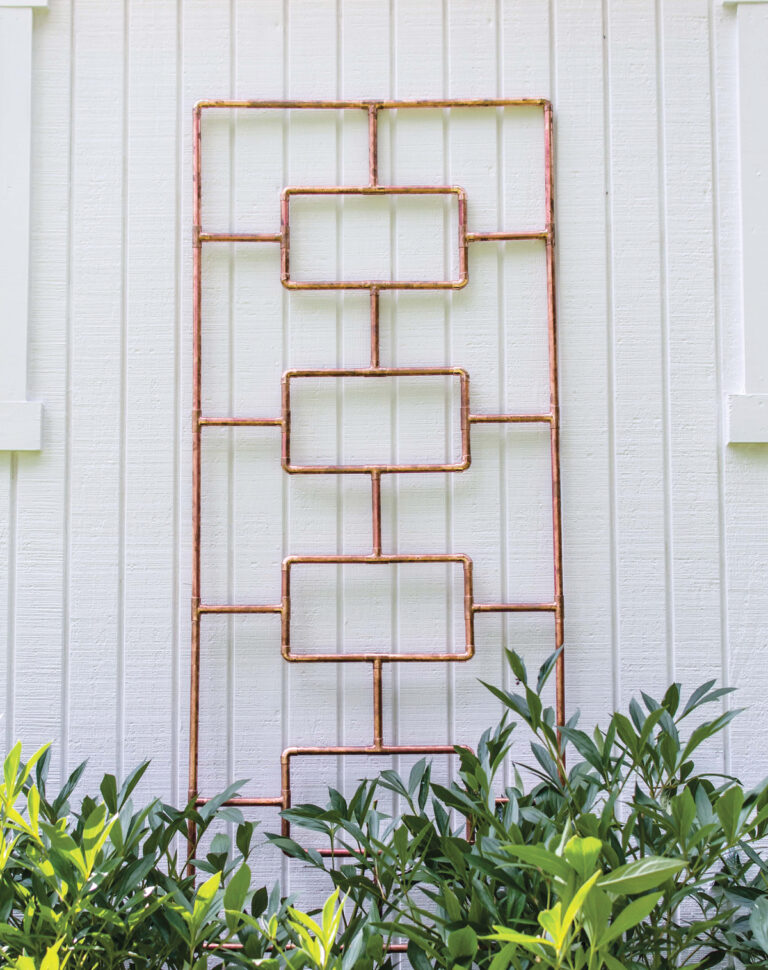
Striking and functional, this DIY copper trellis will add an artistic flair to your garden while supporting your plants that like to climb.
Trellises, by their very nature, are meant to support climbing plants. Although this copper trellis can do just that, it also aspires to do more, all by itself. Whether leaning against a wall or standing erect in a more natural backdrop, the trellis will add verticality to a garden of any style — traditional, modern, or even steampunk.
Assembled using polyurethane glue, this trellis is quite sturdy — especially as an objet d’art versus a plant support — but for those with the equipment and expertise, soldering the trellis’s joints is an option as well.
Also, don’t skimp when choosing a tubing cutter to use for the project. Opting for a cutter labeled “heavy duty” will not only make the job of cutting pipe easier, but it’ll also make the cuts more uniform.
Tools
Materials
- 1/2-inch-by-10-foot copper pipe (4)
- Large piece cardboard or paper
- 1/2-inch copper tees (28)
- 1/2-inch copper elbows (18)
- Polyurethane glue
- Water
- 3/8-inch-by-36-inch rebar (2)
Cut List

From the 1/2-inch-by-10-foot copper pipes:
- A 13-1/3-inch length (6)
- B 12-1/2-inch length (4)
- C 9-1/2-inch length (4)
- D 6-inch length (31)
- E 3-inch length (16)
Build the Copper Trellis
Step 1. Wearing eye protection and gloves, cut the copper pipe using a copper tubing cutter into the lengths on the “Cut List.”
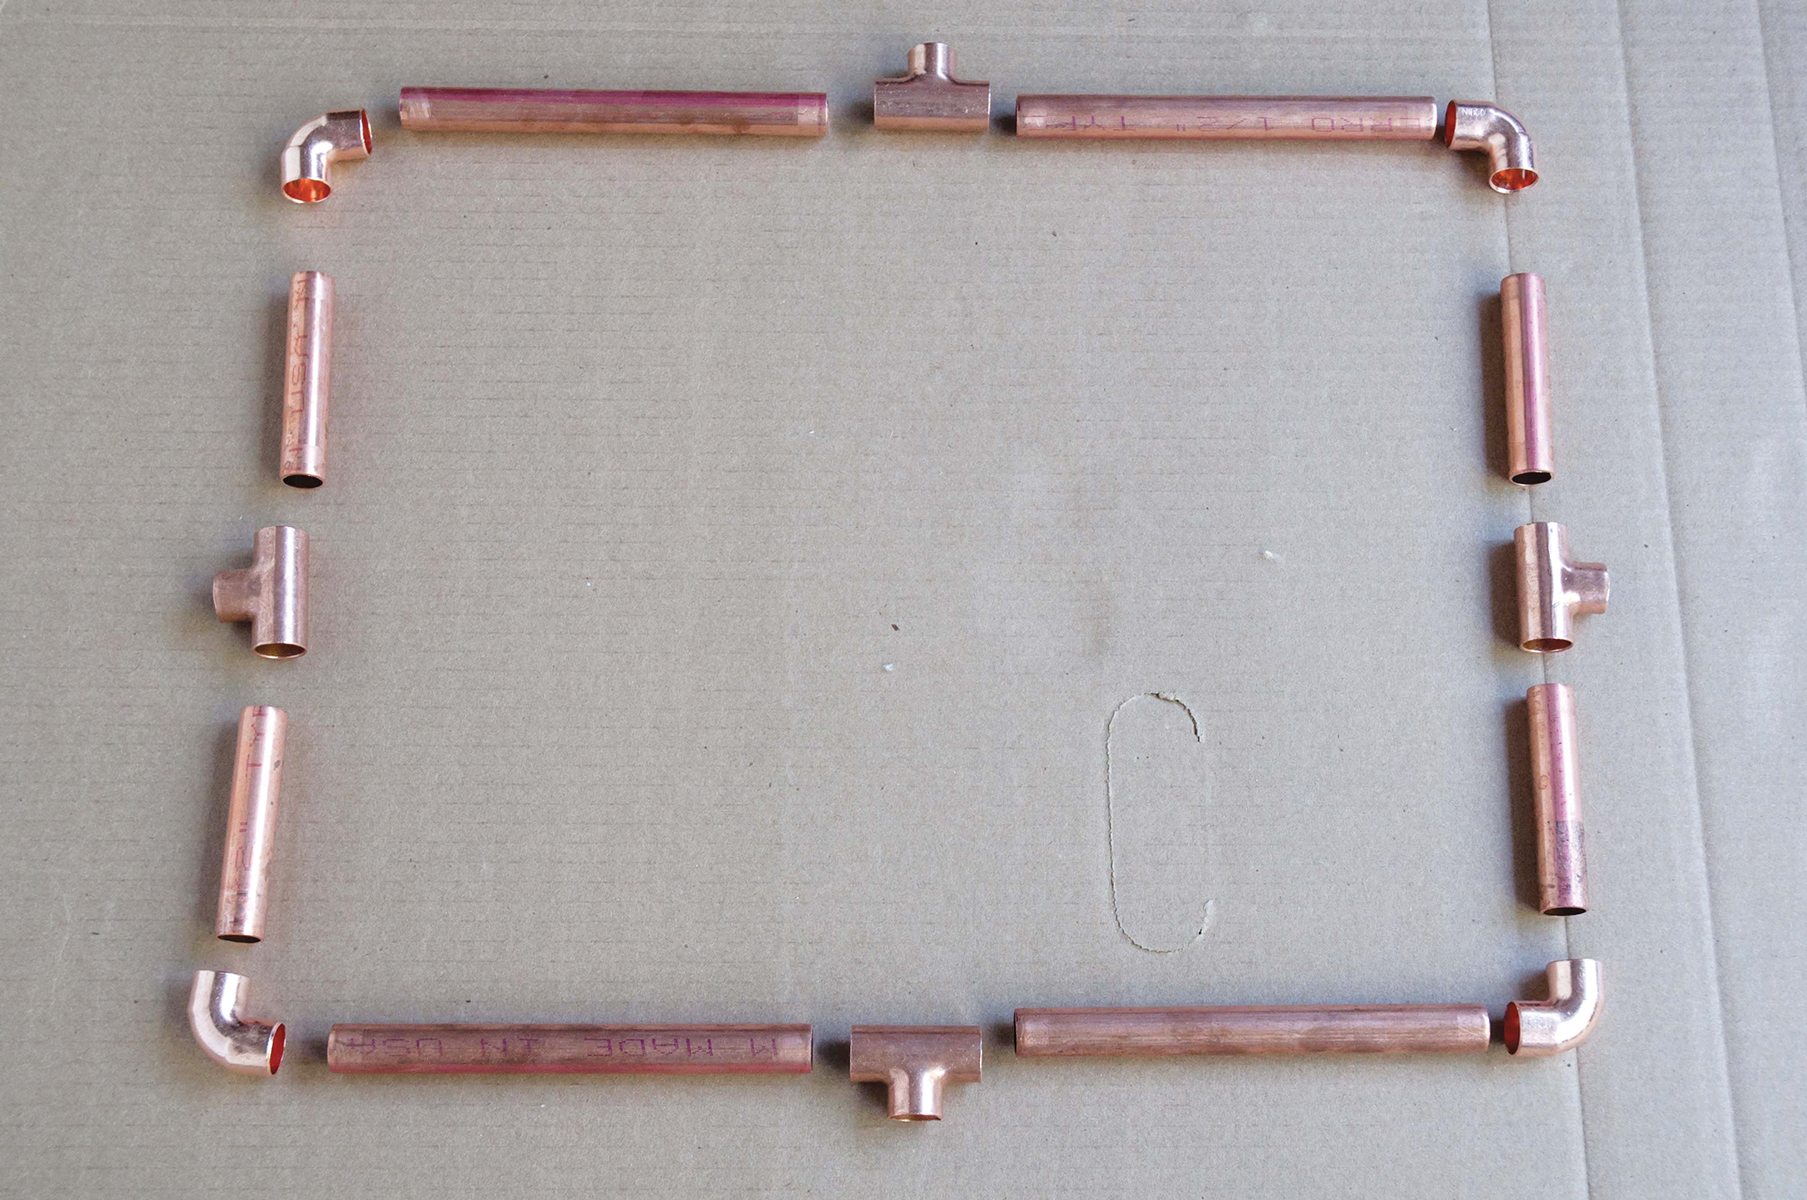


Step 3. When the trellis shape is formed, glue the center motifs (the rectangles) together first, following the instructions on the polyurethane glue. When you glue the fittings together, make sure they’re flat against your working surface and that each pipe is fully inserted into each fitting. Don’t worry if the pipes adhere to the cardboard; a utility knife will scrape the pipes and fittings clean.
Note: Our polyurethane glue called for pre-wetting one side of the gluing surfaces first. If necessary, use a spray bottle filled with water or a wet sponge for quick and easy application.

Step 4. When the center motifs are assembled and have cured for about 24 hours, glue and assemble the outer structure around the center motifs, starting with the top of the trellis and working down. Once again, make sure the fittings are flat against your work surface and that each pipe is fully inserted into each fitting. Let the glue dry for about 24 hours.

Step 5. Once the glue has dried, use a utility knife to scrape cardboard and excess glue off the pipes. Let the entire outer structure cure overnight, and then install the trellis by hammering two pieces of rebar into the ground and slipping the trellis legs over the rebar.
Warning: When installing rebar, beware of electrical wires, as well as any other utility services, buried underground.
JoAnn Moser has been a featured contributor to DIY websites and other publications. She’s also the author of Mason Jar Nation. She resides in Eden Prairie, Minnesota, where she and her husband design and build wood furnishings in their spare time. Follow her online at DIY Maven. This is excerpted from her book Garden Builder: Plans and Instructions for 35 Projects You Can Make (Cool Springs Press).


