Fat seems to come and go in relative estimations of value and devaluation depending on various factors of its content. I’ve in recent years become a fan of pasture-fed, pure beef tallow. It came to me in the form of a sort of gift along with the purchase of a piece of my cousin’s homegrown cow three years ago. Nobody else seemed to want the stuff so I took it; there was no extra charge and it would otherwise have been thrown out.
Health Benefits of Pastured Beef Fat
Then I began to research beef tallow’s health merits. As compared to vegetable shortening or margarine, tallow wins out in many respects. It’s unprocessed, meaning it has no free radicals that can lead to a greater likelihood of cancers. It’s pure, meaning there are no carcinogenic chemicals added. In addition, pasture-fed cows are less likely to have been contaminated by staph as those sold on supermarket shelves. And I know exactly where it came from, how it was treated, and who handled it. Buying from family locally and knowing the animal was pasture-fed is important to me.
I haven’t bought shortening now for over a year, though I still use it for greasing pans now and then. Likewise, I rarely use margarine, though I consider butter an essential ingredient in my cooking. I’ve rendered beef fat into quart jars of tallow two years in a row and consider myself seasoned in the art of avoiding too much of a mess in making it. I did a bit of internet recipe research and through trial and error found how to make the best of my time in the process. The last batch of fat may have weighed about 30 pounds. I wound up with just short of two gallons of tallow, poured into quart jars.
How to Render Beef Tallow
1. First, you need as many big, flat pans and casserole dishes as you can fit into your oven. They each need to have sides that are at least 2-1/2 inches deep and preferably a spout for pouring; if not, a square corner. (Otherwise the fat will be more likely to drip over the rounded sides of the pan.) Fat is not something you want anywhere but inside a vessel. Drips are a problem to be assiduously avoided, needless to say. I’ve found cast iron pans seem to be hotter than others, making the process faster.
2. Next, you need a well sharpened big knife and a large cutting board. Cut the pieces of fat into chunks around one to two inches in diameter; cubes work well but there’s no need to be uniform in shape.
3. Lay them flat in the pans only one layer deep.
4. Completely cover all pans with fat chunks.
5. Add around 1/2 cup water to each pan.
6. Heat your oven to 400 degrees Fahrenheit.
7. Cover each pan with aluminum foil. This is important because it will protect the inside of your oven from being completely covered with grease splatters. I found that out the hard way.
8. Completely fill all the racks in your oven with as many pans as you can. The water is helpful in that it will heat up and start the rendering process faster. It will then evaporate in the very long process of rendering in your oven.
9. After 1/2-hour turn the oven down to 325 degrees Fahrenheit and leave it to cook for 3 hours. You may want to move the pans around halfway through as the top and bottom racks will cook fastest. Other than that, don’t open your oven.
When the process is done, the chunks of fat should begin to look a bit golden will stick to the bottom of your pans. That is a convenient aspect in the regard that it probably won’t need to be strained. The fat will be a clear liquid which is rendered and ready to pour. My method is tried and true and was chosen after reading a couple of websites, but others have found it easier to cut up the fat in a food processor.
While making this fat, beware of burning. If your oven is hotter than most, you may prefer to cook at a slightly lower heat to avoid this. The fat has a distinctive odor which will fill the kitchen but shouldn’t be that distinctive smell of burned beef. This will ruin the entire effort.
How to Store and Use Rendered Fat
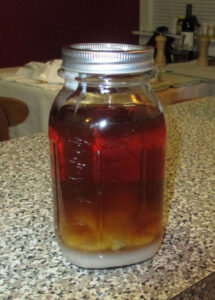
The fat lends a flavor to dishes that is particularly desirable for Mexican foods, fried potatoes and savory pie crusts. But if it becomes overcooked or rancid, the fat will ruin anything and everything and waste a lot of your time and effort. The final product should be completely clear of particulate matter and will not need to be strained as it is poured into jars. It will cool into a uniform milky white and will be rather hard as compared to other fats. You will need to keep it refrigerated or frozen until used. I’ve found that quart glass jars filled with the fat freeze fine without breakage. This fat keeps for three months in a refrigerator. I do sterilize the jars first and use conventional canning lids, also sterilized. And I use canning jars because they don’t break as easily as other glass jars when coming in contact with the very hot fat.
To remove it from the glass, use a knife to break pieces of the tallow loose. I use this as a way to oil my pan before cooking burgers, and in pie crusts in a half-and-half ratio to butter. It tends to be harder than shortening or butter and thus more difficult to measure so I weigh it when making pie crusts. When baking enchiladas, I use it to oil the pan and cook tortillas. I make enchilada sauce with it. I melt a few tablespoons of it in a cast iron pan to oven-fry potatoes which were previously blanched in water. This takes only around 15 minutes if the pan has been preheated. Don’t be afraid to use it to fry eggs; its flavor isn’t overwhelming yet does contribute well.
All MOTHER EARTH NEWS community bloggers have agreed to follow our Blogging Best Practices, and they are responsible for the accuracy of their posts. To learn more about the author of this post, click on the byline link at the top of the page.


