This is it! Now we make Goats Milk Soap with the cold process method. After reading Part 1 and Part 2 of my blog here at Mother Earth News (or you can also find the links to the article also on my website at Serenity Acres Farm), you have all the basic knowledge and hopefully have assembled all supplies and ingredients by now.
Now let’s go! Here is the very simple recipe, followed by (hopefully) simple instructions. The recipe will make a 4 pound loaf. And for practice, make sure to run the recipe through the soap calculator before you start.
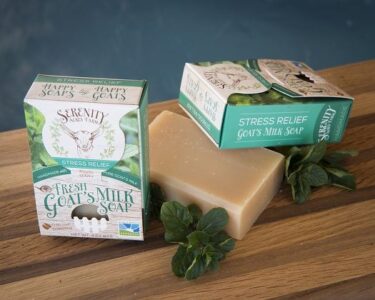
The Goat’s Milk Soap Recipe
Ingredients:
• 16 oz frozen goat milk (stored in a Ziploc freezer bag)
• 3 oz food grade lye
• 17 oz of 76 degree Coconut Oil
• 17 oz of Grade A or Pure Olive Oil
• 9 oz of Organic, Sustainable Palm Oil
• 2 oz of Essential or Fragrance Oil (suitable for soap making)
Yes, that’s it, these are the only ingredients.
The Process and Instructions for Making Goat’s Milk Soap
1. Cover your work space with newspaper.
2. Line your mold with freezer paper, shiny side out, as wrinkle free as possible.
3. Trim the edges of the freezer paper to the height of your mold and tape down.
4. Measure out all your ingredients except lye (frozen milk chunks, coconut oil, palm oil, olive oil and essential or fragrance oil), each in individual glass or stainless steel containers and set them aside within easy reach on your work space.
5. Pour the measured out Olive Oil in the container designated for the base oils, then heat up the Coconut and Palm Oils (also base oils) so that they are liquid and clear. The temperature of the oils will be around 110 – 120 degrees.
6. Stir the Palm Oil.
7. Mix the Olive, Coconut and Palm Oils together in a glass or stainless steel container.
8. Add the essential or fragrance oil to the base oils. Set aside.
PUT ON YOUR SAFETY GLASSES AND GLOVES. KEEP THEM ON FROM NOW UNTIL THE DISHES ARE CLEAN.
9. Measure out the lye.
10. While constantly stirring, slowly add the lye to the frozen milk chunks (always lye into liquid). The lye will melt the milk chunks slowly and the color will turn from white to a cream color. Try not to inhale the fumes.
11. Once the lye is completely combined with the frozen milk and the milk chunks are all melted, slowly pour the lye/milk mixture into the base oil mixture while stirring on low with the stick blender. (Keep the stick blender UNDER the surface to avoid splashing and to avoid creating bubbles). This liquid looks awesome and pretty, but it will hurt/burn you, so keep it away from your skin and eyes.
12. Once the mixture (the soap batter) starts to trace, meaning it has the consistency of a milk or vanilla pudding (do not eat), stop the stick blender, lift it out of the soap batter carefully, and slowly, with both hands, pour the soap batter into your prepared mold.
A note here: while I am stirring with the stick blender, I always take the temperature of my soap batter with a laser thermometer. The temperature likely will go down first as the cold lye/milk mixture mixes with the warm base oils, but after 5 to 10 minutes, as your soap is reaching trace, the temperature will then be going up by 1 to 5 degrees. The steady temperature increase is a sure sign that the lye molecules are reacting with the oil molecules and are in the process of attaching themselves together where they won’t let go again. So, if you want to make sure you have a real trace, keep taking the temperature of the soap batter.
Make sure the batter is level.
13. Cover the mold with a lid.
14. Wrap the mold in a towel.
15. Let sit for 48 hours on a level and quiet surface.
16. After 48 hours remove towel and lid and lift soap out by freezer paper. If everything has been measured and mixed correctly, all the lye in the original recipe will have reacted with the oils to become soap, and the soap block will not be harmful to your skin anymore. If you see white, chalky spots, they may be lye spots. I do the good old fashioned tongue test (stick the tip of your tongue against the white spot and if it tingles, its lye) in that case, or just cut them out when the bars have cured for 4 weeks. As the bars will continue to cure for the next 4 weeks, any minute traces of lye will have completely disappeared/saponified by then.
17. Cut into desired bars and place on a cookie tray lined with freezer paper with space between the bars.
18. Let the bars cure for 4 weeks. Turn the bars every 2 – 3 days to ensure even curing. The soap can be used before that, but olive oil and goat’s milk soap make a softer bar, so curing them a bit longer will help the bar harden and last quite a bit longer.
* washing instructions for pots and utensils: if these pots and utensils are dedicated to soap making, keep your gloves on and wipe out the pot and blender with paper towels, everything else rinse with water only. The soap batter sticking to everything will still burn your skin.
CONGRATULATIONS – YOU HAVE MADE GOATS MILK SOAP!
And so you are on your way to soap queendom. It is a fascinating and never ending source of fun and great soap. I’ve covered here the basics. There are lots of variables, variations and soapstakes that can happen. Soap will misbehave. You will make 9 great batches and think you’ve done it and the 10th batch bombs very badly. Do not despair, it will get better.
Oh and yes, keep notes with every single batch of soap you make, what you did, what worked and what didn’t and refer back to those notes when you make your next batch. I have binders full of notes on all my soap batches, and those notes have saved me from making mistakes again, improving each batch, refining my recipes, and fixing little things here and there.
Here is a great little video shot by film students from West Palm Beach in Florida.
Julia Shewchuk owns and operates Serenity Acres Farm on 80 acres in Florida. Serenity Acres runs on solar, is Animal Welfare Approved-certified, houses anywhere from four and eight WWOOFers and interns, and is the home to a small herd of dairy goats, 11 Black Angus cattle, 100 laying hens, 3 horses, 2 cats, 5 house dogs, 8 livestock guardian dogs, and 2 ducks. Read all of Julia’s MOTHER EARTH NEWS posts here.
All MOTHER EARTH NEWS community bloggers have agreed to follow our Blogging Guidelines, and they are responsible for the accuracy of their posts. To learn more about the author of this post, click on their byline link at the top of the page.


