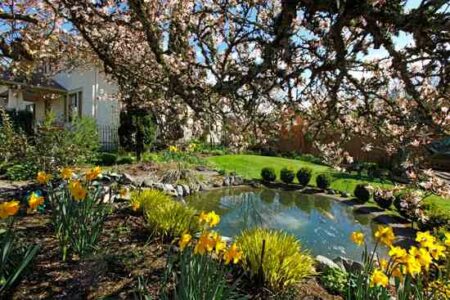
Get great advice on how to build a low-cost pond and maintain it on the homestead.
How to Build a Low-Cost Pond
The reasons for building a homestead pond are many and
varied. I originally built mine because I wanted a
plentiful supply of good fish for food; I wanted the
convenience of catching those fish right on my own farm;
Once our two “mini-lakes” were finished, however, I found
they contributed much more than fish to our life: many more
animals, wild ducks and other birds now come to visit and
sometimes stay on our place; the edible wild plants that
grow around the moist edges of the ponds add much “free for
the picking” variety to our diet; the little lakes form an
extremely convenient water supply for the chickens and game
birds we raise; the reservoirs give us a place to swim and
practice, canoeing in the summer and are our own private
skating rinks in the winter; the steady sources of
water — always handy for fire department use, if
necessary — cut the fire insurance premium on our
house.
There are other considerations too, such as the beauty that
the ponds add to our homestead . . . the satisfaction I get
from just sitting on a rock and watching the fish . . . or
the visiting fisherman (a ten-year-old. sage) who knows
what water spiders eat, where turtles go in the winter and
why a coonhound will never bark “treed” on Halloween night.
When I started my reservoirs I didn’t have a water supply
nor a particularly good place to build a pond. I didn’t
even know where to go for helpful information. Gradually,
by “feeli ng” my way along, I not only successfully
established our two ponds — one managed for trout and
the other stocked with bass and panfish — but I learned
several methods of building small lakes for very little or
absolutely no money at all. I now feel that anyone with a
half-acre or larger homestead — and armed with the
knowledge in this article — should be able to build and
maintain a successful fish pond regardless of his resources
or geography.
Selecting the Pond Site
I suppose the ideal location for a pond would be a
half-acre (or larger) gulley or valley with clay soil,
located on a gentle, grassy slope directly below a spring
or artesian well. All a builder would have to do, in such a
situation, is build an earth dam (with a spillway or drain
pipe to control the water’s depth) across the lower end of
the depression and let it fill.
If you’ve got the gulley and slope but not the spring or
well, you may still be in luck. As long as you have five
acres drainage for each square foot of water that is six
feet deep in your minilake, you can build the dam and let
the rainwater runoff from the hillside fill your pond. As a
matter of fact, you can get by without the galley and
slope. Even if your homestead is flat as a pancake you can
still have that “private fishin’ and swimmin’ hole” . . .
by excavating.
An excavated pond is more work but it’s also the most
versatile (therefore, most popular) mini-lake. Such a pond
can be located anywhere a source of water is available or
can be made available. An excavation — instead of a
dam — can even be placed in one of the gullies
mentioned earlier and, so located, would probably be easier
to keep full of water than a dug-out pond on level land.
Most valley ponds are at least semi-excavated, as
a matter of fact: the dam at the gulley’s lower end being
constructed, generally, of clay bulldozed out and pushed
down from above.
The only minus factor (vastly overstressed in my opinion)
of an excavated pond is the difficulty involved in draining
such a reservoir dug into level ground. I believe, once
your pond is stocked, you’ll find yourself much more
concerned with how to keep the water in than with how to
let it out. A pond can always be speedily drained with a
large pump that can be borrowed or rented if you don’t have
one of your own.
Pond Beds: Good and Bad
One of the poorest places to excavate a pond is in gravel
or coarse sand. Such a bed will not hold water for any
length of time and — if you’re forced to establish your
private lake in such soil — you’ll have to seal the bed
in some way.
Sand beds can be made watertight with strips of heavy black
plastic laid to completely cover the pond bottom and sides.
The strips should be lapped about three inches to form a
seal. Consult your local plastic dealer or county agent for
more information.
Sand ponds also can be sealed with clay if it’s available.
The sides are waterproofed by digging a narrow trench one
foot deeper than the pond and three feet outside its water
area. This trench, which completely surrounds the lake, is
then tamped full of clay. The bottom is plugged by throwing
clay into the water and keeping the mini-lake as muddy as
possible by running an outboard motor or driving animals
through the pond to keep the clay in suspension. The clay
particles in the water that seeps through the bottom will
eventually form a tight, long-lasting seal.
As you might have suspected, clay makes the best bed for a
pond and — if your lake site has such subsoil (as most
do) you’re home free and should have no trouble holding
water in the finished reservoir.
The Pond Dam
Although there are a number of ways to build a farm pond; sport concrete and other complicated barriers, a plain old earthen dam is — by
far — the most popular “stopper” for a homestead lake.
Rule of thumb says a ratio of two parts clay to one of sand
makes the best structure; that the top of a dam should be
at least eight feet wide: and that the slope of the sides
will be three-to-one upstream and about two-to-one
downstream.
A dam is not just dirt (even clay) piled up on the bottom
of a gully. The “seam” where such fill lays on the original
soil will be a choice place for a water leak unless a
trench is dug through any top soil and down into clay to
accept the first layers of fill (which should, if possible,
be pure clay). Succeeding layers of the dam should be sand
and clay which is both well mixed in the proper proportions
and well compacted. Black top soil and/or gravel should not
be used and soil mixed with tree limbs, stumps or other
debris should also be avoided. As the dam settles and the
wood and other trash rots — as it quickly
will — holes will form in the structure and the only
hole we want in our dam is — possibly — a spillway.
The Pond Spillway
A spillway is a channel over, through or around a dam
designed to carry excess water out of a pond or lake
and — thereby — hold the maximum water level in the
reservoir to a desired level. A properly designed spillway
is just as important as a properly designed dam. Indeed,
many good dams have heels washed out because a contractor
tried to save a few dollar with a “short cut” overflow
system. This is foolish because a spillway is relatively
inexpensive in the first place and quite easy to lay out
and build.
Many spillways are constructed of rocks cemented together
to form a trench through the top of a dam. Some look like
open boxes of treated wooden planks. Such a “box” spillway
has both ends missing to form an inlet and outlet for the
water and may have a vertical slide at the inlet end so
that planks — called slash boards — can
be dropped across the flow through the box to adjust the
pond’s level. Cranberry and rice farmers, who must adjust
water levels to inches, use this slash board arrangement
and their wooden spillways last as long as ten years.
A pipe, eight inches or larger in diameter, also makes a
very satisfactory spillway and probably the most
trouble-free idea is simply to let excess water run around
the ends of the dam in a thin, slow-moving sheet. This
latter arrangement only works when a dam is higher than the
sides of the pond, of course. In some special cases
(usually when it’s built of concrete or stone) the dam
itself becomes the spillway and a gravel bottom immediately
downstream catches the run-over and prevents erosion.
Starting Pond Construction
One of the first questions you’ll ask yourself, after
you’ve picked the site for your pond, will be, “How am I
going to move all that dirt?”
At the very bottom of the do-it-yourself methods is the
hand shovel and wheelbarrow approach. Hundreds of dams have
been built this way and hundreds more will be . . . but
it’s strenuous, time consuming and the finished dam should
be allowed to settle a year before it has to hold back
water.
One alternative to the “Armstrong” idea is an earth moving
scraper pulled behind a farm tractor. If you have or can
borrow the tractor, a second-hand scraper usually can be
obtained at a farm auction or from a machinery dealer. You
can sometimes borrow or rent one also. Horses and mules
have been used to pull these scrapers but an experienced
tractor driver can move a lot more dirt with one in a day’s
time.
The mini-lake will go in much faster and easier, of course,
if you can hire (or get free) a bulldozer or earth mover to
do the job. If you do hire the construction out, however,
insist that the operator be experienced and that he follow
all the accepted rules of good pond design and
construction.
How I Built My First Pond
Half my homestead is tillable and the other half is
forested. At the south edge of the forested half there was
a small opening in the oak and hickory trees. This clearing
was about 100 feet in diameter and appeared to be almost
constantly damp as the result of an underground water
source. I sighted across a hand level to establish a base
line for the edge of the planned pond and staked the area
out. Then I started to dig by hand.
One week and four blisters later — with a grave-sized
excavation to show for my efforts — I decided I had to
find a new way. I wanted a pond 75 feet in diameter and 7
feet deep with sides that sloped like a bowl (to minimize
cave-ins and make the mini-lake easy to seine). At the rate
I was going I would be an old man before I got the pond
dug. I certainly did want that homestead lake — and
soon! — but I knew I couldn’t afford to contract the
construction out to a heavy equipment operator . . . so, by
necessity, I was forced to discover that there are
ways to get an excavating job done for little or no money.
I work for an equipment manufacturer who, at that time, was
developing a tractor-mounted backhoe. The backhoe was in
the working prototype stage and I learned that the engineer
in charge of the project was looking for a place to make
some unobserved tests of the machine. I quickly went to the
engineer and generously offered to allow his backhoe to dig
my pond. He was reluctant at first but I wore down his
objections by promising to grease the machine and chase
away any of my distant neighbors that showed up. Finally,
the engineer agreed.
The next morning, before I left for work, the machine
roared into my yard. I showed the operator the staked-out
lake, told him what I wanted and left. When I returned that
night, the entire pond — a big yellow bowl with
mountains of dirt piled, around the edge — was dug. I
bought fuel for the tractor and greased it. The following
day the operator came back and spread the mounds of dirt in
a gentle slope around my new lake. He was gone before I got
home. My fish pond was dug. Total cost — including a
box of cigars for the operator — was $9.45.
To keep the pond from washing I then seeded the edges down
with a mixture of grass that the local garden store
recommended. I kept the seeded earth moist for a few days
and it soon turned a beautiful green, completely healing
the fresh scars. The pond, situated near the bottom of a
gentle slope, filled rapidly with subsurface drainage and I
was ready for fish.
The excavation of my first homestead lake may seem like a
lucky one-of-a-kind deal but there are dozens of companies
which manufacture earth moving machinery and they have
thousands of employees. I’m sure that many other folks
would be able to get work done this way if they tried. And
if you don’t happen to work for such a firm? Well, if you
don’t work for a heavy equipment manufacturer there’s at
least one other way to get a fish pond dug “for free.” I
know, because I used the method to build my second pond.
Building My Second Pond
After I had my first pond dug I decided I needed and could
utilize a second, bigger homestead lake. The engineer’s
answer was “No” this time but he told me that the heavy
equipment dealer in our area would rent machinery to anyone
who was qualified to use it. I visited the dealer and found
that his rate was fifteen dollars an hour for the machine I
needed. Not so bad . . . but I couldn’t operate the
monster. All the estimates I got from contractors were way
beyond my budget so I forgot about pond number two for a
year.
Then, with the other projects around my homestead pretty
well caught up, I decided to give the second pond another
try. I had already selected the site (downslope from pond
number one) and staked it out.
This mini-lake was to be 60 feet wide and 100 feet long. It
would average about seven feet deep with the overflow
running around the banks on the original earth. The
potential pond was located in a clearing (in fact, it was
part of our 1 1/2 acre garden) and again I wondered, “How
am I going to get all that dirt out of there?” About then I
fell in with a cheery fellow who shared my hobby of raising
gamebirds and, suddenly, my problem was solved when my new
friend introduced me to the “demonstration” method of
getting a pond dug.
My new acquaintance, his dad and brother were in the
excavating business and the very same heavy equipment
dealer I had contacted was trying to sell the family a
front end loading earth mover. The dealer had agreed to
lend the contractors a demonstrator and operator. The
operator would spend a day or so showing the family how to
run the loader after which my friend, his brother and
father would test the machine.
Guess where the demonstration took place? That’s right: my
place. More specifically, on the site of my number two
pond.
We thought, in advance, that the dealer would let my
friend’s family use the loader for only a day or so and the
contractors agreed to turn the machine over to me as soon
as they had found out what they wanted to know about it.
Since I knew nothing about operating heavy equipment I
decided to learn all I could in the week we had before the
loader was delivered.
I went to the library where I found a copy of How To
Operate Heavy Equipment by H. L. Nichols,
Jr., printed by North Castle Books, Greenwich, Connecticut.
I read and re-read this excellent manual until I had the
principles firmly in mind then I pored over another book by
the same author — Modern Techniques Of
Excavation; printed by Colonial Press, Inc., Clinton,
Massachusetts — until I thought I knew exactly what I
would do when the loader arrived.
Finally the machine was here . . . and the deal turned out
even better than I had expected. The dealer’s operator
stayed with the loader for two days. This almost took care
of excavating the pond right there. My friend finished the
digging in about two hours the third morning and then I
climbed on and used my “book larnin” to level the piles of
earth around the new little lake.
The second pond was done. It had cost me 25¢ for soft
drinks.
Other Low-Cost Excavation Pond Methods
There are still other ways to get a pond constructed for
very little out-of-pocket cash. If yours is to be located
at least one-half mile from human habitation, blasting is a
very reasonable way to remove the dirt. It’s not necessary
to pay for dynamite to move all that earth either, although
dynamite will be used to trigger the blast.
The main explosive element is ammonium nitrate saturated
with fuel oil. This is the same ammonium nitrate farmers
use for fertilizer and the fuel oil is the number two grade
available at any service station. A good-sized pond can be
blasted for less than ten dollars with this method. Before
you try it, however, you should obtain a copy of the
booklet, Blasting Potholes For Wildlife from the Wisconsin Department of Natural Resources, Box 450, Madison, Wisconsin 53701.
Many states have cooperative programs whereby they will
share or absorb the cost of digging a fish pond.
Information on this can be obtained from your county agent
or local conservation agent. Most of these programs are in
cooperation with the U.S. Department of the Interior.
Fill the Pond Full and Keep it Full
After you have — by hook or crook — managed to get
your pond excavated, your next consideration will be to get
enough water to fill and keep it filled. Of course, the
spring owner or pond owner with five acres or so of
drainage for each six cubic feet of water will not have to
concern himself with a water supply.
Right here would be a good time to mention that if your
only possible homestead lake location is, say, below a bare
hillside where much silt and dirt will wash into the body
of water, you will do well to build a double pond. The
first pond will trap the dirty mixture and let the silt
settle out before the water runs into the second pond where
you’ll have your fish.
If your pond is located on level ground then you may have
to use a well for a water supply. I use my house well which
will supply the house and permit me to pump 850 gallons of
water per hour to my fish ponds without affecting the
well’s level. Well drillers have told me that this is a
good — but by no means exceptional — flow. Many
wells will supply this much water.
I have my fish pond pump circuit independent of the
submersible pump circuit for the house water. The entire
jet pump, jet, 100 feet of hose and a large tile for a pump
house cost me less than $150.00. I installed the “pond
pump” by first dropping a weighted line down the well
casing to find out how far down the water level was (25
feet).
I next went to a local water pump dealer and purchased a
used jet pump. Then I built a pumphouse from 40-inch tile
that I bought from a tile manufacturer.
I dug down around the well casing and set the tile
vertically below the surface of the ground. Complete with a
cement floor and a block to mount the pump on, this became
a useful and easily made pumphouse. I covered the top of
this house with a wishing well that doubles as a bird
feeder in winter.
All that remained then was to purchase plastic pipe to
connect the jet to the pump. I made the pipe 32 feet long
to sink the jet five feet into the water inside the casing.
The outlet froth the pump was connected with 3/4-inch
plastic pipe to a waterfall at the first pond 100 feet
away.
It was necessary to bury the pipe about three feet in the
ground to keep the water cool while it traveled to the
pond. Burying also keeps the line out of the way and out of
sight. I drain the line in winter when there is no problem
with evaporation or the water getting too warm for my
trout.
I wired the pump through a 20 ampere fuse, primed the jet
and started it up. Altogether I have 1/5 surface acre of
ponds and the outlet from the trout pond is a 6-inch clay
tile to the bass pond. I easily keep the water in the first
fish pond below 70 degrees in summer with this pump and the
overflow maintains the water level in the second tiny lake.
Two other ways I have seen for keeping ponds full are: (1)
connecting the eave troughs from three large buildings into
a pipe that runs into the pond, (2) digging drain tile in
like spokes of a wheel that radiate out from a pond so that
the tiles catch and direct most of the local drainage into
the lake. This works very well if the pond will hold a
considerable surplus of water for the dry season.
Any pond in any location should stay full through use of
one or more of the above methods. All that remains then is
to stock it with fish.
Stocking the Pond With Fish
Getting fish is simple if you have a large pond. Just
contact your county agent and he’ll make arrangements for
the Department of Interior, in cooperation with your local
conservation department, to deliver fish to you. This
service is free but the fish have to be ordered before May
1st.
If — like mine — your ponds are small, then getting
fish is more complicated. In my state, you cannot legally
buy fish and stock them in a small pond without a license.
After consulting with personnel from the fisheries division
of the Wisconsin Department of Natural Resources, however,
I learned two almost unknown but very important points of
the law.
Trout can legally be bought from a licensed hatchery and
stocked without a license and other fish can be bought from
hatcheries or caught from public waters for restocking if
you possess a class C hatchery license. A class C license
costs $5.00. Many states have no regulations against
restocking native fish so it may be possible for you to get
your brood stock by fishing public waters.
Trout, channel catfish and some other fish will not
reproduce in many ponds so it is mandatory to have a source
of supply for them. I buy my trout from Rushing Waters
Trout Farm at Palmyra, Wisconsin and my bass and bluegills
are good native Wisconsin stock.
Trout must have water that contains plenty of oxygen and is
kept below 70 degrees. The rainbow trout I’ve raised feed
and gain best with water temperature kept between 65 and 70
degrees. I avoid crowding the rainbows and raise only 100
at a time in my 75 foot diameter pond although I could
raise many more trout by installing a system to aerate or
churn the water. I artificially feed the trout a little but
they don’t eat much: they seem able to forage most of their
food.
I have upwards of 100 adult largemouth bass in my other
pond and hundreds of bluegills. I cleaned out the bluegills
last fall and now — as I write this in August — I
have an estimated 500 “eatin’ size” bluegills to catch
again this year. The bass have spawned also so I’ll take
out some of the larger adults.
It’s very easy to get so many fish in a pond that they all
stop growing and I feed the fish in the bass pond the same
feed that the trout get: a product called Trout Chow sold
in floating pellet form by a large farm feed company. It is
very gratifying to see the bluegills feed and grow like
they do. I suspect more pounds of meat could be raised from
bluegills than from any other fish.
Fisheries personnel have a term for carefully fed and
maintained ponds. They call it “intensive management” as
opposed to minimum management where you just throw in a
certain number of fish, fertilize the water and forget
about it except for catching what you want.
I’ve planted cattails in one pond and wild rice in the
other. Each has done well and I regularly use both cattails
and wild rice for food. Once in awhile a muskrat will come
and forage among these plants and I’m glad to see his raft
like feed beds and to know that I’ve established a place to
his liking.
If the muskrat becomes a nuisance I’ll just string a light
bulb out to the pond and let it burn all night. This will
bother him into leaving. Incidentally, this is a good way to
attract insects for fish food, too. Hang the bulb just over
the water and many insects will fall in to be devoured by
the fish that are also attracted to the light.
Now and again a mink will come for a visit and I’ll see his
cat-like tracks in the mud at the water’s edge . . . and
maybe the uneaten tail of a fish lying nearby. The mink is
such a wild and independent creature that just knowing they
have been by cheers me. If they become too much of a
nuisance I’ll trap them during the fall when their pelts
are prime and worth the skinning.
When winter comes and locks the land the problem of water
evaporation disappears but a thick layer of ice on a small
pond can create another trouble: oxygen starvation. This
develops when the water is isolated from the air and the
oxygen-producing algae is shaded from sunlight for long
periods. The problem is especially acute if snow covers the
ice. In ponds with a high fish population and no incoming
water it will usually be necessary to use one of the
following methods to keep the fish from using up all the
oxygen in the water and dying.
The first idea I tried was churning the water with an
outboard motor about once a week. I set the motor low
enough on its stand so that it could be placed through a
hole in the ice and submerged in the water about a foot.
The action is terrific when you start up the outboard. It
will draw the water up through the hole in the ice like a
pump. I can almost completely erase the ice from my small
pond this way — in about a half hour. It works well but
I usually wind up getting wet before the session is over.
Looking around for an improvement I decided to try a small
electric-motor powered air compressor. I bought a used
compressor for $5.00, attached about 30 feet of hose, cut a
hole in the ice, dropped the hose in and started the
compressor. This works very well. It saturates the water
with oxygen while at the same time circulating the water to
open a hole in the ice. This, of course, brings the water
in contact with the atmosphere where it picks up more
oxygen. I still use this rig and have yet to lose a fish
from oxygen starvation.
A large (the largest) mail order, retail store chain lists a
windmill in its farm catalog that will keep a hole in the
ice open all winter for livestock watering. I can see no
reason why this wouldn’t keep a fish pond aerated also.
When you have your fish pond operating well, don’t overlook
its money-making possibilities.
One good bet is raising bait fishes or minnows. If you
decide to try this a good publication to have is
Raising Bait Fishes, distributed by the Fish and
Wildlife Service, Department of the Interior, Washington,
D.C. 20240. This little booklet contains a lot of good
pond-building information also. Three-inch minnows in my
area right now are selling for $3.00 a pound (wholesale)
and, according to Raising Bait Fishes, 3000 pounds
of minnows can be raised per acre per year.
There’s also a ready market for trout and other fish. In my
area the “pay ponds” charge so much per pound for the fish
that fishermen catch from them. These ponds appear to do
well.
One interesting sideline we have is trading fish to our
neighbors for beef or pork. The neighbors think that
they’re getting the best of the bargain.
A fish pond can enrich life on your homestead in many ways.
Just remember, before you start, to write your state
conservation department for all the pertinent publications
they have. Contact your county agent for further
information and write the Department of Interior, Bureau of
Sport Fisheries and ask for their list of publications.
Read them all, then go talk to as many pond operators as
you can. Read and reread this article and, frankly, I don’t
see how you can go wrong. If I can help just drop me a line
(please include a stamped envelope) in care of MOTHER.


