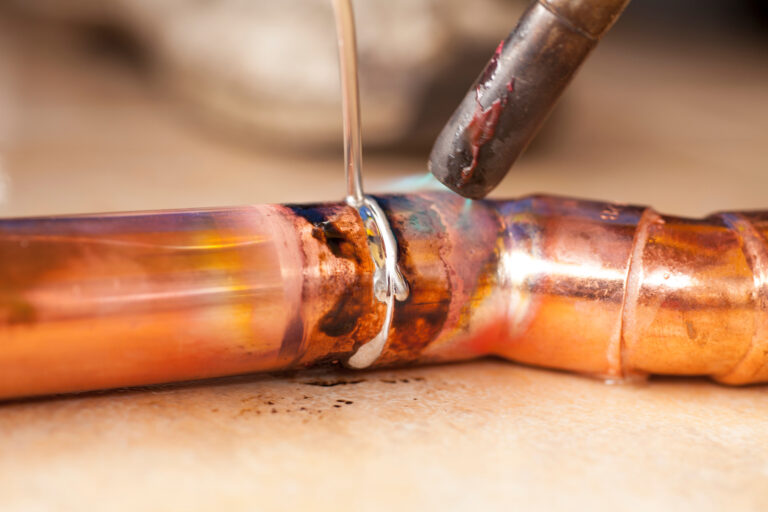
Wondering how to solder copper pipes? If you are going to attempt home plumbing projects, it may come in handy to know how to solder copper pipe with a propane torch.
Plumbing your bathroom with DIY-friendly PEX-AL-PEX water supply lines (see Easier Plumbing with PEX Piping) offers many advantages. While you can buy fittings for making solder-free connections between old copper piping and new PEX, you also can solder transitional fittings to bridge the gap between copper and PEX when replacing drains and toilets. You might even want to stick completely with copper pipes to keep costs down. Regardless of your situation, soldering copper pipes is surprisingly easy to learn.
Soldering (also called “sweating”) is a process that uses molten metal to join copper water supply pipes with a bond that’s strong, permanent and waterproof. Plumber’s solder originally was made of lead, but because lead is now known to be toxic, solder is now mostly made from tin. But regardless of the metal it’s made from, the soldering process involves the same three steps: clean and heat the metal, add solder and then let the joint connection cool and harden.

All good solder joints begin with brightly polished, dry copper pipes, because molten solder flows best into the pores of clean copper. Both the inner and outer sides of every joint — as well as the solder itself — must shine before assembly. Use 120-grit sandpaper or an emery cloth to polish all outside surfaces of plumbing joints, and use a wire brush made specifically for this job to clean inside surfaces. Before you assemble the joints prior to soldering, coat both halves of each joint with flux, a Vaseline-like substance that helps the solder flow and bond to the copper piping.
Now assemble the joint, put on your safety glasses and light a hand-held propane torch. Heat the joint area with the tip of the flame until the copper itself is hot enough to melt the solder when it touches the pipe. It’s vital that the heat of the pipe, not the flame, melts the solder. You know that you’ve completed a well-soldered joint when you can see a silver line of solder flowing on its own all the way around the pipe joint. A solder connection doesn’t require much melted metal, so use a light hand when applying it. If your solder melts and sticks to the pipe in blobs, then the pipe isn’t hot enough. If you want clean-looking joints, wipe the joint with a damp rag to remove excess solder when it’s still molten.
The only thing that might cause you trouble is water inside a pipe. Even a drop or two can keep the pipe from becoming hot enough to melt the solder for a joint. There’s another option if you’re adding piping to an existing network that contains water you can’t drain out. Don’t be afraid to drill a hole an eighth of an inch in diameter at a low spot nearby to let all the water escape. You can easily patch the pipe later with a blob of solder after you’ve completed the joint.

Soldering Tools
Pipe cutter and pipe mini-cutter: For about $30, these tools make cutting copper pipe easy, clean and fast. Use the mini-cutter in places too tight for the full-size tool.
Propane torch: A multipurpose tool that’s economical to operate; ideal for soldering copper water supply pipes.
Emery cloth and cleaning brushes: The perfect pair for cleaning the inside and outside surfaces of copper pipe joints.
Flux and flux brush: Chemically cleans copper for best results. Brush makes flux application neat and easy.
Contributing Editor Steve Maxwell has been helping people renovate, build and maintain their homes for more than two decades. “Canada’s Handiest Man” is an award-winning home improvement authority and woodworking expert.