
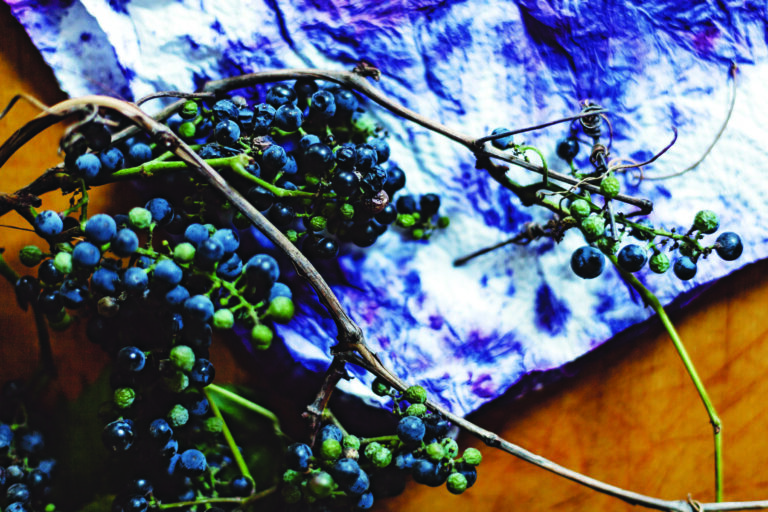
Natural ink isn’t that complicated. You can throw almost any pigment-rich base ingredient into an old pot with vinegar and salt, boil it, and then add a couple of drops of gum arabic binder, and voila! You’ll have ink. Think of ink as any colored water that’s permanent on paper.
No matter which recipe you use, the final amount of ink you make will depend on how long you cook your ink and how much liquid your foraged material contains. However, your goal shouldn’t be a set amount of ink, but rather a color and consistency that feels right to you. If your ink is too thin, keep cooking. If your ink gets too thick, add a bit more water. Ruining an ink is pretty hard, and sometimes an overly faint or thick ink can become a favorite.
Ink-Making 101
These are the materials I recommend every ink-maker have on hand. You won’t need every single one for every recipe, but the more tools you have available, the more techniques you can try.
- Large bowls
- Colorful base ingredient (berries, rocks, charcoal, nuts, roots, or leaves)
- Potato masher
- Mortar and pestle
- Old pot
- White vinegar (cleaning grade, if possible)
- Salt
- Stirring spoon
- Thick white paper, for testing
- Fine-mesh strainer or colander
- Funnel
- Coffee filters
- Gum arabic (found at most art supply stores)
- Wintergreen oil or whole cloves
- Glass container with tight-fitting lid
- Sticker paper, for labels
- Dropper
- Rubber gloves
- Rags
Here are the steps for making your own ink, using whatever materials you wish to experiment with. If you’d prefer to follow a proven recipe, see “Wild Grape Ink” below.

1. Prepare the base color ingredient.
For berries: Using the potato masher, crush 2 cups berries in a large bowl. Add 1/2 cup water. Skip to Step 3.
For rocks, charcoal, or other dry pigments: Using a mortar and pestle, or similar equipment, finely grind 1 cup dry material to dust. Add 2-3/4 cups water and 2 tablespoons gum arabic.
For nuts, roots, or leaves: In an old pot, combine 2 cups water and 1 cup plant material. Any plant materials may be used as is.
2. Intensify the color. In a large, old pot, add the base color ingredient, 2 tablespoons vinegar, and 1 tablespoon salt.
Heat to just below boiling, and cook for at least 2 hours, stirring occasionally, until you have an intense ink color. Dip a strip of paper into the colored water to test the intensity. Remove from heat and allow to cool.

3. Filter the ink. Place a colander over a clean, large bowl, and filter out the large plant matter pieces, allowing the bowl to catch the colored liquid. To filter further, place the small end of a funnel into the mouth of a glass container, and fit a coffee filter into the funnel. Slowly pour your strained liquid through the funnel; the coffee filter should remove small particles, creating a cleaner ink. This step is particularly important if you plan to use the ink in a pen. To keep a pen writing smoothly, you’ll need to use less binder (which can gum up the nib) and filter out any little grains of plant matter. On the other hand, for painters, some texture in the ink may be a positive; you can always refilter it if it seems too grainy.

4. Add the binder. After your ink has reached the desired color, add gum arabic as a binder. For each 2-ounce bottle of ink, I usually use 10 drops of gum arabic. If you’re using a dry pigment as a base, you’ll need to use more binder (usually 1 teaspoon per 2-ounce bottle). If you plan to use your ink for a pen, try to limit yourself to just a few drops of gum arabic for each small bottle. Add a whole clove or a few drops of wintergreen oil to each bottle to keep the ink from molding.

5. Bottle it. Any small glass jar or bottle with a tight-fitting lid can work for storing the ink. If you want to get fancy, you can buy empty antique ink bottles online, or save small glass jars and bottles from your kitchen. You can also buy empty 1-ounce bottles in bulk. Your ink will last longer if you sterilize the bottle first (see “Sterilize Your Materials,” below).
Label the ink with a list of ingredients, as well as the time and location of the ingredient harvest, if using plant matter. You can also create a name for your specific ink, which gives it more personal meaning. Labels act as a reference for later ink experiment comparisons.

6. Test it. Add a few drops of the ink to a piece of paper. A single drop of natural ink on paper will develop many subtleties as it dries, often intensifying and darkening toward the edges as it evaporates. Another level of variation emerges as you test the ink using various tools: Ink droppers, pens, nibs, brushes, and even sticks or feathers will change the effect of the ink — as will different paper stocks.
Clean up. While natural ink tends to stain less intensely than chemically produced ink, the process of ink-making can stain clothes, countertops, and wooden spoons, so having rags, soap, and paper towels nearby will help keep you and the non-ink-making members of your household on friendly terms.

Wild Grape Ink
A handful of wild grape species exist in North America, the most common being the fox grape (Vitis labrusca). Smaller than cultivated grapes, they tend to be sour, and often grow high in trees on vines that are recognizable by their rough bark. Make sure you have a close look at photographs of fox grapes before foraging, as some look-alikes are poisonous and not good for ink. Fox grapes grow in abundance in hedgerows, roadsides, and untended lots — even in cities. They grow in almost every part of the world. In late fall, when they’re most plentiful, a stand of wild grapes can often be indicated by cheerful birdsong.
Wild grape, without any additives, makes a rich-purple ink. It also has a strong enough dye effect on its own that this recipe doesn’t require a binder. You can control the thickness of the ink by how much water you initially add, as well as by how much you allow to evaporate away while it’s cooking. Because of the sugars present in wild grape juice, store the ink in the refrigerator to keep it from fermenting. Yield: 2 cups.

Tools and Materials
- Large, old pot
- 4 cups wild grapes
- Potato masher
- Fine-mesh strainer
- Large bowl
- Coffee filter
- Funnel
- Wintergreen oil or a whole clove
- Glass container with tight-fitting lid

Note: I like to collect a big potful of wild grapes when they’re at their juiciest, from mid- to late fall. Some people find that grape sap and juice irritates their skin, and after an hour of picking, your hands will definitely be stained purple. If either of these things worries you, be sure to wear gloves.
- In the pot, combine the grapes with 1 cup water. Heat to just below boiling. Cook for 10 minutes, or until the liquid begins to thicken, occasionally crushing the grapes with a potato masher.
- Pour the cooked grapes and juice through a fine-mesh strainer with a bowl underneath to collect the liquid. Discard any solids. A further round of filtering the liquid through a coffee filter should give you a smooth and clean ink that’s easy to use.
- Add a few drops of wintergreen oil or a whole clove to prevent molding. Pour the ink into a glass container with a tight-fitting lid. Keep refrigerated.

Purple Sources
Other ingredients to make purple ink include:
- Lichens
- Purple cabbage
- Mulberries
- Blueberries
- Black beans
- Red onion skins
Jason Logan is a designer and artist. He’s also the founder of The Toronto Ink Company, which specializes in making eco-friendly inks from street-harvested pigments. This is an excerpt from his book Make Ink: A Forager’s Guide to Natural Inkmaking (Abrams Books).






