Finished bag made from a tanned raccoon fur
Photo by Fala Burnette, Wolf Branch Homestead
For nearly 7 years, my husband and I have enjoyed tanning hides and furs in our spare time, responsibly putting part of a harvested animal to good use. I often encourage those who are thinking about small predator management, such as the trap and dispatch of a nuisance raccoon who may be lurking near a chicken coop, to learn about tanning and not let the hide go to waste. The question remains of what to do with the finished hide, and it opens the door for many interesting craft projects.
Raccoon furs are often turned into the old fashioned mountain man/pioneer style caps, but what else could be done with them? We tried using a bottled tanning formula last year for a raccoon hide, and decided to make a small carrying bag for the woods from it.
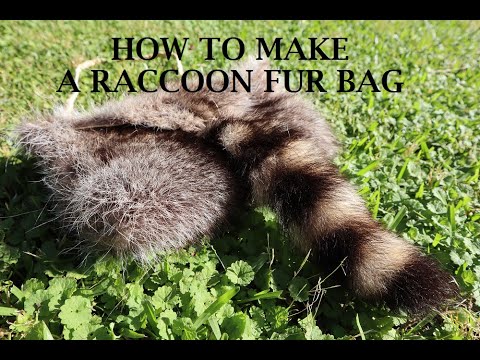
The accompanying video is a look at how we approached making our bag; I wanted the tail to remain on, so I folded the hide almost in half, and draped the tail over as a way to close the bag by tying a piece of lace around the tail to hold it in place. The item requirements included: one raccoon fur, lace/strap material (I used some previously tanned deer hide leather, braided), a pencil, scissors, a small utility knife, artificial sinew, sewing needle, awl, and a hammer. Because of the tools used, younger folks need to ask for an adult’s help in making this project. Please use caution when handling tools.
I started by folding the bag as I wanted it to look, making pencil marks where I needed to trim off the excess hide. It is important when using the utility knife to carefully cut from the underside (“flesh” side that is tanned) and not use scissors or cut from the outside. This helps to preserve the length of the fur, which helps cover your edges. I then turned it inside out, lining up the edges and carefully using the hammer and awl to make matching holes through the fur. Once the sides were sewn together, it was time to turn the bag right side out again.
I made two small holes at the front, using a small piece of tanned deer lace (we used a scrap piece of buckskin and turned it into even lace strips) to feed through from the inside that would tie around the tail and hold the flap of the bag closed. I then took three long strands of the same lace and braided it together to make my strap. I made two larger holes at the top of the back side of the bag, feeding the laces through and tying a knot to hold them in place.
Other ideas for this include making a smaller bag with a belt loop instead of a braided strap or sewing a liner to the inside (flesh side), so that your bag has a nice clean interior instead of directly putting items into the tanned area. Take your bag with you on a nice walk in the woods, carrying inside your emergency fire starting supplies, or carry a book with you for a nice relaxing read in nature. Consider learning about tanning, and put your next raccoon fur to good use by turning it into a little bag just like this!
Be sure to let us know how the project turns out for you, and how you’ve made the bag all your own!
Fala Burnette is a homesteader with her husband at Wolf Branch Homestead in Alabama. They are currently building their own log cabin and milling their own lumber, along with raising heirloom crops in the Spring and tanning furs during the Winter. Read all of Fala’s MOTHER EARTH NEWS posts here.
All MOTHER EARTH NEWS community bloggers have agreed to follow our Blogging Guidelines, and they are responsible for the accuracy of their posts.