
Discover new ways to maximize your garden space in Building Projects for Backyard Farmers and Home Gardeners (Fox Chapel Publishing, 2012) by Chris Gleason. Plans for trellises, raised beds and planters are included, as well as interviews with enterprising urban homesteaders for further inspiration. Learn how to build a potato planter with this design from “Vertical Integration,” a section that discusses ways to grow plants on minimal square footage.
Super-Efficient Way to Plant and Harvest Spuds
I had never tried growing potatoes, but when I heard about the potato box concept, I knew I had to give it a try. Some of the sources I found claim that by growing potatoes in containers more than 100 pounds (45 kg) of potatoes can be produced in a compact 2 x 2 foot (61 x 61cm) area, so this method provides one of the most efficient gardening setups that I know about. The rule of thumb is 1 pound (.5 kg) of seed potatoes can yield 100 pounds (45 kg) of potatoes at harvest time. If you’re trying to produce even more than that, this concept will scale quite easily: a 4, 6, or even 8 foot (122, 183, or 244cm) potato bin could be built to multiply the bounty.
The technique is essentially a way to grow potatoes vertically, but not through the use of trellises, as is the case with many other plants. Instead, you simply build a box around a cluster of potato plants and, as they grow, cover them with mulch and straw. This forces the plants to grow ever higher, and they’ll continue to set potatoes in the “underground” portion below the exposed foliage. You’ll want to make sure to keep some of the leaves exposed–they do need to conduct photosynthesis, after all.
This potato box features modular sides that are screwed on as the plants grow taller, thus providing more space for your potato crop to develop. The slats don’t have to be snug to each other, as the box itself can be filled in with straw and mulch–the main roots of the plants are established deeply in the ground, so the material you’re using to fill in the bin as the plants grow functions more as a cover for the plants than as a nutritional medium. You’ll want to prepare the ground below the planter, however, as that is the soil where the plants will establish themselves and draw nutrients from. Later in the season, you can remove the sides lower down on the box and steal some potatoes while the plants continue to grow, or you can just remove the screws and easily dig through the filler. Growing potatoes in containers has the advantage of not requiring a pitchfork be thrust into the ground, which often results in damaged potatoes.
While you can use ordinary potatoes from the grocery store that have begun to sprout, it is recommended that you plant seed potatoes that are known to be disease-free. Any good garden store should have them, and I paid less than $1.50 for a whole bunch. And since I used a couple of free shipping pallets to build the potato planter, this project was among the most economical that I’ve ever built, too.
Potato Planter Materials List
| Item | Materials | Dimensions | Quantity |
| Posts | 2x2in (3.8×3.8cm) | 48in (122cm) | 4 |
| Side strips | 3 1/2 to 4 1/2in (9 to 11.5cm)-wide boards, 5/8in (1.6cm) thick | 36in (91.5cm) | 32 |
| Screws | |||
How to Build the Potato Planter
1. Gather your materials. The humble pallet has many things to offer to a resourceful farmer. Its main advantage is probably its price: I don’t mind having to do a little work to strip away the useful lumber when it costs nothing. If you’d rather use standard lumber or other scraps you have on hand, go right ahead — this project isn’t too picky. I will continue to give tips for those of you utilizing pallets, though.
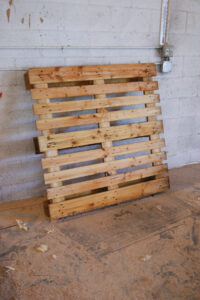
2. Prepare the wood. Pulling out every single nail, in my experience, is not usually worth the time and effort. It takes a long time, and it offers very little extra material, so I generally focus on the center sections, which have a lot fewer nails. A reciprocating saw, jigsaw, or circular saw can be used to quickly remove the nail-infested end portions of the pallet. This method leaves a number of fairly long (almost 36in [91.5cm]) strips of lumber from the center of the pallet.

3. Free the boards. To separate the strips from the center support, I don’t try to pull the nails — I’ve found that it is faster to remove the strips by twisting them. An angle grinder quickly cuts away any nails that remain, and a reciprocating saw does a great job of powering through any stubborn fasteners.


4. Rejoice in your pile of free lumber. This is the stack of lumber that I scavenged from two pallets. The boards are of varying widths, but they were uniform in length, and were free from splits, cracks, or other defects that would have limited their future uses.

5. Attach the first slat. The potato planter is very easy to build — I took four pieces of 2x2in lumber that I scavenged from the pallet’s thicker support pieces and used them as vertical corner posts. Screwing the first strips to the posts was easiest when I set the posts down flat on the bench. It was much easier to ensure proper alignment between the parts. Assemble the planter someplace flat so that the assembly goes together straight and square. This will become important later on when you try to add the extra side pieces — if the frame is out of square, the boards won’t fit!

6. Build two sides. I built two sides like this one. I used two strips at the bottom to keep the assembly rigid, and one at the top to keep the posts from splaying out irregularly. I also used a tape measure to verify that the diagonal measurements were equal — this indicated that the side panel was square.

7. Assemble the frame. I then attached a couple of strips to one of the side panels, and I finished by screwing the other side into place. The completed potato box is lightweight and easy to move around, so it doesn’t have to be built on site if that isn’t convenient.

8. Set up the potato planter.Take the planter frame to where you want to grow your potatoes. Make sure that the placement of the bin allows access to all sides — I was tempted to push ours up against the fence, as an automatic reflex geared toward saving space in the yard, but you’ll need enough room to screw the extra side pieces on as the potatoes grow, so bear this in mind when you situate yours. Dig up the soil a bit so you can sit the frame relatively flat on the ground. Plant the seed potatoes. My daughter, Abigail, at age three is already an avid gardener, and she couldn’t resist hopping inside and doing some digging.

9. Add slats as needed. A few weeks in, the plants were well established and growing like crazy. After six weeks, I had added a number of tiers to the box so it was almost waist height. When the plants grow above the current highest slat, screw on the next level and fill up to that point with straw or mulch. Be sure to keep some leaves showing!

More About Growing Potatoes:
• How to Grow Organic Potatoes: No. 1 Potato Expert Shares His Best Tips
• When and How to Plant Potatoes
• All About Growing Potatoes: Early, Midseason and Late Varieties
• All About Growing Sweet Potatoes

Reprinted with permission from Building Projects for Backyard Farmers and Home Gardeners by Chris Gleason and published by Fox Chapel Publishing.


