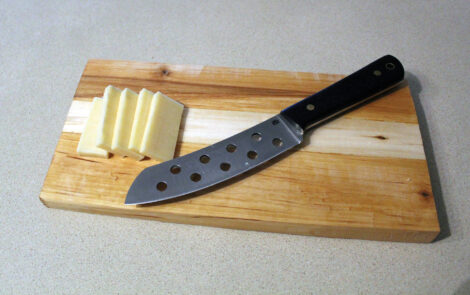
Honor your land by learning how to make a cutting board from wood using green, raw wood to create unique utensils for your home.
Two years ago, my wife and I bought a piece of property in northwest New Hampshire, a land of hemlock, spruce, birch, trillium, and ferns. I walked the property, paying attention to the forest that surrounded me. I knew I’d have to destroy part of it to build my new home, and the thought saddened me. I sat in a grove of old hemlocks and sought guidance from the forest spirits, burning sage and offering tobacco. The message I received was that I was allowed to build my home, but in exchange, I needed to use as much of what I took as I could, and with humble respect.
To honor this agreement, I decided to use the hardwoods to make spoons, rolling pins, cutting boards, and other items, using strictly “old-school” hand tools to complete these projects. I wanted the finished products to contain both my spirit and the spirit of the forest. I also didn’t want to wait one year or more for the felled logs to season, or haul them to be kiln-dried – so I decided to work with them “green.”
Working with Green Wood
“Green wood” refers to wood from freshly cut trees, which still contains a lot of water. The moisture content of green wood, which compares the weight of the water in the wood to the weight of the wood itself, can range from 30 to well over 100 percent.
I prefer to use green wood when I do hand projects. It’s easier to manipulate, the bark can be removed with any knife (I like to use a drawknife), and cuts go a lot easier, especially when using a handsaw. Lastly, the wood feels alive. Woodworkers often report a piece of wood “telling” them what it wants to become. A raw piece of wood in my hands is a life given to me that I feel compelled to treat with respect.
Our land features mainly small birch, about 4 inches or less in diameter, so that’s what I used for this project, along with a small piece of elm. The trees had already been cut to make room for my future house. You’d never cut a living tree just to make a cutting board. If you want to try this project yourself, look for a source of scrap wood, such as wood that’s been taken down by your neighbors. You won’t need a great deal, and I’m sure they’d be happy to let you have it.
While pine is good for many things, stay away from green pine for items to be used in your kitchen. Pine, spruce, and other softwoods won’t stand up to heavy use. They also emit sap for a long time that isn’t pleasant in your food. Additionally, some woods aren’t safe to work with or use, including oleander, yew, and sassafras. Seek out good options local to you. I recommend sticking to hardwoods, such as birch, maple, hickory, ash, walnut, and oak.
Tools and Materials
- Green hardwood logs
- Drawknife
- Handsaw
- Hand plane
- Wood glue
- Clamps
- Sandpaper
- Oil of choice and a cloth to rub it in
How to Make a Cutting Board from Wood
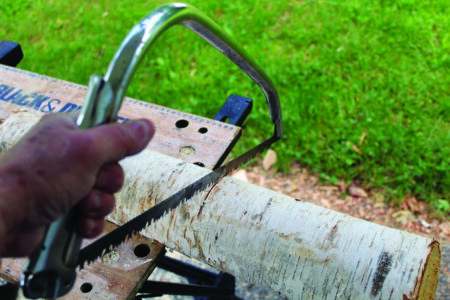
1 Cut to size. An entire tree, even a small one, is way too much to handle for this project, especially when using hand tools. You’ll need to cut your logs to a manageable length. For a cutting board, between 12 and 18 inches in length is good.
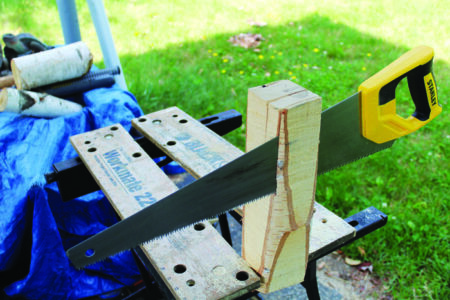
2 Start the rip. After you’ve removed the bark (a drawknife works well for this) and have fairly square edges, rip the boards to your desired thickness. For this project, I wanted roughly 1-inch-thick boards. Ripping any piece of wood means you’re cutting it lengthwise, along the grain. When ripping, you could run into two problems. First, the grain doesn’t run straight and takes the saw in different directions. Be aware of this as you’re cutting. Second, you try to cut straight, “square” boards out of a round piece of stock that’s thicker at one end than the other, which prevents you from achieving a perfect result. Start a little at a time, watching the saw with each pass. You may need to go back a few times until you get what you want. Do this for each side of the log until you achieve a fairly squared piece to work with. You’ll get a little drift when using a handsaw, but this can be cleaned up afterward using a drawknife and a hand plane.
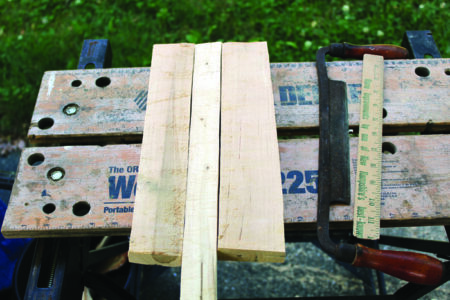
3 Square the edges. I can almost guarantee your edges won’t be square. In order to fit all the pieces together, you’ll need to get the edges as square as possible. Set the boards side by side, and then shave a little at a time using your drawknife or plane.
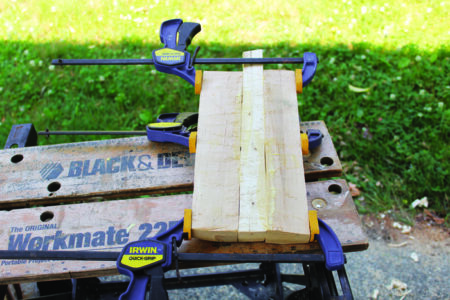
4 Put it together. For this cutting board, I decided to edge glue each piece and clamp it together. Good-quality wood glue will provide great adhesion and is actually stronger than the wood. In theory, this means the wood will give way before the glue lets go. The key is to let the glue dry thoroughly, at least a few hours or overnight.
5 Trim to size. After the glue has set, it’s time to trim the board to size. The size is up to you. I wanted a board to fit into my pack when I head out on trips, so mine is small.
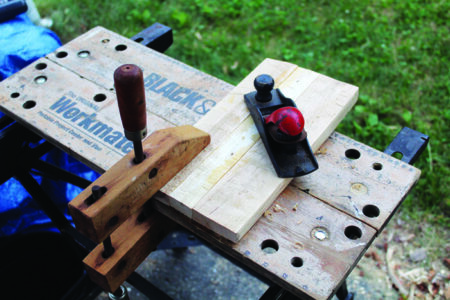
6 Finish. Use your plane and sandpaper to make the cutting board as smooth and level as possible. Then, treat the cutting board with liberal amounts of oil. Choose an oil to finish your board that feels right to you. Food-grade mineral oil is often recommended. Home woodworkers are fond of walnut oil so long as you don’t have nut allergies. I’ve had good success with vegetable oil. The oil will make the wood food-safe and help prevent cracking.
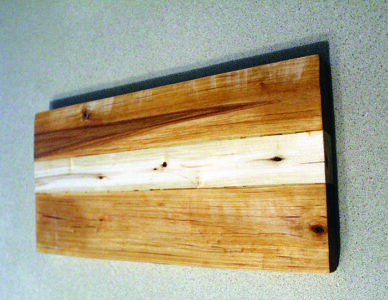
This project should take only a couple of days to complete when you factor in drying time, though it took me much longer. For me, it wasn’t about time but the experience. This project is about connecting to my past and to the environment in a way that shows respect. Altogether, a project like this will mean more than just making a surface for chopping and slicing.
Dana Benner has been writing about the outdoors, sustainability, history, and the environment for over 35 years. His work appears Grit, Mother Earth News, Countryside & Small Stock Journal, and Backwoods Survival Guide.
Originally published in the April/May 2026 issue of MOTHER EARTH NEWS and regularly vetted for accuracy.


