


Installing a freestanding wood stove requires installing chimney pipe to vent the wood stove. This step by step guide will explain the typical chimney pipe and stove pipe installation when venting through a flat ceiling. Every installation varies, so if you have questions about your particular installation we’re glad to help; please contact us with any questions you may have on your wood stove setup.
How to Install a Class A Insulated Chimney Pipe
Below, we will explain in full detail how to install Class A insulated chimney pipe and black stove pipe to vent your wood stove through a flat ceiling. After reading, you will see how simple the installation is and know the basics for how to install your own. We’ve also included an installation video for a visual reference.
1. First, locate the center point where the chimney pipe will penetrate the ceiling. You can mark this with a marker. When using single wall black stove pipe, you must be 18″ away from combustible materials.
2. Once the center point is found, use the ceiling support box to mark the ceiling to make your cut. Trace the outside of the ceiling support box on the ceiling.
3. Following your mark, use a sawzall to cut the opening in the ceiling.
4. The ceiling support box will come with two brackets to mount to the ceiling joists. From the attic, slide the ceiling support box through the opening and attach the support box to the ceiling joists.
5. Now that we have penetrated through the ceiling, we will need to mark the hole to penetrate the roof. By sliding a section of single wall stove pipe through the support box with a level attached to it, you are able to mark where the center-point of the pipe will be on the roof. Running a screw through the roof deck will make it easy to identify from the roof where the center of the pipe will run through.
6. Moving on to the roof, take your adjustable roof flashing and center it around the screw you just put in the roof deck. An easy way to mark the hole is to use the flashing as a stencil and spray painting the inside on the roof shingles where you will make your cut.
7. Once the hole is marked on the roof, use your sawzall and cut the hole through the roof.
8. In order for the flashing to slide underneath the shingles, you must cut the nails on the top half of the circle. Using tin snips, cut the shingles 2″ back on the top half of the circle. This will allow the flashing to slide underneath the shingles.
9. Next, apply a healthy amount of high temperature silicone to the back of the chimney pipe flashing. Slide the adjustable roof flashing under the top half of the roof shingles that you cut.
10. Screw the roof flashing to the roof deck using stainless steel screws. Silicone all of the screw heads and the area where you slid the flashing underneath the shingles, this will create a weather-tight seal.
11. Now it’s time to put together our Rock-Vent Class A insulated chimney pipe. Locate the end of the pipe that has the insulation recessed down. This is the male end of the pipe. To make the transition from Class A insulated chimney pipe to single wall black stove pipe, we will be using the universal pipe adapter. Attach the pipe adapter on the male end of the chimney pipe with the provided hardware.
12. Once you have the universal adapter connected, lower this first section of chimney pipe through the flashing and through the support box. The bottom portion of the universal chimney pipe adapter will come through the support box.
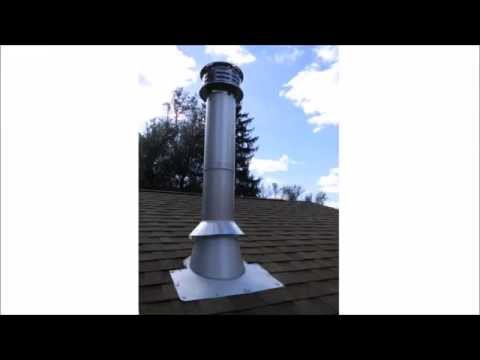
13. While you’re still on the roof, attach the storm collar to the chimney pipe. Be sure to put a bead of silicone around the storm collar where it meets the chimney pipe. This will create a weather-tight seal.
14. The Class A insulated chimney pipe should protrude above the roof at a minimum of 2 feet and it should be 10 feet away from the roof line. Attach the needed lengths of pipe for your installation using the included hardware.
15. Now we will attach the chimney pipe rain cap. Using a 5/16 nut driver, attach the chimney pipe rain cap to the top piece of chimney pipe. The chimney cap will keep water, debris & animals from entering the chimney pipe as well as keeping sparks away from the roof.
16. We are completed on the roof line, let’s go back inside and install the single wall black stove pipe to the insulated chimney pipe. We chose to use a telescoping stove pipe for the first section of pipe since it eliminates cutting the pipe and gives you the perfect length. Attach the female end of the telescoping stove pipe to the male end of the universal pipe adapter with the included hardware.
17. Connect the remaining lengths of pipe needed for your installation and connect to the last section of pipe to the collar on the wood stove. You can use a level to make sure the pipe is straight.
18. To finish the inside pipe installation off nicely, you will want to install the trim collar around the support box. With the provided hardware, anchor it to the ceiling.
19. Congratulations! We have completed our wood stove chimney pipe installation through a flat ceiling!
Here you can find the Rock-Vent Class A insulated chimney pipe and Rock-Vent single wall black stove pipe used in this wood stove installation video. As always, please comment or contact us with any additional questions – we’re here to help you do-it-yourself and save.
Jaquelin White is a Web marketer near Ann Arbor, Michigan. From helping local businesses increase their web presence to working for Rockford Chimney Supply serving the U.S. and Canada, Jaquelin loves the always-changing ways of the web, because there is always something new to learn and try. Read all of Jaquelin’s MOTHER EARTH NEWS posts here.
All MOTHER EARTH NEWS community bloggers have agreed to follow our Blogging Guidelines, and they are responsible for the accuracy of their posts. To learn more about the author of this post, click on their byline link at the top of the page.






)