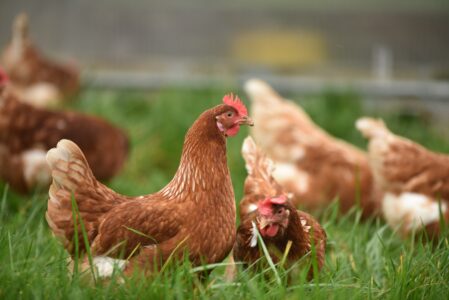
It’s finally spring and time for hatching. We spent the past few months having the flock on a good breeding diet and they have been separated in their breeding groups to ensure the right roosters are in with the right hens. Know that if your hens were previously mixed with other roosters not intended for breeding, you need to wait at least two weeks after you have separated them to know for sure that the rooster they are now housed with now will be the sire of the intended chicks.
As part of our spring activities, our NPIP inspector came to the farm and tested the whole flock for Salmonella Pullorum Typhoid (P-T) and for Avian Influenza. Everyone got brand spanking new numbered leg bands as they all passed the P-T testing. Normally we should get a report on the Avian Influenza findings in a week or two. As mentioned in the previous chapter you need these tests as a breeder wanting to sell or ship stock.
Egg production has been high this year so we’ve really been fussy about the eggs we collect for hatching. When we only had a few birds to work with, we could not afford to be too choosy but now that the flock has grown, we can pass up many more eggs than we were able to before. The eggs should be good sized and not misshapen. Of course anything with cracks will not be kept. The cleaner the eggs, the better. Lots of folks talk about whether or not to wash eggs because it will damage or remove the protective coating of the egg known as the “bloom”. Ideally leave the eggs be if they are clean. In the case of rare breeds if you have only a few eggs to work with, you may have to clean some slightly soiled eggs because that’s all you have to work with. I go the warm soapy water route with cleaning and rarely have bacterial growth issues that affect the hatch. Some other producers go to the length of using Tek-Trol disinfectant for egg sanitizing, especially for eggs that are from outside farms. I produce all my own hatching eggs so I am comfortable without it but, it is a personal preference. In all cases never use cool water because that will cause the pores of the eggs to draw in bacteria and the problems that go with.
You want your hatching eggs as fresh as possible but you can collect eggs up to two weeks of age and still expect a decent hatch if the flock was on a good diet and the eggs were handled and stored properly. For our needs I like to hatch eggs that are 10 days old or less. If I ship eggs, they are no older than one week.
I store my hatching eggs pointy side down in egg cartons which are kept in a dark cool room. The cartons are slightly elevated on one side so that they are resting at an angle. Every day I switch which side of the carton is elevated like the action of an automatic egg turner in an incubator. This elevating of the carton from side to side helps to keep the yolk from sticking to the inner shell of the egg as it might just sitting in the same position for a week or so. Some folks don’t do this side to side rotation of eggs until they are in the incubator but it just happens to be another case of my personal preference for pre-incubation egg care.
I’ve polled a number of breeders about storage temperature and wondered at one point if I should purchase a cooler or refrigerator that can store my eggs at an ideal temp of about 55 degrees. I got loads of opinions but by far the general consensus is that if you are a commercial hatchery then the storage temp will affect your bottom line. So, refrigeration certainly makes more sense for large scale production. In the case of my farm, storage in the coolest room or closet in the house will suffice as it does for most hobby farmers. The big thing is to make sure the temp doesn’t fluctuate much. If the sun was pouring into the room at noon and elevating the ambient temperature by ten degrees or more, then find another room or closet that has a more stable temp throughout the day and night. Basements are great for that if you have one.
We like to have our first hatches at a time when it’s not terribly cold out because we brood the chicks outside in the chicken barn. They have good protection from the elements and predators out there but temperature can be an issue. I figure if there’s a power out and it’s really cold, their chances will not be good if it happens when we are not home or asleep at night. As a result our first batches of chicks for our own use usually hatch around the end of March.
Early spring hatches are advantageous because fertility will be very good when the weather is not too cold or too hot. We see a decline in breeding activity as the weather gets hot so we like to finish up the breeding season around mid-May to the beginning of June here in the Carolinas.
New Large-Batch Brooder
This year we are constructing a new brooder in anticipation for large batches of chicks. Our Crevecoeur project is coming into year four and now that we have larger numbers of hens to work with, we are ramping up the number of chicks and I think we need a bigger brooder. We’ve decided on an elevated hanging brooder about 8 feet long and attached along the length of one of the room walls. This is to optimize the space it takes up in the room and incorporating a wire mesh floor, it will simplify cleaning. The brooder is being painted with a tough oil based paint that will hold up to scrubbing. Non-painted surfaces are covered with white fiberglass FRP sheets like you would find on the walls of a commercial kitchen. They are easy to clean and hold up for a long time. The new brooder should be finished up by the next blog installment so I’ll talk more about it then.
Common-Sense Incubation
Incubation is a fine art but not rocket science. The key to success is keeping good records so you can pinpoint what went wrong if you have a bad hatch. It’s essential to make sure you have the incubator in a room that does not have much temperature fluctuation throughout the day and in a spot that will not be hit by the sun at any time. We use a GQF cabinet model with all the bells and whistles including digital readouts for temperature and humidity and an automatic turner. It makes life easy, especially when I’m on the road a lot and have to depend on others to maintain the unit. The unit has its ups and downs, the biggest one is regulating humidity. Through some tweaking in the form of partially covering the water pan, we are able to manage that a bit better. Normally we have the temp set at 99.5 degrees with a relative humidity of ~45-55% for the first 18 days and then transfer the eggs to the hatcher (another GQF cabinet but it’s a base model with nothing fancy) and finish at 98.5 degrees and ~65-70% for the last three days. During the final weekend before the transfer to the brooder, based on our hatching problems of the past and on the suggestion of a long time breeder, we let the humidity drop to 30-40% to help improve the air cells in the eggs. This technique is what works for us to get about an 80-85% hatch rate. Depending on your particular incubator’s quirks, the room where it is placed, and time of year, there may be slight differences to improve your own hatch. Not all incubators are the same. The point here is to track what’s going on with your eggs so you can refine incubation technique over time and figure out what works best for you.
The last word in this blog on incubation is “necropsy.” In order for you to find out “what went wrong” you need to crack open the unhatched eggs to see how the egg developed and at what stage did it become unviable. It’s not the most palatable thing to do but it can really pinpoint problems that will make or break your hatching success. There’s a really great resource for troubleshooting your hatch, from the University of Illinois.
Hatching can be one of the most rewarding or frustrating experience of your poultry endeavors. Make sure you do all you can to set yourself up for success and if at first you don’t succeed, document and learn from the mistakes and you are certain to improve over time.
All MOTHER EARTH NEWS community bloggers have agreed to follow our Blogging Guidelines, and they are responsible for the accuracy of their posts. To learn more about the author of this post, click on their byline link at the top of the page.


