Jump-start your woodcarving with simple, traditional techniques that beginners can learn to start transforming wood into beautiful works of art. Chris Pye’s Woodcarving Course & Reference Manual (Fox Chapel Publishing, 2012) is a guide to getting started. In the following excerpt, Pye gives instructions for seven cuts that form the basis of the woodworking craft.
You can purchase this book from the MOTHER EARTH NEWS store: Chris Pye’s Woodcarving Course & Reference Manual: A Beginner’s Guide to Traditional Techniques.
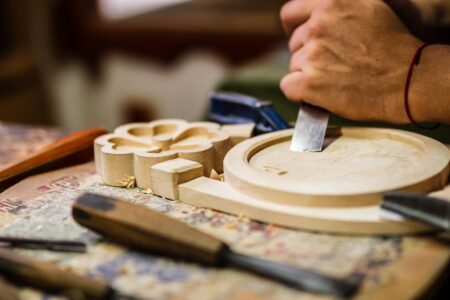
In your hand is a sharp and well-shaped carving tool. You hold it in a safe grip that will let you carve with confidence and facility. Now you want to make things happen — but how exactly? What can you make these tools do? Well, a lot more than most newcomers think!
Here’s a learning-the-guitar analogy: After you have understood tuning (sharpening) and how to hold the guitar (grips), I imagine our guitar teacher would probably have you plucking strings. You would just play around lightly in a relaxed way, getting a sense of how the guitar works and the notes and chords you could make. So, before turning to woodcarving projects — our tunes proper, so to speak — I want to look at what we can call the outcome of the tool, the sort of notes you can play with a gouge.
Gouge Tools Needed
Cuts of the Carver
As a sample of the versatility of traditional carving tools, I’m going start by separating out a few of the cuts carvers make. Of course, you won’t be thinking in separate cuts like this when you are deep into your carving; you’ll just be working with the tool and eventually forgetting about it.
1. Running Cut
How to do it: This is similar to the low-angle grip. One hand at the rear propels the tool and the other, wrapped around the blade, resists. The blade hand rests on the wood for control as you start, stop, and direct the cut at will, swapping hands to reverse direction. The nature of a running cut is that it keeps going; it’s a long stroke.
Try running parallel and equal lines of varying depths with your V-tool; then cut curves to the right and left, swapping hands, and so on. Tilt the V to the left and right and observe. Try with a narrow, deep gouge or U tool.
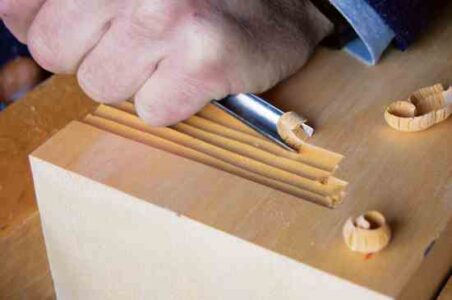
With a deep gouge (#8 or #9) run a long channel across the grain. A single deep channel like this is called a flute.
Place a second channel as similar as possible to the side, then a third, and so on. The surface will look a bit like it’s been plowed.
Application: Running cuts with V- and U-tools have obvious drawing-like applications for veins and hair etc. Lowering the background in this way is a much more efficient approach than simply carving away wood here and there at random.
2. Stabbing Cut
How to do it: Using the high-level grip, put the weight of your shoulder behind the handle. Push the cutting edge of the carving tool straight into the wood and pull it out again.
Try the cut with a medium gouge: straight in and out. If you wobble the handle from side to side you are likely to break off a corner. To release a stuck blade from the wood, ease it out by tilting the handle in a direction along the edge.
Make some surface patterns with a gouge.
Try emphasizing just one corner as you push in. You’ll make a stab cut that starts deep at one end and fades around the curve (sweep) into nothing. You thus have two cuts: to the left and right.

Application: Stab cuts are used decoratively, say in the details of hair and fur, and to give emphasis by adding a harder shadow, such as between lips or at the end of a running line. Use your mallet to stab into particularly hard wood.
With a change in function, the stab cut can become the very important stop cut.
3. Stop Cut
How to do it: When you place a stab cut so as to control the wood grain — to stop them from breaking out — you have a stop cut. You would make a simple stop cut in exactly the same way as the stabbing cut.
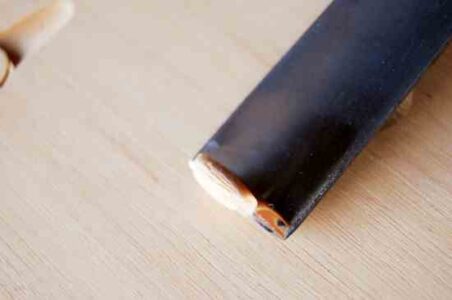
You can see the stop cut in action clearly in a medieval decorative element called a thumbnail (or fingernail): Make a strong vertical stab cut with a deep gouge and mallet at one end of the fingernail — this is the stop cut. Scoop up to this with the same gouge. It’s easiest to work across the grain and you may have to cut the thumbnail itself with a few passes. Try making the scoop cut first. You’ll see the bevel of the tool wedges the wood fibers up and forward and finding a precise place to end the cut is difficult. Thus we place the stop cut first to control this wedging effect.
Repeating these thumbnails side by side will create a simple molding. A challenge would be to make a dozen even and equal ones, side by side.
Application: By its very nature, the stop cut has a job to do, and, having done it, the stop cut disappears; it is subsumed by the cuts that follow. This is what separates the stop cut from the stab cut; the stab cut remains on the surface to make its own effect.
You can also see stop cuts in traditional incised lettering: a heavy stop cut goes in first in the center of part of a letter, controlling the grain; subsequent angle cuts come in from either side to leave the V trench.
We also made stop-type cuts in the last chapter when we finished off the delta-shaped V cuts with a skew chisel. We could have put in the stop cuts first. And a running cut or groove can act as a sort of fire break –functionally a stop cut — to prevent grain splintering.
Woodcarvers will use stop cuts when necessary and without thinking. Don’t hesitate to apply one to your carving when you need to control the grain.
4. Sweep or Rocking Cut
(Note: Remember that the sweep of a gouge is its profile seen end on. In a true gouge, the sweep is a part, an arc, of a circle — unlike U-shaped gouges.)
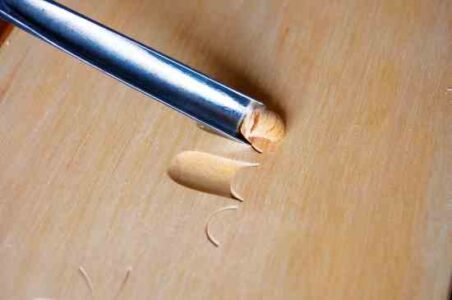
How to do it: The sweep of a gouge is an arc of a circle. Rotate the handle as you push your gouge forward in a short, scooping, running cut. You will be able to feel the edge slicing across the wood as it follows its arc.
You can make a sweep cut with either low or high-angle grip, rotating to the left or the right. Make some sweep cuts with a medium gouge (about #6).
Start and end the sweep cut with the corners clear to avoid tearing the grain. The scooping action of the cut has three parts: the tool enters the wood; you then drop the handle a little and move the edge along as you rotate; you then drop the handle further as you make the exit.
More than anything, this is a feely cut and is done with both hands working together: feel the sweep as you scoop.
Try it with deep gouges too, and rotate the handle both clockwise and counterclockwise.
Rotate the tool along the arc of the sweep but do not wiggle or rock the handle from side to side: this will tear the grain, tend to blunt the cutting edge, and may even result in chipping the metal or losing a corner.
Application: The slicing action eases the tool through the wood and produces a much cleaner cut. The movement is also called a rocking cut, sometimes called “rocking the tool through its cut.” Slicing the tool like this along the edge — in this case making full use of the sweep — is, more than any other, the cut of the carver. Indeed I’d say that if you take out running and stop cuts, all my cuts are sliced in some way.
One form of the sweep cut is the all-important slicing cut that you make with the flattest gouges.
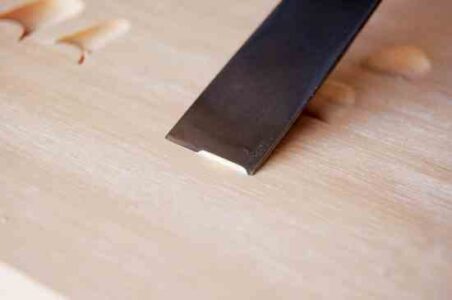
5. Slicing Cut
How to do it: The arc of the circle that forms the sweep of a very flat (#3) gouge is so big that it’s impossible to rotate the gouge meaningfully at the handle: the corners dig in immediately.
So, you have to emphasize the sideways movement as the tool moves forward. Think of paring the surface, drifting the edge across, rather than actually rotating the tool; in fact you are hardly rotating at all.
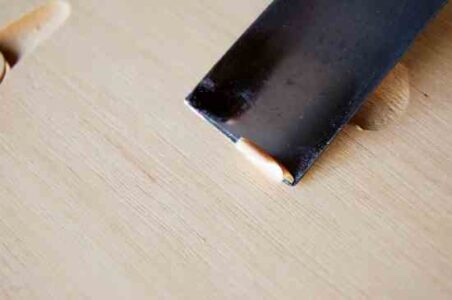
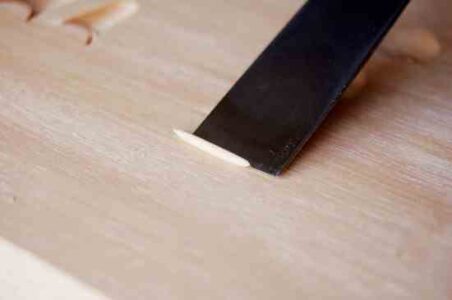
With a #3 gouge in the low-level grip, make very shallow slicing cuts, keeping the corners clear at all times. Work at right angles to the grain — in other words across it — and you’ll find the slice itself will be more or less along the grain.
Slice from left to right and from right to left. Keep the area clean as you go along. It’s tricky at first not to dig the corners in. If you do, immediately go over the torn grain and repair the surface.
Application: This is the cut for flattening and finishing off a surface, from backgrounds to bodies, wherever you choose to finish from the tools rather than sanding. The proviso here is that the closer you can match the sweep to the form, the smoother a surface you will leave; and sometimes, of course, the sweep you need to match the form will not be the flattest.
The same slicing action is also used in cutting the curves of incised letters.
So there, in brief, are some basic cuts. You’ll need them again and again in projects.
Learn more: Read Pye’s guide to the gouge tool, which can be used to create verstile cuts, even by beginners.
This excerpt has been reprinted with permission from Chris Pye’s Woodcarving Course & Reference Manual: A Beginner’s Guide to Traditional Techniques, published by Fox Chapel Publishing, 2012. Buy this book from our store: Woodcarving Course & Reference Manual.


