
In New Ceramic Surface Design (Quarry Books, 2015), Molly Hatch helps you take your ceramic project to the next level with easy ideas for drawing, printing, painting, and stenciling on clay surfaces. Each project is outlined with step-by-step instructions, along with hand-drawn illustrations and inspirational photographs of Hatch’s finished pieces. A faculty member at the Rhode Island School of Design, and an internationally shown ceramics artist, Hatch introduces innovative techniques using a variety of materials.
Rubber Stamping Ceramic Surfaces
I have loved rubber stamps for as long as I can remember, always somehow finding my way to rubber stamp displays at art supply stores. If you are like me, you have a collection of unused rubber stamps that have been waiting for just the right project. The imperfection of the print is charming and the process is so simple–great for the surface of ceramics. I developed this rubber-stamping process when working on a large-scale project that required 500 signed pieces. I needed a quick and easy way to stamp each piece with a number. As a result, I figured out how to make my own ceramic stamp pad using materials I had on hand in my studio.
Tools:
• two synthetic sponges, one damp and one dry
• underglaze
• hake brush
• selection of rubber stamps
• paper
• clear or tinted glaze
Instructions:

1. Use the damp sponge to wipe the bisque ceramic surface clear of any dust. The dry synthetic sponge will be used as a “stamp pad” for this project. To make the sponge “stamp pad,” slowly pour a dollop of underglaze onto the center of the sponge.

2. Using any brush you have on hand, blend the under-glaze dollop into the sponge until it is fully absorbed, creating a ceramic stamp pad. Use this area for “inking” your stamps.

3. Gently “ink” your rubber stamp by pressing it into the surface of the sponge ink pad. With a brand-new stamp that you haven’t used with underglaze before, it may take a few tries to get it properly inked. Test the stamp on paper to see how it works before stamping the surface of your work.

4. Place the “inked” stamp onto the clean bisque surface and remove. You have stamped your ceramic surface!

5. Simply finish with a clear or tinted clear glaze.
Tip: Layer Color Behind the Stamp
If you want to have a more detailed stamp with a layer of color behind it, try inking your stamp with a normal inkpad ink and stamp this on the bisque surface. The image will give you a guide as to where to put color, but because it’s normal ink, it will burn out in the firing process and disappear! Simply paint the color where you’d like it to appear in the stamped image, ink your stamp with your ceramic stamp pad, and place the stamp over the color, taking care to register the image as closely as possible.
For more easy ceramic design techniques check out:
• Creating Ceramic Designs Using Tape
• Using Stickers to Create Ceramic Designs
• Doodle Your Own Ceramic Designs
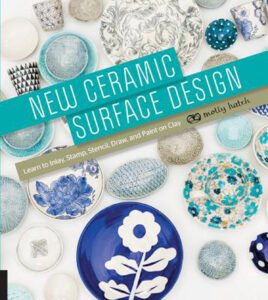
Reprinted with permission from New Ceramic Surface Design: Learn to Inlay, Stamp, Stencil, Draw, and Paint on Clay by Molly Hatch and published by Quarry Books, 2015.


