Learn how to make a gate with wire fencing using basic welding skills for a low-cost gate you can scrap together in less than a day.
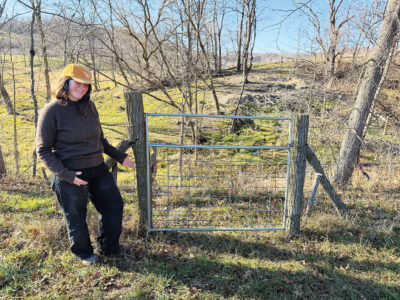
When fencing the pasture on our farm, we faced a choice when it came to installing a gate: buy or build. Adding the gate was necessary to allow us direct access to our woods beyond the pasture. Buying a suitable store-bought gate would cost at least $120, and going to get it would take an hour from our day. Making a gate, we figured, would take us about two hours and require no out-of-pocket costs since we had the materials on hand. We decided to build our own and are happy to share the results.
Gather Supplies
We like to find the materials before making any design decisions, so the materials can inform the design from the start. For this project, we used a bent hog panel that had lived out its intended purpose on the farm; a new one would cost about $30. We needed about 30 feet of conduit, so we selected several pieces of 1-inch electric metallic tube (EMT) conduit left over from another project. New 1-inch conduit costs about $20 per 10-foot section; enough to build this project would run about $60. Suitable substitutes for conduit include old trampoline frames, other types of metal pipe, and T-posts. Much of the structural strength of the gate comes from the hog panel, so the frame serves to add rigidity to the panel.
Tools and Materials
Design
In our experience, making a gate is easier when the width is narrower than the gate’s height. This way, the gate won’t have as much of its own weight to support.
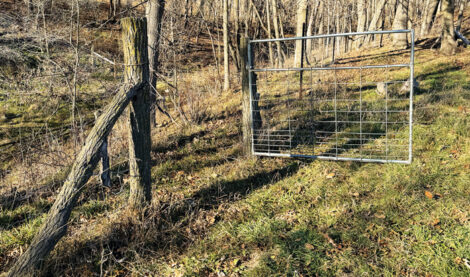
To design our gate, we started by measuring the opening in the fence: 54 inches wide. We could choose any height we wanted, and we picked a height of 48 inches, because that’s how tall the field fence is (and it’s a relatively nice, round number). Our chosen design features three horizontal bars and two vertical bars, which we find makes for a simple construction with robust strength that can stand up against various forces.
We designed the gate to be wide enough that the side without hinges would close against its corresponding post tightly enough that animals wouldn’t push against and damage the latching mechanism over time. We decided to latch this gate with a simple chain and clip.
Fabrication
Welding galvanized metal and other products containing zinc is potentially harmful to your health, so do any welding in a well-ventilated area and use appropriate safety gear rated specifically for toxic metal fumes generated during welding.

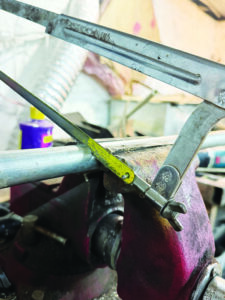
Step 1 First, cut three pieces of 1-inch EMT conduit to the desired width of the gate. Notch the horizontal bars on the ends to fit snugly against the round profile of the vertical bars, taking half an inch off the width of the horizontal bars.
To notch the horizontal pieces, we used a 1-inch hole saw in our Bridgeport milling machine. Alternately, you can use a drill press, a grinder, a file (and some patience), or even several well-placed blows with a hammer to flatten the vertical bars where the horizontal bars intersect.
Step 2 Cut two pieces of EMT conduit to 48 inches to serve as the vertical supports. Because the verticals aren’t notched, you can make these cuts with a hacksaw. You could otherwise use a power saw, a cutoff wheel in a grinder, or a plumbing tube cutter.
Step 3 Arrange the four bars together to form a rectangle, and fix them in place using clamps that’ll hold them at 90-degree angles. While clamps aren’t strictly necessary, they’ll help keep the structure square while you’re welding.
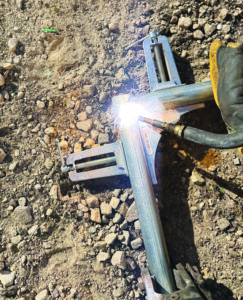
Tack-weld the four conduit sections together, and then weld all four corners securely. Welding thin tubing requires some patience and reduced power compared with welding thicker materials.
Step 4 After you’ve built the main rectangular frame, lay a piece of hog panel over it with the bottom of the panel aligned to the bottom bar of the gate. Weld the panel to the frame at each point where they intersect. The panel should be shorter than your frame at the top.
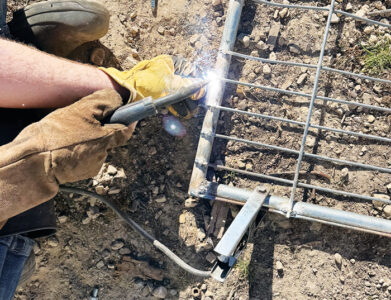
When your panel is securely welded, slide the cross brace into place, aligned with the top of the hog panel, and weld it to the panel and vertical bars.
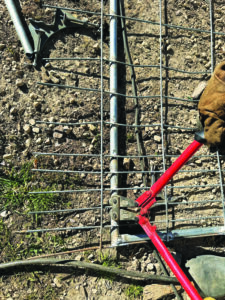
Step 5 Use bolt cutters to trim the width of the hog panel to match the gate, and use the welder to melt down the sharp ends and to further secure the panel to the gate structure.
Step 6 For the gate side of the hinges, weld a small section of steel pipe near the bottom of the hinges’ vertical sides, and make a second, repositionable hinge component that tightens onto the bars of the gate using a clamping bolt. At least one of the hinge components needs to be able to move up and down to allow it to fasten to the installed hinge pins (or you’ll have a gate that can be lifted off the hinges).
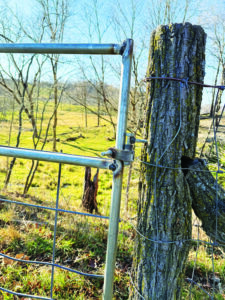
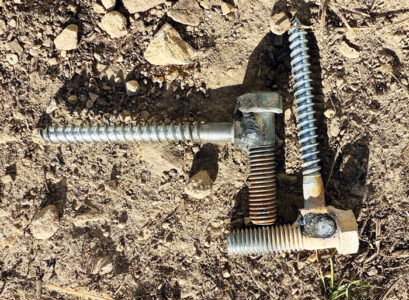
Step 7 For the post side of the hinges, make hinge pins by welding bolts to lag screws. Choose appropriately sturdy hardware for this step.
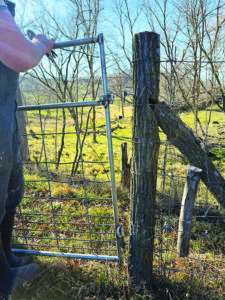
Step 8 Hang the gate by placing it at the height you want, and predrill a hole for the lower hinge. After the lag screw is securely in the post, place the lower hinge onto the hanger and eyeball the location of the top hinge. The alignment won’t have to be perfect. For the top hinge, install the hanger facing down, and place it so you can slide the top hinge up into place and bolt it securely. This will prevent the gate from being lifted off the hinges.
Consider This
- Safety. Are you experienced enough to safely operate the tools used to build your gate? If not, find someone in your community to show you the ropes. YouTube is a great resource for learning new skills. Consider how both you and your animals will interact with the gate, and eliminate sharp burrs or protrusions that could cause injury.
- Durability. Make sure your gate meets your needs and is built to last. Think about what you’re keeping in (or out) with the gate and eliminate large gaps. Consider the forces that may get applied to the gate; in our case, a hearty head butt from a ram in rut. Materials or designs can be strong when operated in one direction but not another; balance these so your gate is strong in any direction it may encounter force, including laterally, because it’ll always need to hold its own weight.
- Decoration. Make your gate as fancy as you want! Last time we made gates, we used our plasma cutter to cut out some ram skulls from sheet metal and welded them onto the panels for a little extra flair. Look for inherently beautiful materials to make something uniquely yours.
Making your own gate is an opportunity you’ll likely have more than once. Some of our old homemade gates are still in use but will be replaced now that we’ve gained skill with practice. If your first gate fails, strengthen the failure point in your next design, or make a repair that’s stronger than the original build. Buy a gate and you’ll have a gate. Build a gate from scrap and you’ll have what it takes to make all the gates you’ll ever need.
Amanda Caldwell is a lover of biology and ecology, blending her passion for agrarian living with conservation work. She enjoys tending to all things, from seedlings to her family. Ben Caldwell is a lifetime tinkerer, inventor, mechanic, self-taught engineer, and rockhound. He can fix any motor, and he enjoys vehicles with two, three, or four wheels.
Originally published in the April/May 2026 issue of MOTHER EARTH NEWS and regularly vetted for accuracy.


