
Always wondered how to make a homemade quill pen and ink? Learn how to make quill ink from beets and a quill pen from a single feather in this comprehensive tutorial.
Quill pens have been used as writing implements for centuries, the number of which isn’t definitively known, though there are accounts of their use as early as the sixth century A.D. Compared with reed pens, quill pens are flexible and responsive to light variations of touch and pressure. They have a gliding action when drawn across paper, creating lines that are smooth, fluid, and flexible. This responsiveness gives you the ability to control the width of a line by varying downward pressure. The harder you push down, the wider the line becomes.
Artists took notice of these favorable properties in the 12th century, when quills became preferred over reeds for drawing as well as writing. This was the case for most of the old masters, even as steel-nib pens became widely available in the 19th century. These days, quill pens get most of their action in the hands of illustrators and cartoonists.
Quill pens are fun to make and even more satisfying to use. They’re crafted from the shafts of primary feathers (the outermost wing feathers) from large birds, such as turkeys, geese, and swans.
Feather is a unique material to work with, and it requires you to spend some time getting acquainted with its distinctive characteristics. You’ll certainly learn of these properties as you gain experience working with feathers as raw materials for your projects. Even so, set aside any damaged or less-than-ideal feathers to practice on. After shredding a few of these into smaller pieces, you’ll be ready to make your first quill pen.
Quill Pen Tutorial
Tools and Materials
- Primary feather from turkey, goose, or other large bird
- Scissors
- Sharp pocketknife or utility knife
- Paper clip
- Small metal bread loaf pan or tall metal can
- Fine sand
- Hot plate or stovetop burner
- Superfine sandpaper
As you’re reading these directions, keep in mind that the “calamus” is the thickest part of the quill, where the feather was originally attached to the bird. The calamus will become the “nib” of your homemade pen, or the part that comes into contact with, and deposits ink on, the paper.
Instructions
Find a feather. The primary wing feathers from large birds are ideal for making quill pens. Keep in mind that migratory birds are protected by federal law, and possession of feathers from many bird species is illegal and can result in a substantial fine, even if you find the feathers on the ground. Exceptions exist for feathers taken from legally hunted game birds, but always check your local regulations first.
Introduce yourself to the hunters in your community; these folks can be great resources for legally sourced feathers. Otherwise, you may be able to find feathers online, or at archery or craft supply stores.
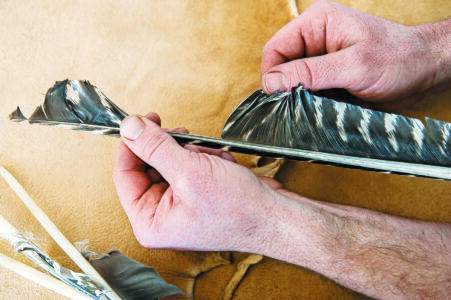
Remove the barbs and trim the length. The quill of the feather is flanked by “barbs,” the technical term for the feathery part. You can leave the barbs on your pen as adornment, but now’s the time to remove them if you don’t like that look. To do so, grip a section of barbs near the top of the feather and pull down, peeling it toward the calamus. Repeat this on the opposite side of the feather. At this point, the feather should be stripped, leaving a naked shaft. Use scissors or a knife to trim the shaft to 8 or 9 inches long by removing a section from the top of the shaft.
Cut the first bevel and remove the pith. With a knife, cut the calamus end of the feather off at an angle, beginning approximately 11⁄4 inches from the end of the shaft, on the underside of the feather’s natural curve, and removing about two-thirds of the underside of the shaft (see photo, above).
Once this cut is made, the hollow interior of the quill shaft will be exposed, revealing a pithy cellular material inside. Remove this pith with a slender tool, such as a modified paper clip. If this material isn’t adequately removed and gets compressed deeper into the quill, it could interfere with ink flow in the finished pen.

Heat-treat the quill. Fill a small bread pan with fine sand. Heat the sand on a hot plate or stovetop burner until it’s too hot to touch for more than a second or two. Turn off the heat, and insert the prepared quill into the hot sand, beveled end first, so it fills with sand on the way in. Keep the quill in the hot sand for 5 minutes or so, or until it turns a slight yellowish color. This will render the quill harder (and more brittle), which will make fine carving easier and create a pen that will require less maintenance when you resharpen the nib later. You can also heat-treat your quill using a tall tin can full of sand that’s been heated in the oven. Be careful, though, because if it gets too hot to touch, your quill will burn and smell terrible.
Next, use superfine sandpaper, your thumbnail, or a dull-edged tool to lightly scrape off any membranous tissue that remains on the outside of the quill shaft.

Square off the end. Use a sharp pocketknife or utility knife to make a cut that’s perpendicular to the length of the quill shaft, on the point of the nib-to-be, leaving a flat end with sharp corner edges.

Split the nib. You’ll need to cut a shallow split (called the “slit”) into the nib to help facilitate ink flow. Place a sharp, thin-bladed knife in the center of the squared-off nib, on the end of the quill. With your thumb on the back of the blade, carefully apply pressure while rocking the blade slightly back and forth, until the slit begins to form. Gradually extend the slit deeper until it’s about 1 inch long.

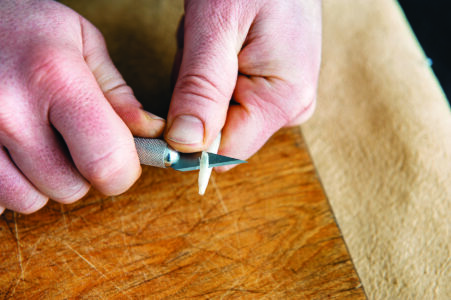
Narrow the tines. The “tines” are the two halves of your nib, created by the slit you cut in the previous step. In this step, you’re going to cut a second bevel on the point of the tines that’s shorter than the first bevel (study the nib in photo, above). With a sharp knife, cut both sides of the nib 3/4 inch from the point to achieve the desired nib width. Strive to keep the tines symmetrical, and maintain the slit as the center line. Make these cuts as clean and deliberate as possible, without leaving jagged or frayed edges.
Note that commercial nibs are available in extra-fine, fine, medium, and broad sizes. Your second bevel will determine nib size and, thus, how bold or delicate your writing will appear.
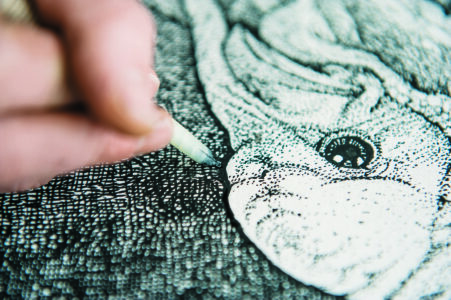
Test your new pen. Open a bottle of ink and try out your new pen! Modify the nib according to the line quality you desire.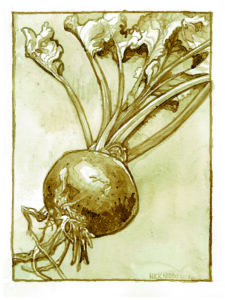
Beet Ink Recipe
Ingredients
- 1 cup chopped raw beets (use 2 cups for a darker ink)
- 1 pint water
- 1 teaspoon vinegar
- 1 teaspoon salt
Beets make a brownish color when they’re boiled at length to make ink. When you cook beets for an extended amount of time, most of their nutrients are leached out, but the resulting product is a joy to work with. This ink is ideal for drawing and washes. Yield: about 1 cup.
Directions
- Place the beets and water in a large stockpot. Boil for 45 minutes or longer.
- Keep boiling until the solution has reduced to the consistency and opaqueness you desire in your homemade ink. The more the solution is reduced, the more opaque the ink will be. Boil it down to about 1 cup, strain out any remaining beet fibers, and then add the vinegar and salt.
- Transfer the ink to a glass jar with a lid, and store it in a cool, dark place.
Nick Neddo teaches at the Roots School in Vermont, where he works with both children and adults on primitive arts, Stone Age skills, wilderness survival, and nature awareness. This is excerpted from his book The Organic Artist (Quarry Books).


