Find root cellar alternatives to store more, waste less, and enjoy fresh garden vegetables for months – without digging a traditional root cellar.
When I built my eco-cabin several years ago, I fully expected to add a traditional root cellar someday. That project is still waiting, but in the meantime, I’ve discovered I don’t actually need one.
Like many homesteaders, I assumed successful winter food storage depended on having one perfect place to keep vegetables. Instead, years of trial and error taught me something different: It’s better not to rely on a single storage method. Just as the old saying warns against putting all of your eggs in one basket, I spread my harvest among four different “baskets.” If one method performs a little worse than another in a particular year, the others make up the difference.
Root Cellar Alternatives
Together, these four storage methods keep fresh vegetables on my table throughout winter and often well into spring. I use these methods in rural Eastern Ontario, Canada, where winters are long and cold. While some approaches are easier to duplicate than others, each can be adapted – whether you live on acreage, in the suburbs, or even in town.

My Refrigerator
The simplest place I store root vegetables is in my refrigerator. I use a 3-cubic-foot, high-efficiency model that runs on either AC (on-grid) or DC (off-grid) electricity. Unlike a conventional refrigerator, it opens from the top like a cooler and has two deep compartments.
Root vegetables stored in ventilated plastic bags keep for months in here. To see just how well this worked, I placed a carrot in the refrigerator on Nov. 16 and didn’t take it out until March 12. It still looked freshly harvested.
Curious why it worked so well, I measured the humidity inside the refrigerator. It averaged about 90 percent – ideal for storing root crops. By comparison, my regular household refrigerator, which I use for overflow storage, averages closer to 50 percent humidity.

You don’t need a specialized refrigerator to try this yourself. Many modern refrigerators have crisper drawers designed to retain humidity. If yours has adjustable controls, set them to the highest humidity setting. If it doesn’t, the drawer is already designed to hold moisture better than the rest of the refrigerator.
Another option is to place root vegetables in a small container filled with damp sand or sawdust and store it on the lowest shelf, where temperatures tend to remain the coldest. Even a second refrigerator in the garage or basement that’s mostly reserved for drinks can become valuable winter storage space for carrots, beets, turnips, and other root crops. My refrigerator was the easiest place to begin, but before long, I found myself looking around the cabin for other naturally cool spaces that might work just as well.
A Cool Place
The next stop in my winter storage experiment turned out to be my utility room. Located on the northeast corner of the cabin, the room stays cool all winter. Right on the concrete floor, temperatures hover around 50 degrees F – cool enough for many vegetables without any special equipment.
The room itself is tiny, just 24 square feet, but it doesn’t take much space to store crops that are naturally good keepers. ‘Waltham’ butternut squash, onions, garlic, and sweet potatoes all thrive there in simple plastic bins set directly on the concrete floor.
I’ve taken my squash storage one step further through seed saving. Each year, I save seeds from the squash that lasts the longest in storage. Over time, that simple practice has gradually selected for squash with even better keeping qualities.
Root vegetables require higher humidity than my utility room provides – it averages only about 50 percent – but potatoes do surprisingly well when packed in damp sawdust inside a cardboard box placed on the cool floor. Even in May, I’m still enjoying squash and sweet potatoes in excellent condition.

Tenting and Trenching
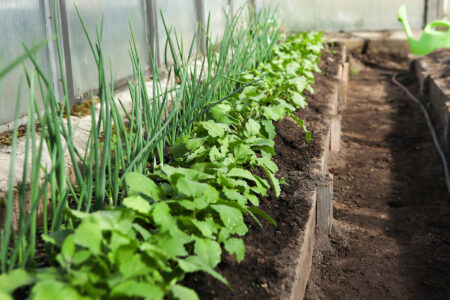
By then, I’d learned that vegetables didn’t always need a carefully controlled environment to store well. That made me wonder: Could some crops simply stay in the garden all winter? The answer, at least for several hardy vegetables, turned out to be yes.
As soon as I planted my first garden on my half-acre, I began experimenting with trenching, following the methods described by Mike and Nancy Bubel in Root Cellaring: Natural Cold Storage of Fruits & Vegetables. I dedicate one section of the garden to late-season carrots and parsnips. Before the ground freezes hard, I cover the bed with a layer of metal screening to discourage rodents, followed by 8 inches of straw, plastic sheeting, another 10 inches of straw, and finally a tarp weighted down with an old door or a few sturdy boards.

Parsnips are my favorite crop to trench. Winter’s freezing temperatures convert more of their starches into sugars, making spring-harvested roots noticeably sweeter than those dug in fall. After months beneath the snow, pulling a basket of crisp parsnips from the ground feels like uncovering buried treasure. Cooked simply with a little churned butter, they’re one of my favorite rewards of spring.
I also experimented with “tenting,” a simple way to protect cold-hardy vegetables without digging them up. Using leftover plastic vapor barrier, I created low tunnels over rows of rutabagas after mulching them heavily with straw. The plants survived a particularly harsh winter, and when spring arrived, their tender greens became my first fresh harvest of the season.

I’ve had similar success with kale. The setup doesn’t need to be elaborate. Some years, I’ve supported the plastic with wire hoops. Other years, a few sturdy stakes and old boards were all it took to keep the cover in place. Like many homestead projects, I found that using what I already had worked just fine.
Whether you have a backyard or a community garden plot, trenching and tenting are worth trying. If your garden allows year-round access, you may be able to leave part of your harvest right where it grew. Better yet, invite fellow gardeners to join you – there’s something deeply satisfying about uncovering vegetables together after a long winter. There are possibilities to try something like this in urban settings. When I lived in a city of 100,000, I was part of a community garden with extra land. If you have a plot at a community garden, you could ask if you can trench or tent in your own plot or in a common area. People connected to the garden might appreciate you making this activity a group session where others can learn about the method. Imagine the fun gathering to harvest in spring!

Micro Root Cellar
Each successful experiment made me a little bolder. After experimenting with refrigerators, cool rooms, and overwintering vegetables in the garden, I was ready to try something I’d been thinking about since building my cabin: a compact root cellar that could fit almost anywhere.
The idea came from Root Cellaring, which described using clay drain tile buried in the ground. The problem was that clay drain tiles are no longer manufactured in my area. After a little searching, I found a practical substitute – clay chimney flue liner.
Each flue liner measures 2 feet long and 12 by 12 inches on the outside, leaving an interior space of about 9-1/2 inches square. By stacking two liners, I created a storage chamber about 4 feet deep.

I dug the hole deep enough that the top of the liner would sit about an inch above the surrounding soil to keep surface water from running inside. A couple of inches of gravel in the bottom provides drainage.
The original design relied on the insulating value of the clay itself, but our Canadian winters convinced me to add extra protection. I wrapped the entire liner with 2 inches of rigid foam insulation (R-10), doubling it to 4 inches (R-20) on the side most exposed to the cold.
To further guard against frost, I installed a horizontal collar of 2-inch rigid insulation extending 16 to 24 inches around the top of the liner before backfilling the soil.
The chamber’s lid is simple but effective: two patio stones with 4 inches of insulation sandwiched between them. An additional piece of rigid insulation fits snugly into the opening beneath the lid. The weight of the patio stones creates a tight seal that keeps out weather – and curious critters.

Finding the right storage containers took almost as much experimentation as building the cellar itself. Eventually, I settled on inexpensive plastic garbage bins that fit neatly inside the liner. After drilling small ventilation holes, they worked perfectly. Because the baskets must be lowered to the bottom of the cellar, I originally attached them to natural fiber rope. It didn’t last long. The consistently high humidity caused it to rot, so I switched to plastic cord, which has held up well ever since.
The two flue liners cost about $55 when I built the cellar four years ago. Everything else came from leftover building materials and a weekend of digging. For such a modest investment, the results have been remarkable. Each spring, I’m still pulling out firm, healthy vegetables long after I’d expect them to be finished. On May 20, when the outdoor temperature reached 68 degrees, the temperature just 2 feet down inside the micro root cellar was a steady 50 degrees with 88% humidity – ideal conditions for long-term storage.

If you have even a small yard, there’s a good chance you can build something similar. Community and educational gardens and neighborhood organizations might also welcome a shared project like this. Sometimes all it takes is asking the question.
Keeping All of My Vegetables in 4 ‘Baskets’
When I first imagined storing vegetables throughout the winter months, I thought success depended on building one perfect root cellar. I may still build a traditional root cellar someday – but I’m not in a hurry. What began as a series of small experiments gradually became a reliable system. Instead of depending on one storage method, I now spread my harvest among four. Each has its strengths, and together they keep fresh vegetables on my table throughout winter and often well into spring.
Perhaps the biggest lesson I’ve learned is that successful food storage isn’t about having the perfect setup. It’s about understanding what each crop needs and making the most of the spaces you already have. A refrigerator, a cool corner of the house, a protected garden bed, or a simple underground storage chamber can all become part of the solution.

That’s one of the reasons I love homesteading. Every season teaches me something new, and every experiment builds a little more confidence. Sometimes the best ideas aren’t the ones we planned from the beginning – they’re the ones we discover along the way.
If my four-basket system has taught me anything, it’s this: You don’t have to wait for the perfect root cellar to enjoy a winter’s worth of homegrown vegetables. Start with the space you have, experiment with what works, and let each success lead you to the next one.
Best Crops for Each Storage Method
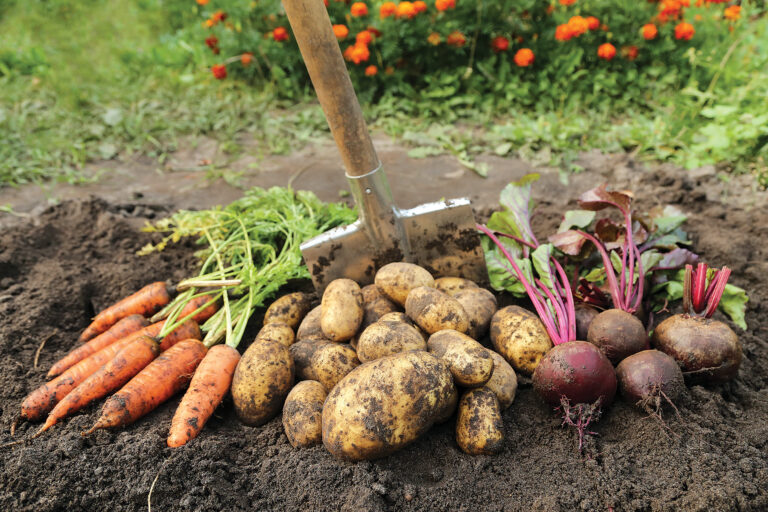
- Refrigerator: Beets, carrots, celery root, turnips, radishes
- Cool room: Garlic, onions, pumpkins, squash, sweet potatoes
- Trenching: Carrots, leeks, parsnips
- Micro root cellar: Beets, cabbages, carrots, potatoes, rutabagas
Colette Kenny has a passion for sharing her knowledge about sustainable housing and self-sufficiency. She lives on a half-acre homestead, where she makes herbal medicines from the plants on her land, talks to the trees, and eats nourishing food. Connect with her at Half-Acre Homestead.
Originally published in the October/November 2026 issue of MOTHER EARTH NEWS and regularly vetted for accuracy.