The most affordable way to build a house is to aim for a tiny home and use materials that would otherwise go to the waste stream.
There’s a lot of talk about the lack of affordable housing. Years ago, my ambition to build an affordable house was stimulated by a story of a lumberyard having problems staying open during the depression of the 1930s. Business was very slow, so the owner avoided layoffs by having his workers collect damaged and surplus building materials to build a house using an assortment of mismatched or damaged doors, windows, and flooring. The building project was completed during a single winter. The income from the sale of the house prevented layoffs and allowed the lumberyard to survive the depression.
I decided to build one. My version could be built by almost anyone with basic building skills. As a retiree, I drew from a variety of lifetime experiences, especially growing up on an Iowa farm. I combined the ingenuity powers of the farm boy, summer jobs, and mechanical aptitude with YouTube research on plumbing and electrical skills to complete the project. I had the time of my life designing, collecting, and prepping building materials for this. I hope the concept can be used to address the housing shortage in rural areas and to keep usable materials out of the landfill.
The Plan
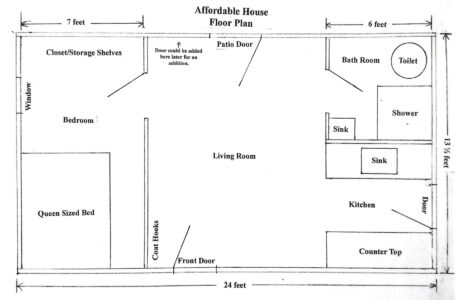
This floor plan has an efficient use of space by having only one window and no hallways. It has three exterior French doors with full-length pane glass, making it possible to maximize wall space and still have a good view, natural light, and ventilation. The living room seems larger than it is because of the open alley kitchen. A mini-split heating and air-conditioning unit could be installed above the patio door.
Tools and Materials
Structure ($490)
- Door weather striping $6
- Storm door, kitchen $25
- Nails $21
- Tar paper $16
- Roofing shingles $30
- Trim $3
- Roofing vent ridge $15
- 18 doors for ceiling $90
- Lumber $31
- Patio storm door $10
- Screws $10
- Brick molding $2
- Staples $5
- Exterior door $30
- Roofing tin $2
- Reflexit floor insulation $194
Electrical ($994)
- Bathroom light $2
- Breaker box $10
- Porch lights $8
- Ceiling light $4
- New 12-2 wire $187
- Empire state lamp globe $16
- Electric wiring push connectors $8
- Electric hardware $14
- Outdoor plug box $5
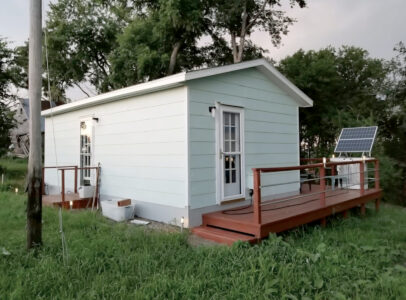
- Solar panels $740
Kitchen and Bath ($146)
- Sink $25
- Faucets $13
- Kitchen wall cabinets $30
- Kitchen base cabinets $40
- Kitchen countertop $15
- Bath cabinet and sink $8
- Bath vent fan $15
Miscellaneous and Interior ($740)
- Hardware $16
- Mop board $7
- Doorknob $2
- Roofing shingles $30
- Bedroom window $5
- Interior doors $10
- New fiberglass wall insulation $145
- Used snap-together flooring $140
- Paint $30
- Flooring for wainscoting $95
- Drywall $100
- Odds and ends $160
I also got free building materials from remodeling job sites, new construction over-runs, and the landfill. The Habitat for Humanity ReStore is a good source of many used building materials. I built this structure for less than $2,500 in supplies.
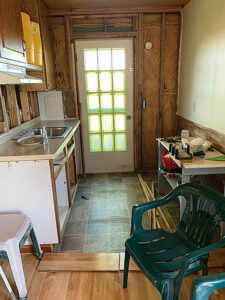
Little House of Doors
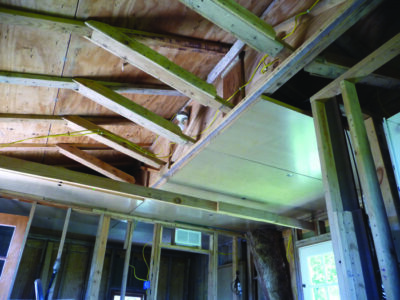
I created a drop ceiling using 18 matching interior doors that cost $5 each from the local ReStore. I used a custom-made plywood I-beam (supported by two exterior walls and two interior walls) and roof braces made from pallet lumber and 2x4s. I laid the 2x4s flat, so it was easier to attach them to the I-beam and top of the perimeter wall plate.
Why doors in the ceiling? Without the need for taping and finishing, they were much easier to install than drywall. This type of truss made it possible for one person to do most of the trusswork by installing one piece at a time. The finished ceiling looks great!
Walls
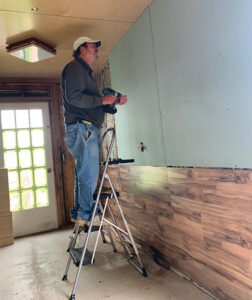
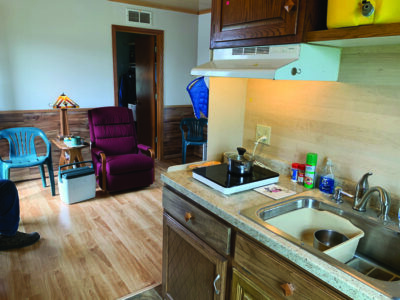
I used 5-by-4-foot pieces of drywall so I could install them by myself. Recycled snap-together flooring became wainscoting in the 3-foot area below the drywall. This made it much easier to finish the wall with wood trim strips at top, middle, and bottom seams so I only had to finish the vertical drywall seams.
Cabinets and More
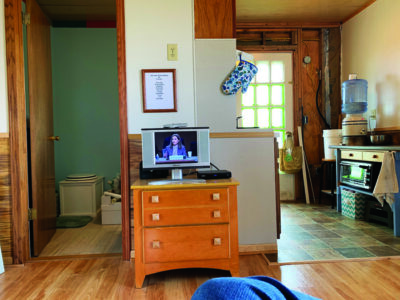
Cabinets came from the ReStore and free take-outs, some restructured for fit. The oven hood, sink, and countertop are from the same source, as were the bath, kitchen, bedroom, and living room floors; the oven exhaust; the closet poles; and more. Even some of the home furnishings were found from the ReStore and other secondhand shops.
Viewing the living room from the kitchen, the snap-together flooring that flows into the open kitchen makes the living room appear larger. The view from the living room looking into the kitchen shows the countertops and work area.
Power
At the beginning, neither water nor electricity were available on-site, so the house was dependent on a generator and imported water. Outside the kitchen door, a junction box connects to the house breaker box to connect the generator. We installed a 6-gauge wire to a 50-amp plug inside the house, which let us add on solar power.
After the house was finished, I added a low-cost solar system myself, based on YouTube tutorials. I purchased a 2,000-watt inverter for $230 and a 30-amp charge controller for $80, and they were large enough to handle more solar panels down the line. The 100-amp-hour absorbent glass mat battery (a type of lead-acid battery) cost $190.
I started with one 100-watt solar panel for $80, then added two more 100-watt panels the following year, totaling 300 watts. This system’s total cost was $740, and it’ll power the TV, lights, and fans, as well as briefly powering a small microwave oven. In addition to solar power, we use a generator to help power the home. The generator has made us very aware of how much fossil fuel it takes to cook and heat the space.
Plumbing
Running water would be possible if the old well was refurbished. For now, the water system in this house involves use of two 5-gallon water containers above the kitchen sink, gravity-fed by a plastic hose, to connect to a home-brewer pump in the kitchen sink base. A hose from the pump connects to the kitchen and bath faucets. The water pump is activated by a switch in the kitchen and bath. Right now, it’s cold water only – if needed, I heat water in a pot or electric kettle or on an induction hot plate. The hot plate is under the recycled exhaust hood next to the sink. In the future, a water heater could be added under the sink.
A drainpipe from the kitchen sink passes through the kitchen and bath wall to the bathroom sink, shower base, and then to the exterior French drain. Warmed water in a cooler with an attached showerhead is placed on a high shelf to provide shower water. The photo above on the right shows the composting toilet I built, based on a 5-gallon bucket, neutralized by sawdust and kitty litter.
Outside
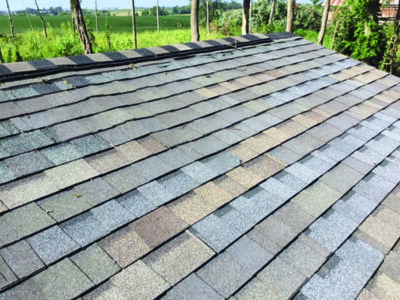
This roof has a quilted look from using five different colors and brands of shingles. All the shingles were purchased from the ReStore, costing only 10 cents each.
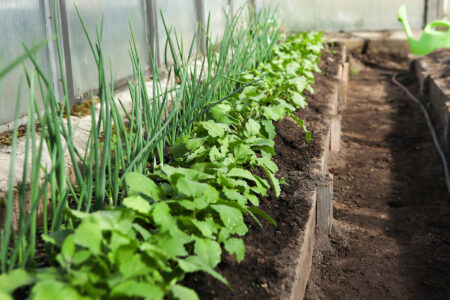
I added the deck later on using treated reclaimed deck and ramp lumber. I started a vegetable and flower garden during the building phase.
Our repurposed-materials home survived the August 2020, straight-line winds that damaged so many buildings, trees, power lines, and crops in Iowa.
For now, this is a three-season getaway. Our visitors that come from town are learning about the possibilities of rural living and are gaining more awareness of living an environmentally friendly and affordable life.
Wayne Bowman grew up on a crop and livestock farm in Iowa. He has a business degree, is a veteran, and worked for the state of Iowa in job placement and unemployment. In his spare time, he’s a home brewer, built his garage, and writes poetry.
Originally published in the February/March 2026 issue of MOTHER EARTH NEWS and regularly vetted for accuracy.


