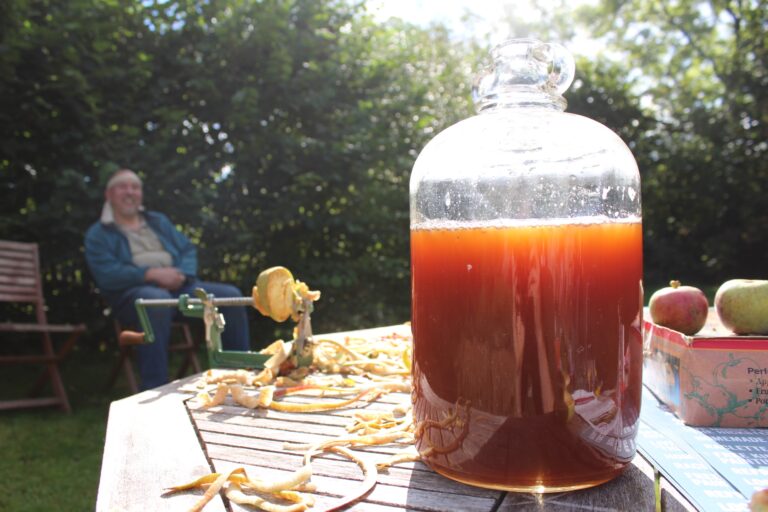
When autumn brings a glut of orchard fruits, capture the goodness by extracting juice from fall fruit. Either cooking fruit or making cold-pressed juice can produce mixers, wines, syrups, and more.
September is the month when hurricanes often lash the southern and eastern United States, and it also happens to be the month when a lot of great orchard fruits come ripe in profusion. As I produce and put up fruit juice each September, I end up calling it all my “hurricane juice.” To me, hurricane juice is a mixture of whatever is handy, whether from the harvest of my own yard, from abandoned fruit trees in vacant yards and alleys around the city, or from the riches of the local farmers markets (perhaps bits of each). By mixing the available fruit juices, I ensure I always have enough “product” to be worth the work. Of course, you can make pure juice of one sort or another without the mixing.

I got started with this seasonal hobby years ago when I began growing fruit myself, as well as foraging friends’ overabundant fields. It’s a shame to let any of autumn’s bounty go to waste, so do give the juice method a try. I usually won’t have a problem finding apples, crabapples (which can be surprisingly sweet), quinces, wild or domesticated grapes, or pears. If you can find other juicy fruits, throw them into the mix. Late-ripening berries might be a good addition.
Unlike jams or jellies, juices require no added sugar, yet taste naturally sweet and can be preserved by canning, freezing, or refrigeration. Hurricane juice is good on its own or as a mixer with alcoholic beverages and soda water.
I use two ways to make fruit juices: cooking fruit with water and cold-pressing. I’ll explain the two techniques, their advantages and disadvantages, and the finished products.
Extracting Juice from Fall Fruit: Cooking Method

Cooking cleaned ripe fruit, roughly chopped or ground, with filtered water gives you quick and easy fruit juice. All that’s left to do is strain it through cheesecloth and let it sit in the fridge overnight in order to let the solids settle out. You can drink it right away, in which case refrigeration is sufficient, or process the juice further as pasteurized juice, wine, mead, or syrup.
The advantages of the stovetop-cooking-extraction method are important:
- there’s no expensive equipment to buy and store
- you can make small batches as fruit ripens
The Process
- After you have washed the fruit and picked out any diseased or damaged pieces, put the rest into a large, non-reactive stockpot (stainless steel or enamel). You may have a gallon or more of fruit, for instance, and you will need to at least cut the fruit into halves or quarters to let the juice run out. Leave seeds, cores, and skins on, as you’ll strain them out later.
- Pour in enough filtered water to cover the fruit completely, plus half -inch or so. Bring to a boil, then lower heat, and simmer the fruit mixture for 10 or 15 minutes, until juice is running freely.
- Meanwhile, line a large strainer or colander with two layers of cheesecloth moistened with filtered water to keep it in place. Put the strainer and cheesecloth over a large bowl, with enough clearance on the bottom, so the juice can run all the way through.
- After the fruit has cooked, ladle the fruit-juice mixture into the colander. Do not squeeze the cheesecloth at any time, because this may cause the juice to become cloudy (a pectin haze). Instead, let the juice drip through overnight.
- Remove the strainer from the bowl, and carefully ladle the juice into jars. Stop when you get to the solids in the bottom of the bowl.
- At this point, you can let the juice settle further in the refrigerator, or you may want to process it by pasteurizing and canning, or by freezing. Yes, it’s OK to add sugar or other sweetener to taste, and you may want to add citric acid to preserve the bright color.
Fruit juices prepared this way will not be as strongly flavored as pure juices, because you’ve added water. And you can’t use cooked juice for making hard cider, because the heat will have killed the natural yeasts necessary for fermentation.
Making Cold-Pressed Juice

Pressing fruit in a fruit press results in fantastic flavors, rich and complex. That’s because there’s no water added with this method. There are serious disadvantages of the fruit press technique, however. The press can be an expensive piece of equipment and requires space for off-season storage. Also, you need a large amount of fruit to even use the press effectively. Cleaning up a fruit press is much more work than the stovetop extraction method. So, only consider using a fruit press if you have access to a lot of fruit, are willing to invest money, and have other people to help with the process.
This fall, I finally made the leap to using a fruit press. My two little crabapple trees produced a whopping 7 gallons of fruit, and in addition, I got hold of several gallons of muscadine grapes and some apples as well. Altogether, I had enough to make a lot of juice, and I had the help of a friend. Pressing fruit is really more fun with people. Even so, the process took several days and left me with sore muscles.


The instructions said, “For best results use chopped fruit.” Well, that really means you must chop or grind the fruit before running it through the fruit press, or nothing will happen. The juice is locked up inside the skins, and the press itself can’t break through that tough layer. After you see the juice start running, though, you’ll be hooked.
Nan K. Chase writes and grows fruit and vegetables at her home near downtown Asheville, North Carolina. She is the author of Eat Your Yard! Edible trees, shrubs, vines, herbs and flowers for your landscape, and lectures about edible landscape design.