Grow your best tomatoes ever with Epic Tomatoes (Storey Publishing, 2014) by Craig LeHoullier. LeHoullier shares decades of experience growing and developing tomato varieties, with practical information as well as the stories and histories behind many tomatoes. Beautiful, full-color photos illustrate this comprehensive guide to successful tomato cultivation, from sowing to seed-saving. The following excerpt is from chapter 6, “Saving for the Future.”
You can purchase this book from the MOTHER EARTH NEWS store: Epic Tomatoes.
Saving Seeds
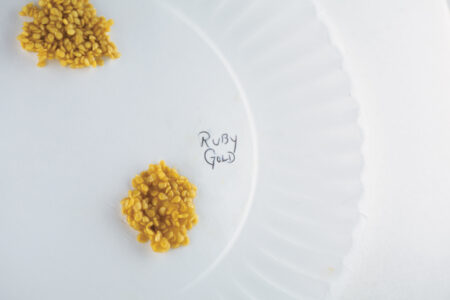
The best time to save seeds from your open-pollinated tomato varieties is when the first tomatoes ripen. I use the first ripe tomatoes for seed saving to reduce the chances that the bees will have worked the flowers and cross-pollinated the seed in the tomato.
Tomatoes that are in edible ripe condition are best, allowing for the pairing of seed saving with eating, cooking, or preserving. Since the genetic material in every seed on every tomato of a particular plant (as long as it is a stable, non-hybrid variety) is the same, it isn’t necessary to use the most perfect specimens on a given plant. (The single exception to this is if the bees that visited the flower cross-pollinated it with another variety; seeds in that specific tomato would produce a hybrid of the two varieties.) The most important thing to watch for is that the tomatoes on a given plant are true to type — that they match your expectations from either the description or past experience.
Harvest for Both Seed Saving and Eating
When you’re harvesting ripe tomatoes for eating, be sure to think about seed saving, too. I carry a permanent marker with me whenever I harvest from the garden. After wiping any moisture off the harvested tomato that I intend to save seed from, I jot down the name or reference number directly on the tomato. Later, after the picking is done, my family knows that any tomato with writing on the shoulder near the stem attachment spot is reserved for seed saving. Cherry tomatoes are too small to write on, so I collect them in a plastic cup and write the name of the tomato directly on the cup.
Seed saving is so simple, yet there are also many differing opinions on the best practice. Here are the three general ways to save tomato seed:
• Drying unfermented seeds on an absorbent material, such as newspaper or paper towels
• Fermentation, followed by drying on paper plates or another absorbent surface
• Chemical treatment with no fermentation, followed by drying
Drying Unfermented Seeds on Absorbent Material
This is a very simple way to save small quantities of tomato seeds. Cut the ripe specimen tomato in half and gather some of the seeds. You may wish to put them in a sieve and rinse them a bit, pushing the mass against the side of the sieve to clean off as much of the pulp as you can. Either way, spread the seeds thinly, in a single layer, on an uncoated paper plate, a piece of newspaper, or paper towels. Over a week or so, the seeds will dry and adhere to the drying surface. Peel off the seeds and store them.
There’s no doubt that this method is widely used because of its simplicity. In my early years of seed sharing among SSE members, I often received samples of seeds folded into homemade paper packets, which contained small samples of seeds stuck to bits of newspaper, napkins, tissues, or paper towel. One issue with this method is that any diseases on the seed surfaces that are typically removed by fermentation would carry through to the dried seeds. If you’re saving large quantities of seed, there is also the cosmetic issue of paper bits stuck to the seeds (though this won’t cause problems with germination).
Fermenting
I find fermenting tomato seeds easy and effective, though a bit odiferous. The advantage is that it helps remove any pathogens on the seed surface, and below or in the surrounding seed gel. The seeds end up clean, attractive, and easy to package and store.
Fermenting also removes the natural germination inhibitor that coats tomato seeds, leaving the seeds vulnerable to germination. That’s why it’s important to limit the amount of time the seeds are fermenting; otherwise, you would end up with sprouted tomato seeds.
How to save seeds using the fermentation method
Armed with your perfectly ripe non-hybrid/heirloom tomatoes, you are ready to start your seed saving. Beware, however, that during the seed-saving process, mix-ups or errors could be introduced in many places. Consider this another plea for good documentation and careful discipline so that future tomato mysteries can be minimized.
Typically, when I have a quantity of tomatoes that are ripe and ready for not only seed saving but processing, I arrange them by variety and work on my kitchen counter with a cutting board, my knife, a big bowl, cups, a writing utensil, and my compost bin handy. Here is my seed-saving procedure:

Materials
• Medium-size cups that can be written on
• Permanent marker
• Sharp knife
• Bowl or pan, if the edible portions that remain will be used for a recipe
• Paper towels
• Fine-mesh sieve
• Spoon
• Uncoated paper plates
• Storage containers for dried seed
1. Note the variety of the tomato and write it on a cup, along with the date. Cut the tomato in half and squeeze each half over the labeled cup to capture the seeds and gel. After squeezing, cut away the core and stem part and toss into the compost bin, and put the remaining edible flesh into a bowl for processing.

2. If the pulp in the cup is very thick or dry or can’t be swirled, add just a bit of water. Check the knife and cutting board to make sure no seeds are present, and then move on to the next variety. Once seed is saved from all of the varieties, move the cups to a place where they can sit undisturbed for a few days, out of the sun. The smell will be pretty bad, so outdoors in a protected place or a garage works well. Cover the cups loosely with a paper towel. The paper towel should help keep flies that are attracted to the fermentation from laying their eggs in the pulp.

3. If the conditions are very warm (85 degrees F or higher during the day), check the cups of fermenting pulp on the second day. If the weather is cooler, it could take up to 5 days for the fermentation to take place and the fungal layer to form. Once the pulp starts to ferment (indicated by an offensive smell and the presence of a layer of white, or occasionally black, fungus), it’s time to rinse the seeds.
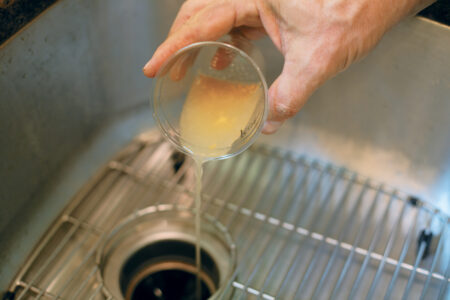
4. Remove the paper towel and bring the cups of fermented tomato pulp to a sink. Add water to each of the cups to within 1 inch of the top, then stir each cup a few times (be careful that seed from one cup is not introduced into the next). Allow the contents to settle for a few minutes. The good seeds will sink to the bottom of the cup, and fungal material and other solid debris will float.
5. Gently tip the cup over the drain and pour off the floating debris. The cup contents can be quite concentrated, viscous, and opaque at this point so be very careful to not allow any seeds to escape along with the upper debris. Add more water, swirl again, and pour off more floating non-seed material. Repeat until you have a cup of clear water and settled seeds.
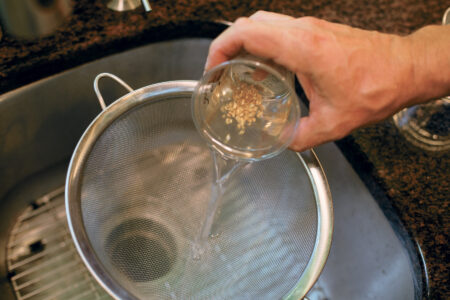
6. Pour the material through a fine sieve (make sure the mesh is sufficiently small to capture the seeds). With the back of a spoon, push the seeds against the sieve under a stream of water to ensure any remaining non-seed solids rinse through. Take a cloth and push against the seed mass from the outside of the sieve to wick away excess water.
7. Label a paper plate with the variety, scrape up the seeds into a mass with the spoon, and press them onto the plate in a single layer. Store the plates of clean, spread, labeled seeds in one layer in a place where they can air-dry. After a week, the seeds should be sufficiently dry for final storage.
Saving Seeds without Fermentation
Some swear by this relatively new method of seed saving. The main ingredients are trisodium phosphate (TSP) and bleach. Follow the fermentation method up to step 2; you will have the labeled cups of tomato pulp and seeds. Add a 10 percent TSP/water solution to the seeds and pulp until the cup is approximately three-quarters full. Let the seeds soak in the TSP solution for 15 minutes, which will dissolve the gel and remove any pathogens. Pour off the top material and sieve and rinse the seeds, then return them to the cup. Add a 10 percent bleach solution to the seeds until the cup is about one-quarter full, and soak them for one to two minutes. Sieve once more, and use hot (120 degrees F) water for the rinse. You are then ready to scrape the seeds onto the plates for final drying.
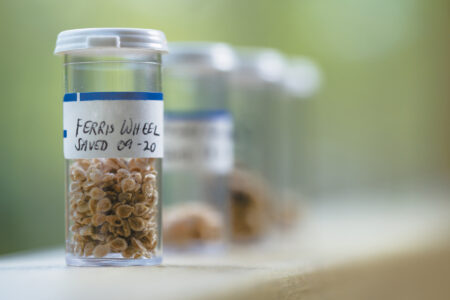
Storing Seed
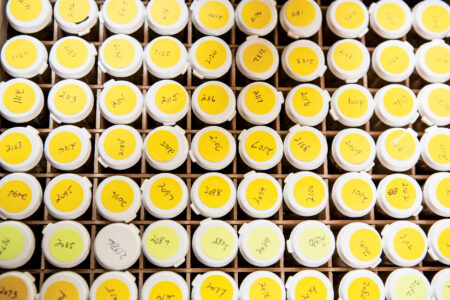
The main enemy of tomato seed is moisture. Any seed storage option should take this into consideration. The other interesting thing I’ve learned about tomato seed is its surprising longevity, which is not something you would know if you read many commercial seed catalogs, whose success is based on bringing people back to purchase seeds each year. Over the years, I’ve stored my tomato seed in screw-top glass or snap-top plastic vials, where it has experienced all sorts of temperature changes as we moved about. Even given that rough treatment, I’ve found that my saved tomato seed germinated very well even at 12 years old, and occasionally up to 14 years.
Tomato seeds will remain viable even longer if stored in the freezer, in a vial with a small packet of silica gel. The main caution for using seeds stored in the freezer is to allow the seed containers to reach room temperature before opening them. Otherwise, unwanted moisture from the air will be drawn into the containers and negate the work that was done to enhance the seed life.
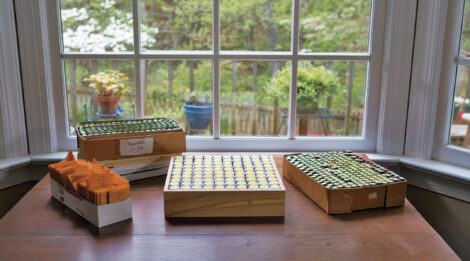
I’m a very frugal gardener, and fortunately, all of the stages of gardening can be done on any budget. My preference is to keep things as simple and inexpensive as possible, and that extends to seed storage. I’ve moved from the glass vials (which are not inexpensive) to plastic vials (which are less expensive but still a significant cost, especially when saving a few hundred varieties each year) to small manila coin envelopes, which I don’t seal but just store upright in my office. Since we have a heat pump, temperature and humidity move in quite a narrow range, so this method works just fine.
One critical final part of the seed-saving process is documentation; a good system is very helpful in terms of locating the seeds you save and ensuring that you know exactly what they are. I take it even further and aim for knowing each saved seed’s genealogy, which helps me determine possible reasons for any unexpected surprises.

Excerpted from Epic Tomatoes © Craig LeHoullier. Photography by © Stephen L. Garrett. Used with permission of Storey Publishing. Buy this book from our store: Epic Tomatoes.


