Learn how to render fat to make soap at home from tallow and lard. This frugal use of extra animal fat produces enough soap for a family of four for one year.
Our family prides itself on being frugal. We buy whole portions of grass-fed and pastured meat every year from our local family farm here in Minnesota. We don’t just get the choice bits either; we get almost the entire animal. That includes bones, organs, heads, tails, and feet. It also includes the fat: tallow from the beef and lard from the hogs. I use the lard in cooking, particularly for deep-frying and pastries, and both the lard and the tallow are great for candles, balms, and soap.
While making soap is not technically cooking, it was traditionally in the arsenal of old-fashioned women’s home arts. Soap is a natural extension of preservation, making use of what you have to the fullest extent possible for use in the future. Making soap is also a sustainable endeavor, using a local product like animal fat instead of buying soap made with exotic oils shipped halfway around the world. It takes fewer resources, and you have the benefit of knowing exactly what’s in your soap product.
Preparing Fat for Rendering
I had several pounds of beef and pork fat in my freezer, conveniently ground for me by my butcher. After rendering each fat, straining stray meat particles, and then “washing” it in water to remove meaty flavors, the fat is ready to be turned into soap. This can be done well ahead of time, with the fat being stored in the freezer for further use.
Below is a guide to how to render fats and make handmade soap, in an easy to use, volume-based recipe. This is a beginner’s guide to soapmaking. As you become more advanced, you will want to switch to a weight-based system, so you can accurately scale and change your ingredients, using whatever oils you have on hand.
Each fat type requires different amounts of water and lye, so please do not substitute! Pure lye can be purchased in small quantities at your local hardware store in the plumbing section. Weight-based calculators like this one from Bramble Berry are very easy to use. Or use a more advanced one like SoapCalc. Learn more about making lye soap
A Note on Using Lye
- Lye (sodium hydroxide) is a dangerous, corrosive chemical that must be used with extreme caution. Traditional soapmaking uses washed hardwood ashes to produce lye. Modern soapmaking uses a refined version of lye. Either way, lye burns if it touches certain organic materials, water, and some metals.
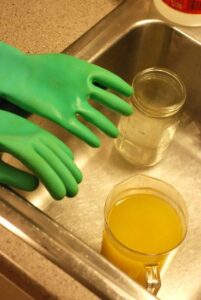
- If lye touches your skin, it will burn you. If it hits your eyes, it will blind you. Take precautions! When making soap use long rubber gloves, safety glasses, a long-sleeved shirt, heavy pants, closed-toed shoes, and an apron. Keep a spray bottle with vinegar nearby in case any lye solution splashes on surfaces or on you. Vinegar will stop the reaction. Call 911 immediately if ingested.
- Reality check! The level of danger lye poses the home soapmaker is no different than that posed by a cook deep-frying with hot oil on the stovetop. Hot oil will burn you, can catch on fire, or even explode. You know how to handle yourself in the kitchen. Just pay attention, keep distractions to a minimum and out of the way (like kids and pets), and be safe.
How to Render Fat to Make Soap
Ingredients for Rendering Fat
- 1 pound beef fat
- 1-1/2 pounds pork fat
- water
Directions for Rendering Fat
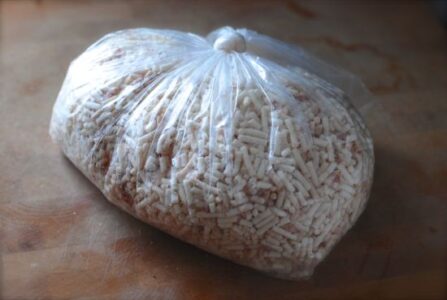
- In separate pots, slowly melt each fat on low heat. Try not to “fry” the fat at a high temp, as that will add meaty cooked odors to your soap. When melted, strain each liquid fat through a paper towel-lined strainer to filter out any particles. (Called cracklings, these meaty bits are great in eggs).
- Add equal parts of warm tap water to the fat in each pot. Bring the water-oil combination to a boil, then simmer on low for 15 minutes.
- Pour in 1 quart of cold water, stir and refrigerate overnight.
- The next morning lift out the hardened fat, and discard the water. Pat the excess water off the solid fat and store, well wrapped, in the fridge or freezer until ready to use for cooking or soap making.
How to Make Handmade Soap Using Rendered Fat
Ingredients
- 1-1/3 cup melted tallow (9.6 oz)
- 2-2/3 cup melted lard (21.3 oz)
- 1-1/4 cup cold water (10.2 oz)
- 1/2 cup, plus 1.5 teaspoons lye (4.3 oz)
- 1 tablespoon essential oil (optional)
Directions
- Wearing full lye-protection gear, on a surface lined with paper, carefully measure the lye. Use non-aluminum, dry measuring cups and spoons. Measure the lye into a glass or plastic container. If any lye particles get out on the paper, wrap them up and dump straight into the garbage. If any get on the floor, brush them up with a hand broom. Do not use water to clean them up.
- In a heavy, heat-proof glass container (like a large mason jar) measure out the cold water. Slowly add the pre-measured lye to the water. Never add the water to the lye as it may explode everywhere. Using a wooden spoon, gently stir the water-and-lye mixture. It will heat up considerably. I like to set this jar in the sink to cool, so it is well out of the way, and if it spills, it just goes down the drain and you can wash it away quickly with cold water. Allow the water/lye mixture to come to room temperature. Check the temp by resting your gloved hand on the side of the jar. Do not stick your finger in the water! You may also use a glass thermometer, but I prefer to keep my lye contact to a minimum.
- Prepare your soap mold container. I like to use plastic as glass often breaks or is incredibly difficult to un-mold. Do not use aluminum. Wood boxes are traditional. Line the mold with parchment paper so that the soap can be more easily lifted out. I find that plastic wrap is too weak and often tears.
- When the water/lye mixture is almost to room temp, melt your fats separately over low heat. When melted, measure out the tallow and lard into a glass or stainless steel mixing bowl. You want the fats and the water/lye mixture to both be at room temperature. When they are both at room temp, slowly stir the water/lye mixture in to the fats until blended.
- Using an immersion blender, hand mixer or stand mixer, mix the fat/water/lye combo on low, being careful not to splash. The lye is still active! Continue emulsifying the mixture until is begins to take on the consistency of loose pudding. This is called “trace” — where you lift up a bit of the liquid soap, and it leaves a trace as it trails back into the soap.
- Add the essential oil, if using, blend once more, then carefully pour the soap into the mold, smoothing out the top.
- Set the soap aside in a clean, safe place until completely solid. For cleanly cut soaps, wait 24 hours then unfold the soap. Wearing gloves, slice the soap into bars. Place the soap in a container and store for at least 3 weeks until the process with the lye and oil is compete. It is not recommended that you use the soap before the 3 weeks have passed.
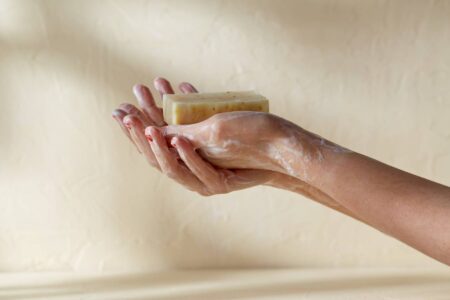
Animal fat soaps are not particularly sudsy, but the cleaning and moisturizing is fantastic. Sudsing is not an actual factor in cleaning ability. This amount of soap will last my family about one year of showers and hand-washing. If you have fun making this batch check out this story of starting a successful homemade soap business
Tammy Kimbler grows, forages, cans, dries, pickles, ferments, brews, ages, cooks and eats from her Minneapolis, Minn., backyard.
All MOTHER EARTH NEWS community bloggers have agreed to follow our Blogging Guidelines, and they are responsible for the accuracy of their posts. To learn more about the author of this post, click on their byline link at the top of the page.


