Crafts with leaves can be a beautiful way to be creative with the seasons. Learn how to make handmade cards and decorate them with dried leaves. So, when the mood strikes, use the artistry you’ve learned to create personalized greetings for everyone you know!
You Will Need
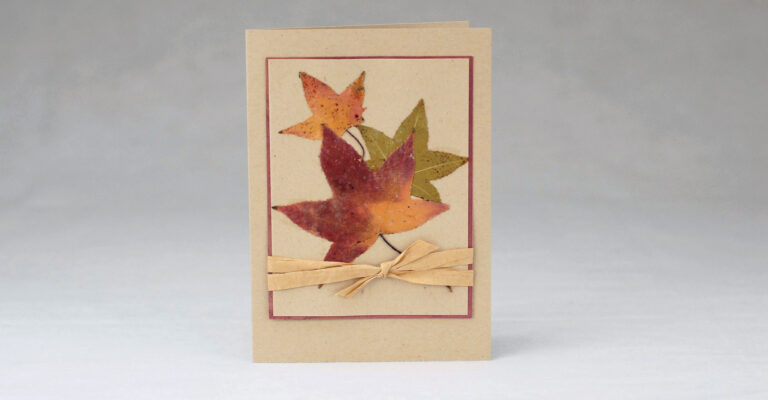
- Adhesive
- 3 pressed leaves in graduating sizes and colors
- 1 sheet kraft-colored card stock, 4 x 5-1/4 inches
Instructions
1. Adhere the pressed leaves to the kraft-colored card stock and let dry.

2. Adhere to the burgundy-colored card stock with double-sided tape.

3. Wrap the paper ribbon around both layers approximately 1 inch from the bottom. Tie a square knot. Trim the ends.

4. Adhere to the folded card with the top and sides equidistant and the bottom margin a little larger.
Read more from The Complete Photo Guide to Cardmaking:
• Decorate Greeting Cards by Using Tissue Paper
• Using Fingerprints to Decorate Greeting Cards
• Drawing with Tape to Design Greeting Cards
• Using Napkins to Design Beautiful Cards

Reprinted with permission from The Complete Photo Guide to Cardmaking, by Judi Watanabe and published by Quarto Publishing Group, 2016.


